Lynx
User Guides
Discover the app for a pleasant project management experience
About Lynx User Guides
Lynx user guides are instruction materials designed to make users understand the app properly. It is an essential document that helps users to get on board with the app quickly
About Lynx
Overview
Lynx is a project management tool that aims to make project management easier for users.
The app is intended to simplify project management. It is straightforward and simple to use, with all of the features required for users to remain on top of their projects.
Get Started
Sign up and get set for a smooth project management experience
Get Started
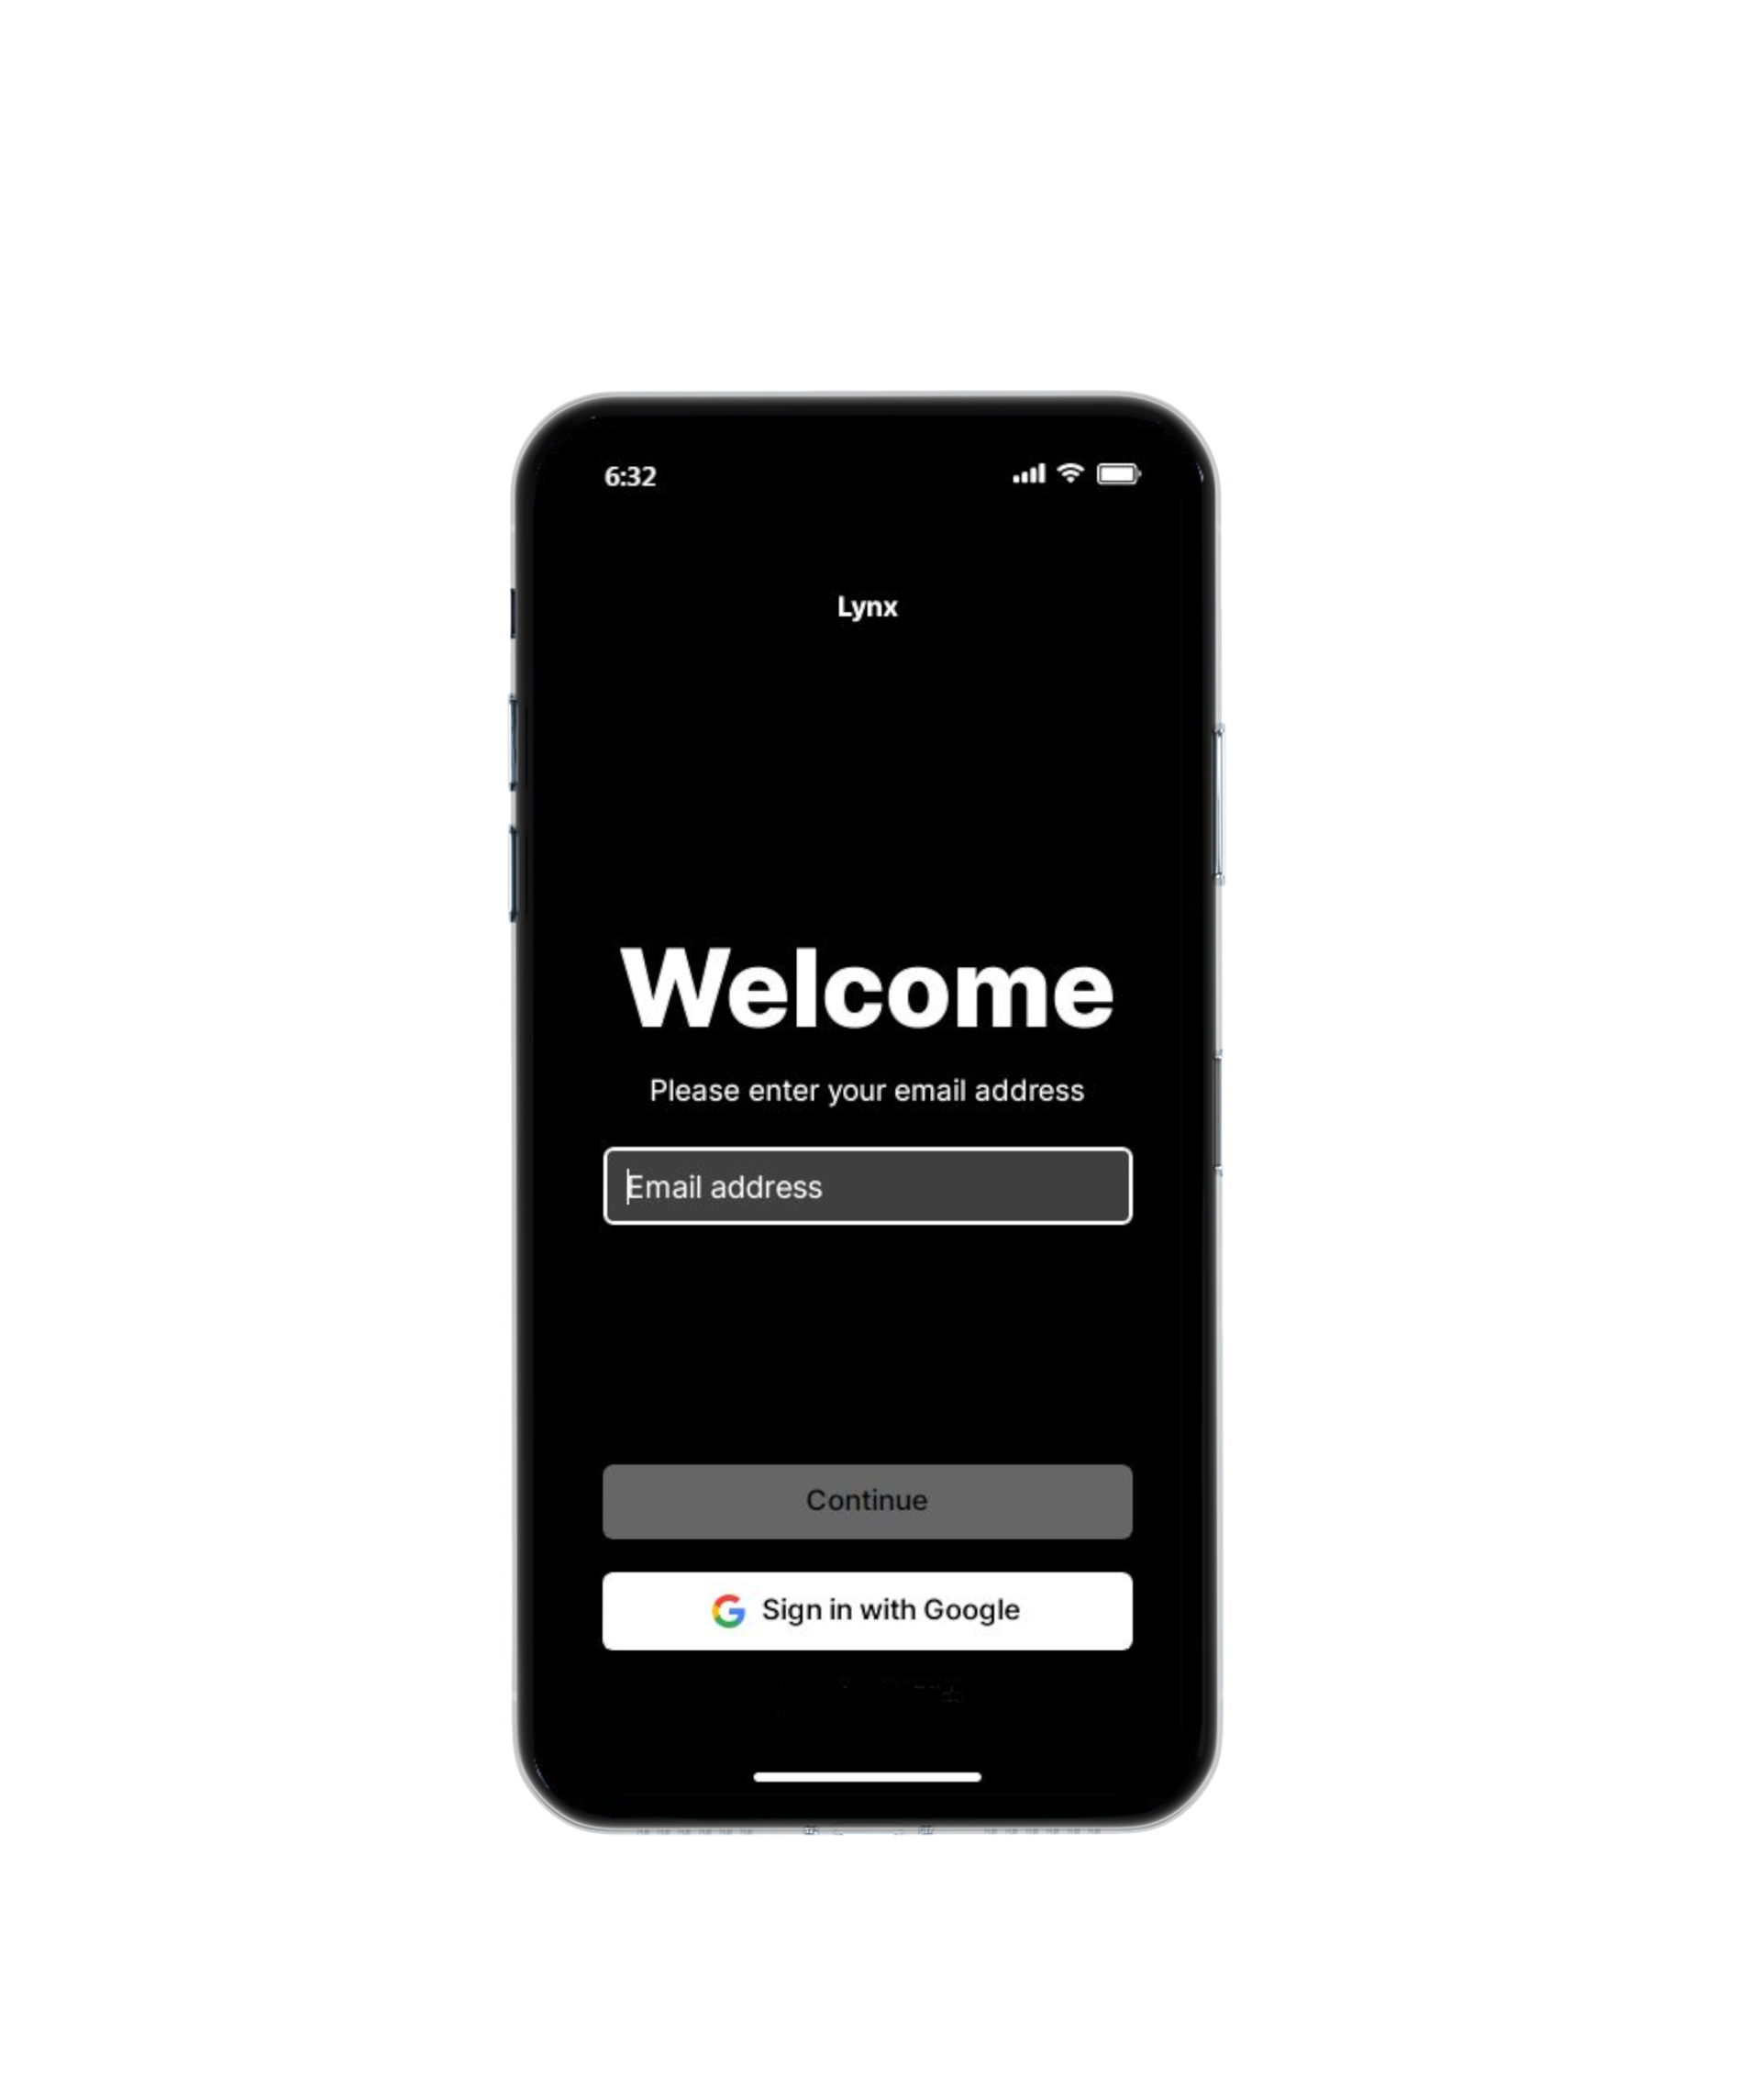
Sign In
Scan the QR code and the URL link will appear to install the app. Then under the link, tap open. The user will be prompted to either download or add the app to their phone's home screen.
Once the Lynx app shortcut or icon is created, the Lynx icon will appear on the screen. When you tap the icon, the app will launch.
When you launch the app by tapping the Lynx or shortcut icon, the Sign in screen appears. After you enter your email address, the verification screen will be displayed. You can also use your Google account to sign in.
Get Started
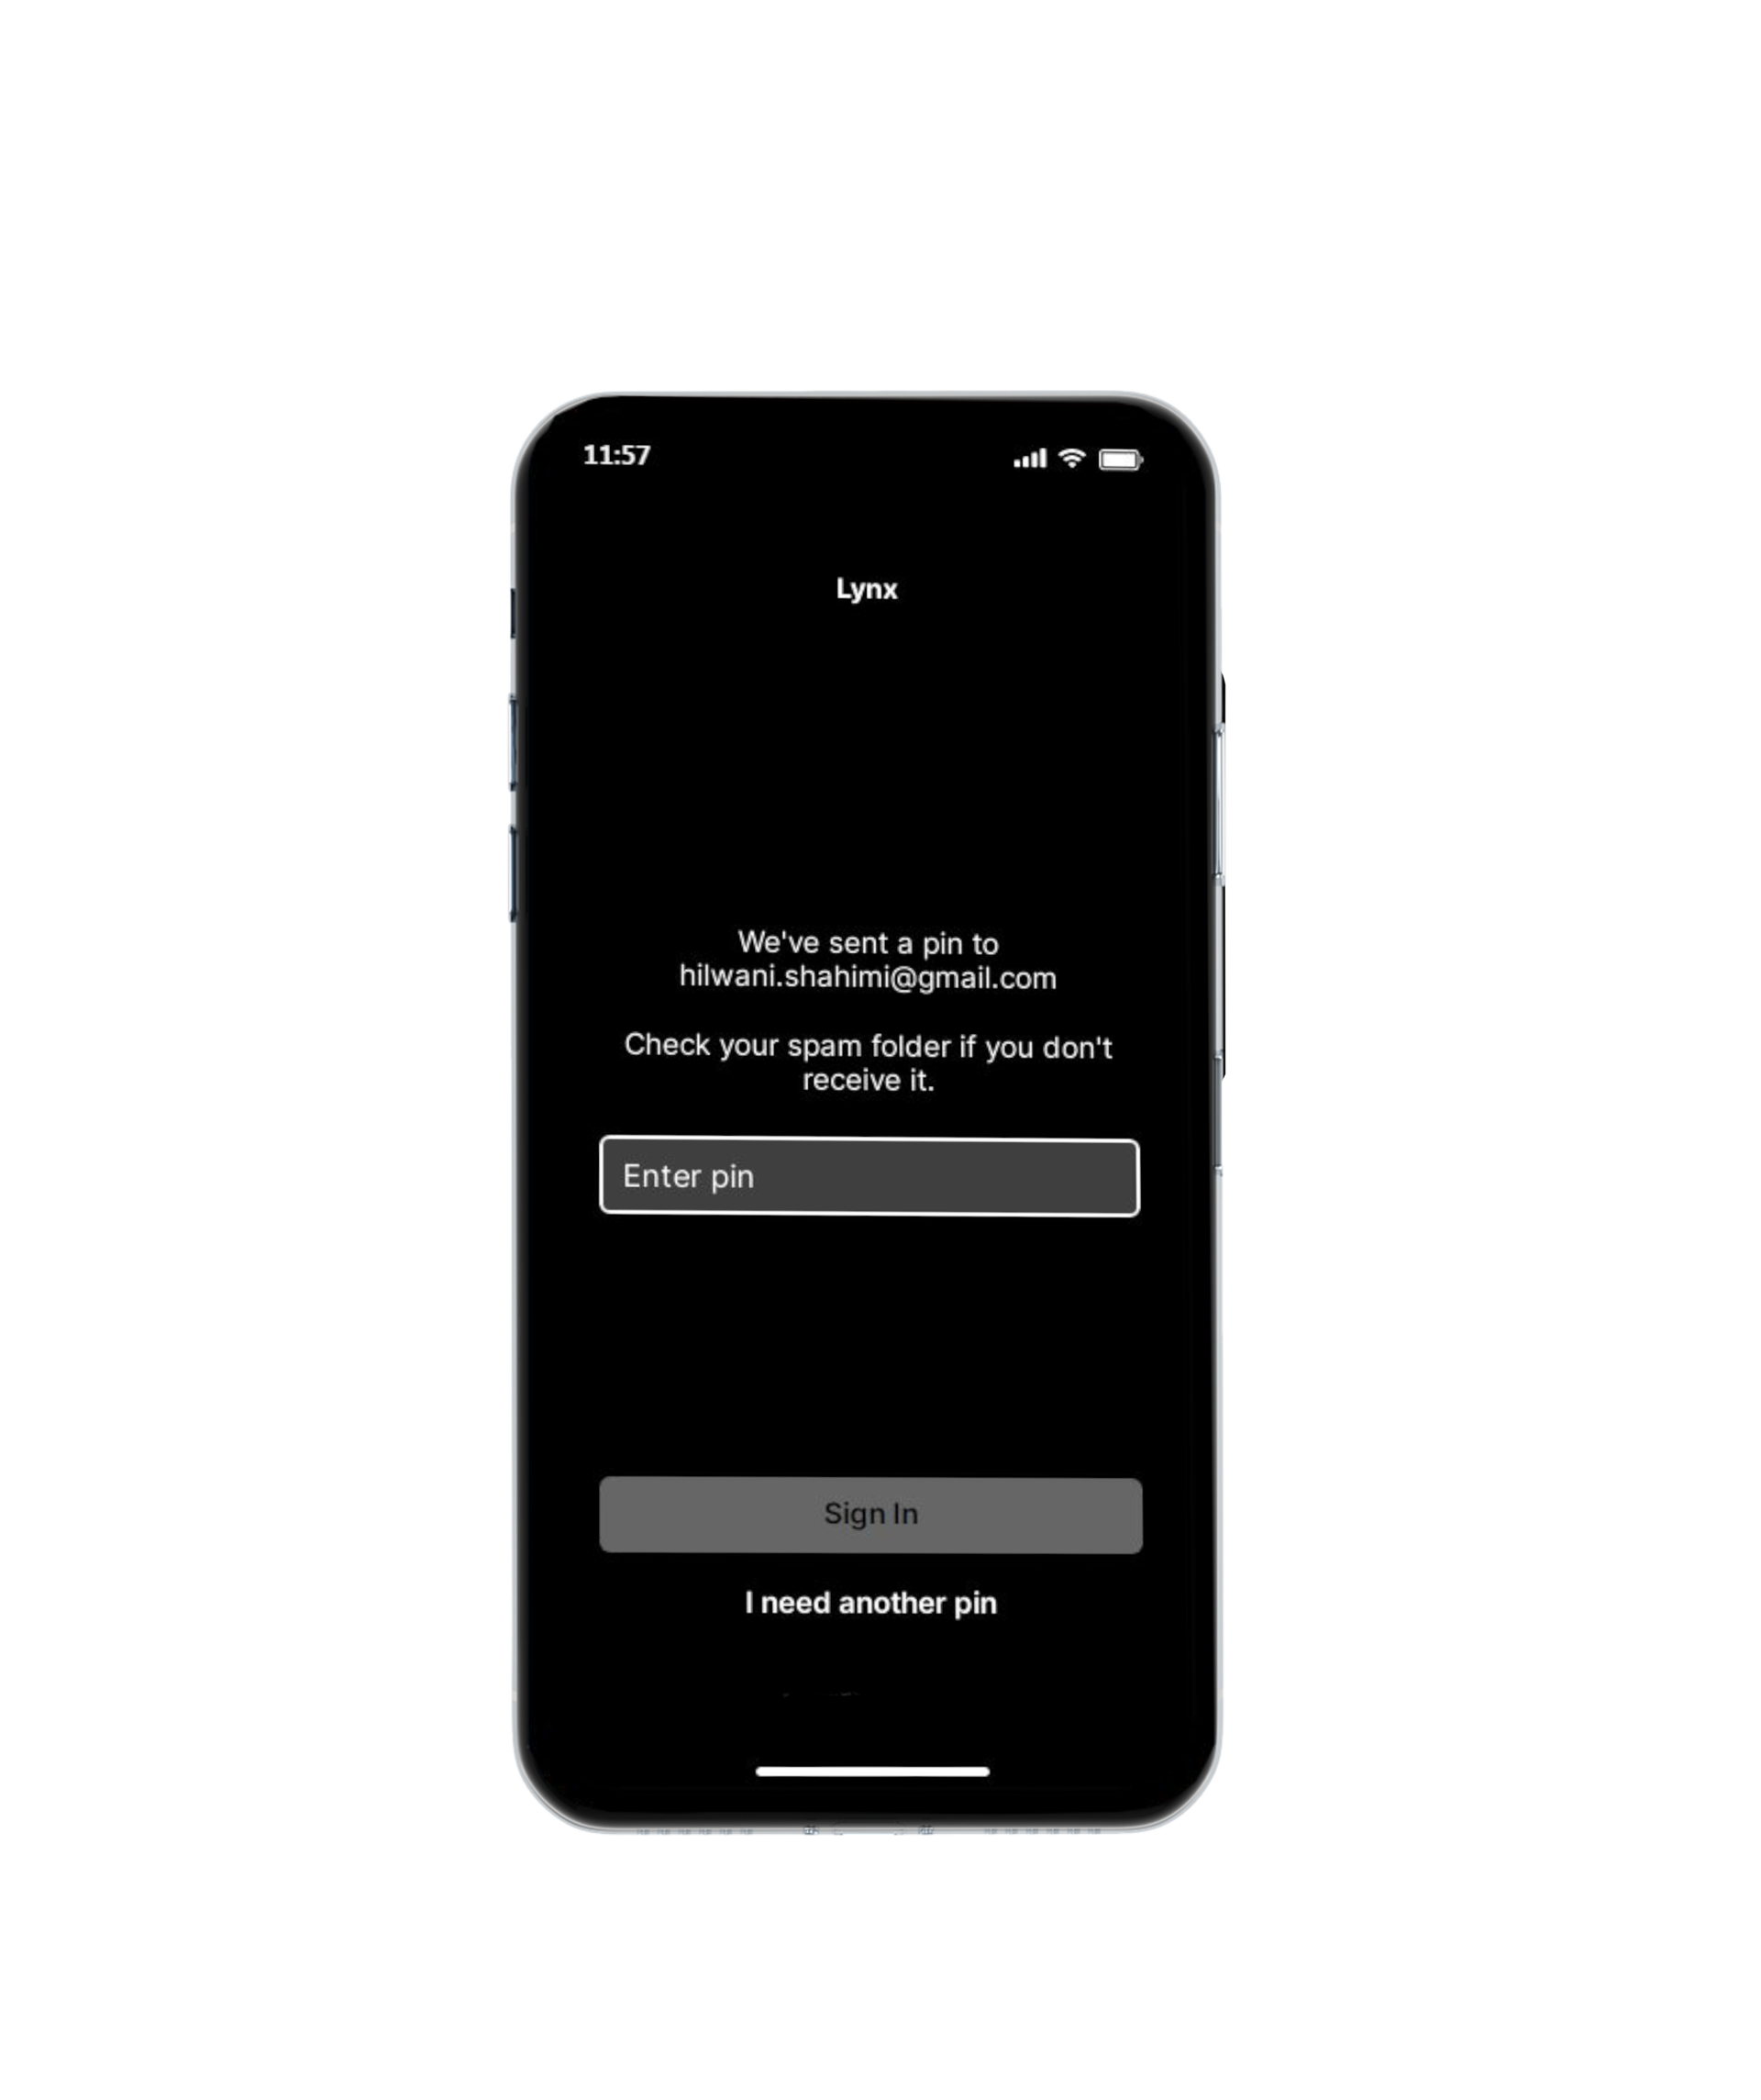
Verification
The verification screen will ask you to input the pin number that was emailed to you. Fill in the pin number in the placeholder, then tap the Sign in button.
Get Started
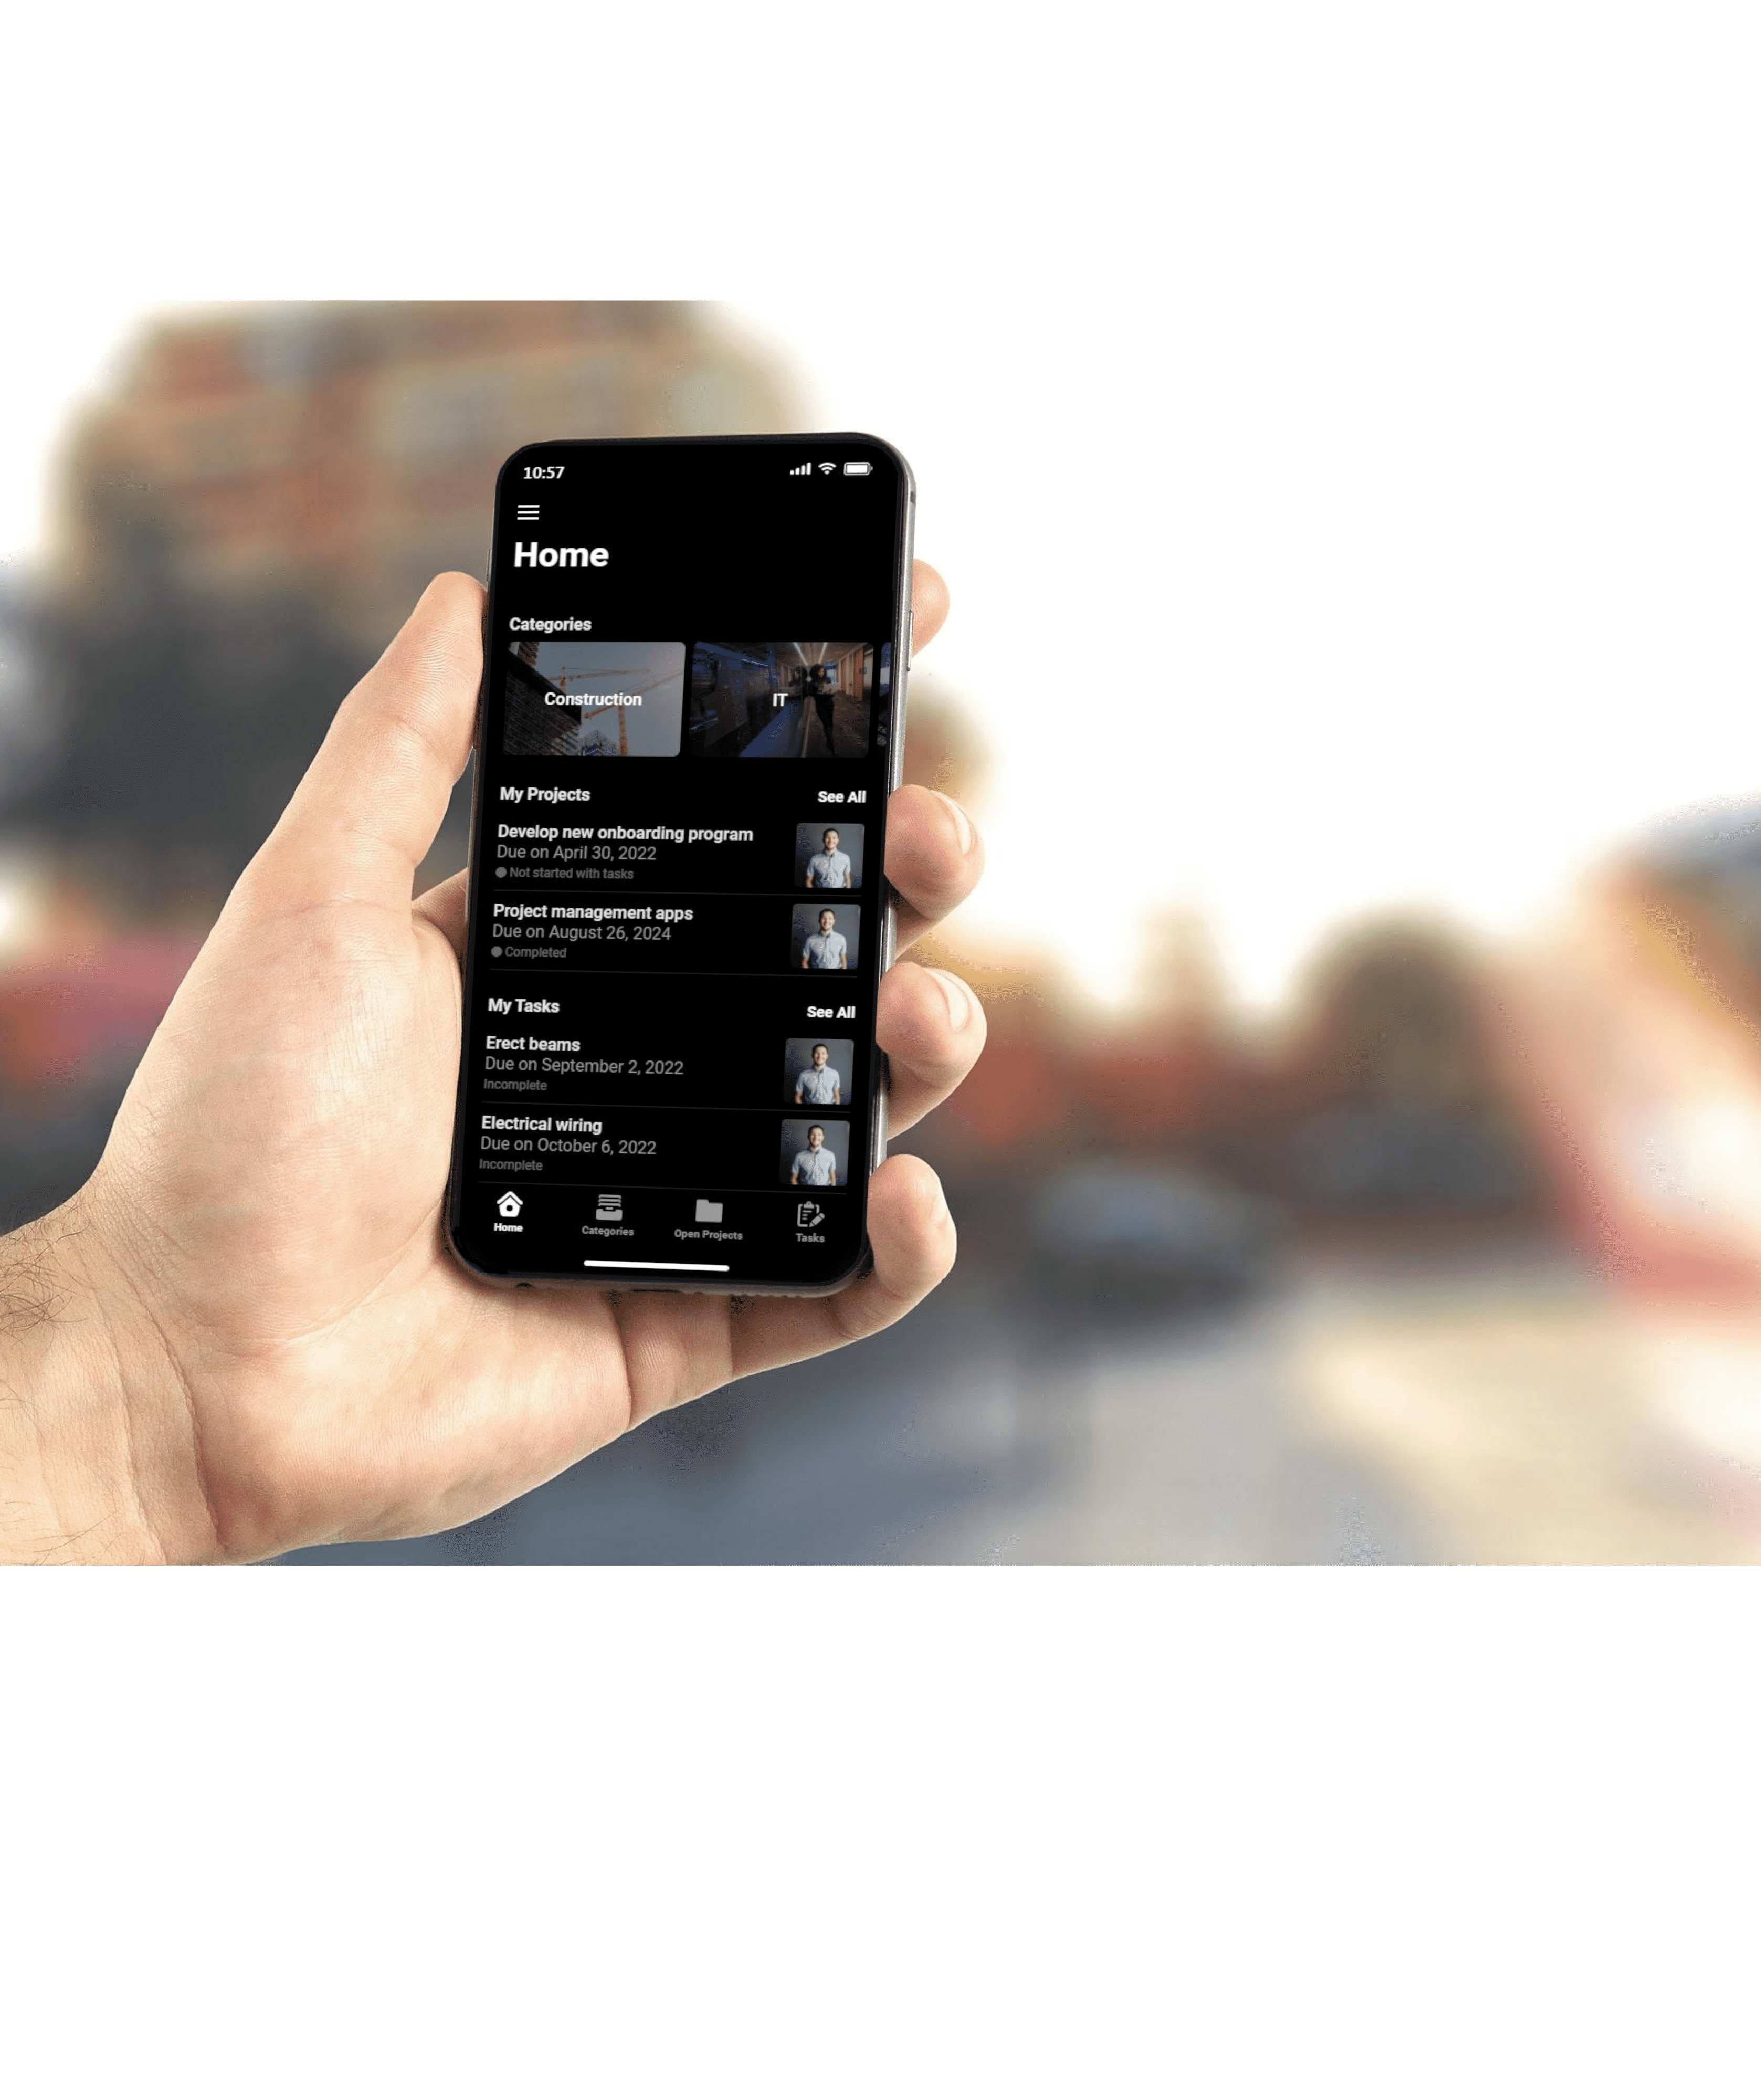
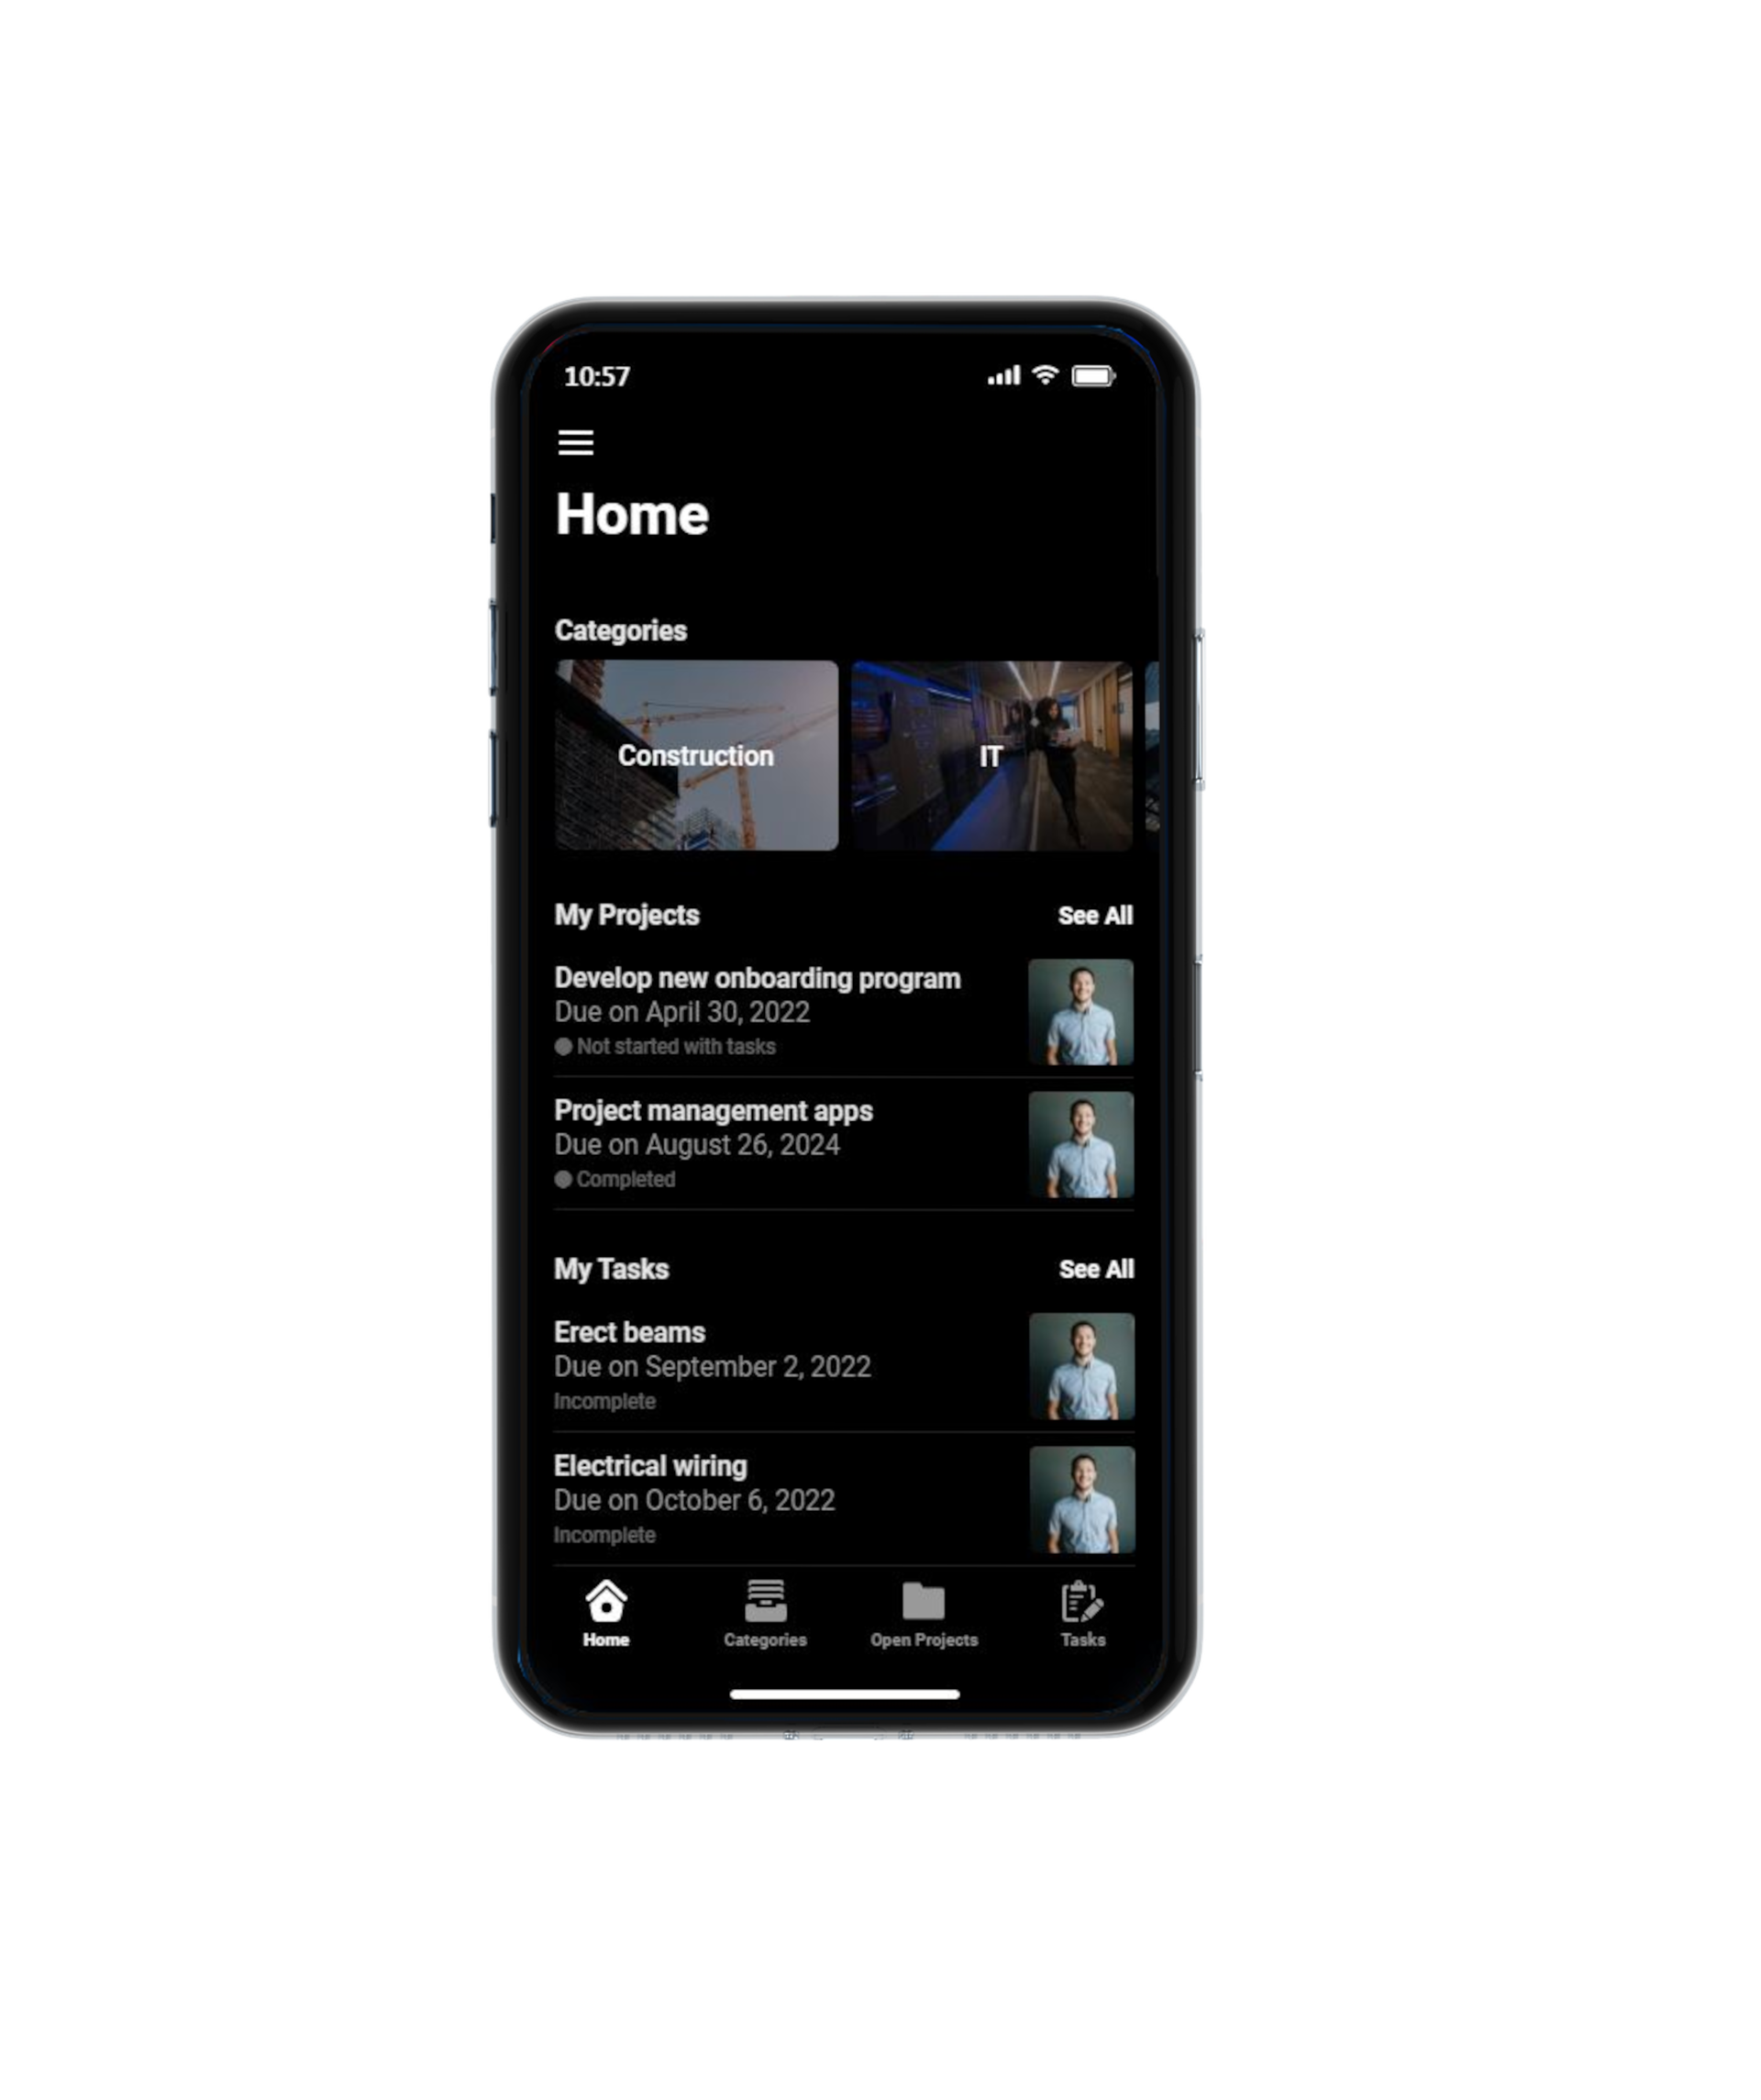
Home
The Home screen is the best starting place for navigating your workspace.
The Home screen lists all projects, tasks, and project categories. The screen can be customized to be either user or guest specific. Under User-specific authentication, the screen will display a list of projects and tasks under the signed-in user.
The app can be navigated using the navigation bar at the bottom of the screen. It has Home, Categories, Open Projects, and Tasks tabs.
Swiping the photos allows the user to go through the project categories. To get a list of all projects and tasks, click See All. Return to the previous screen by tapping the 'Back' or 'left-arrow' icon in the top left corner of the screen.
The Menu icon is represented by three horizontal lines in the top left corner of the Home screen. Tapping the icon brings up a list of projects and signed-in user information.
Get Started Video
Installing The App
Ready To Launch
Add User
Add resources and you're ready to assign projects and tasks to them
Add User
User Information
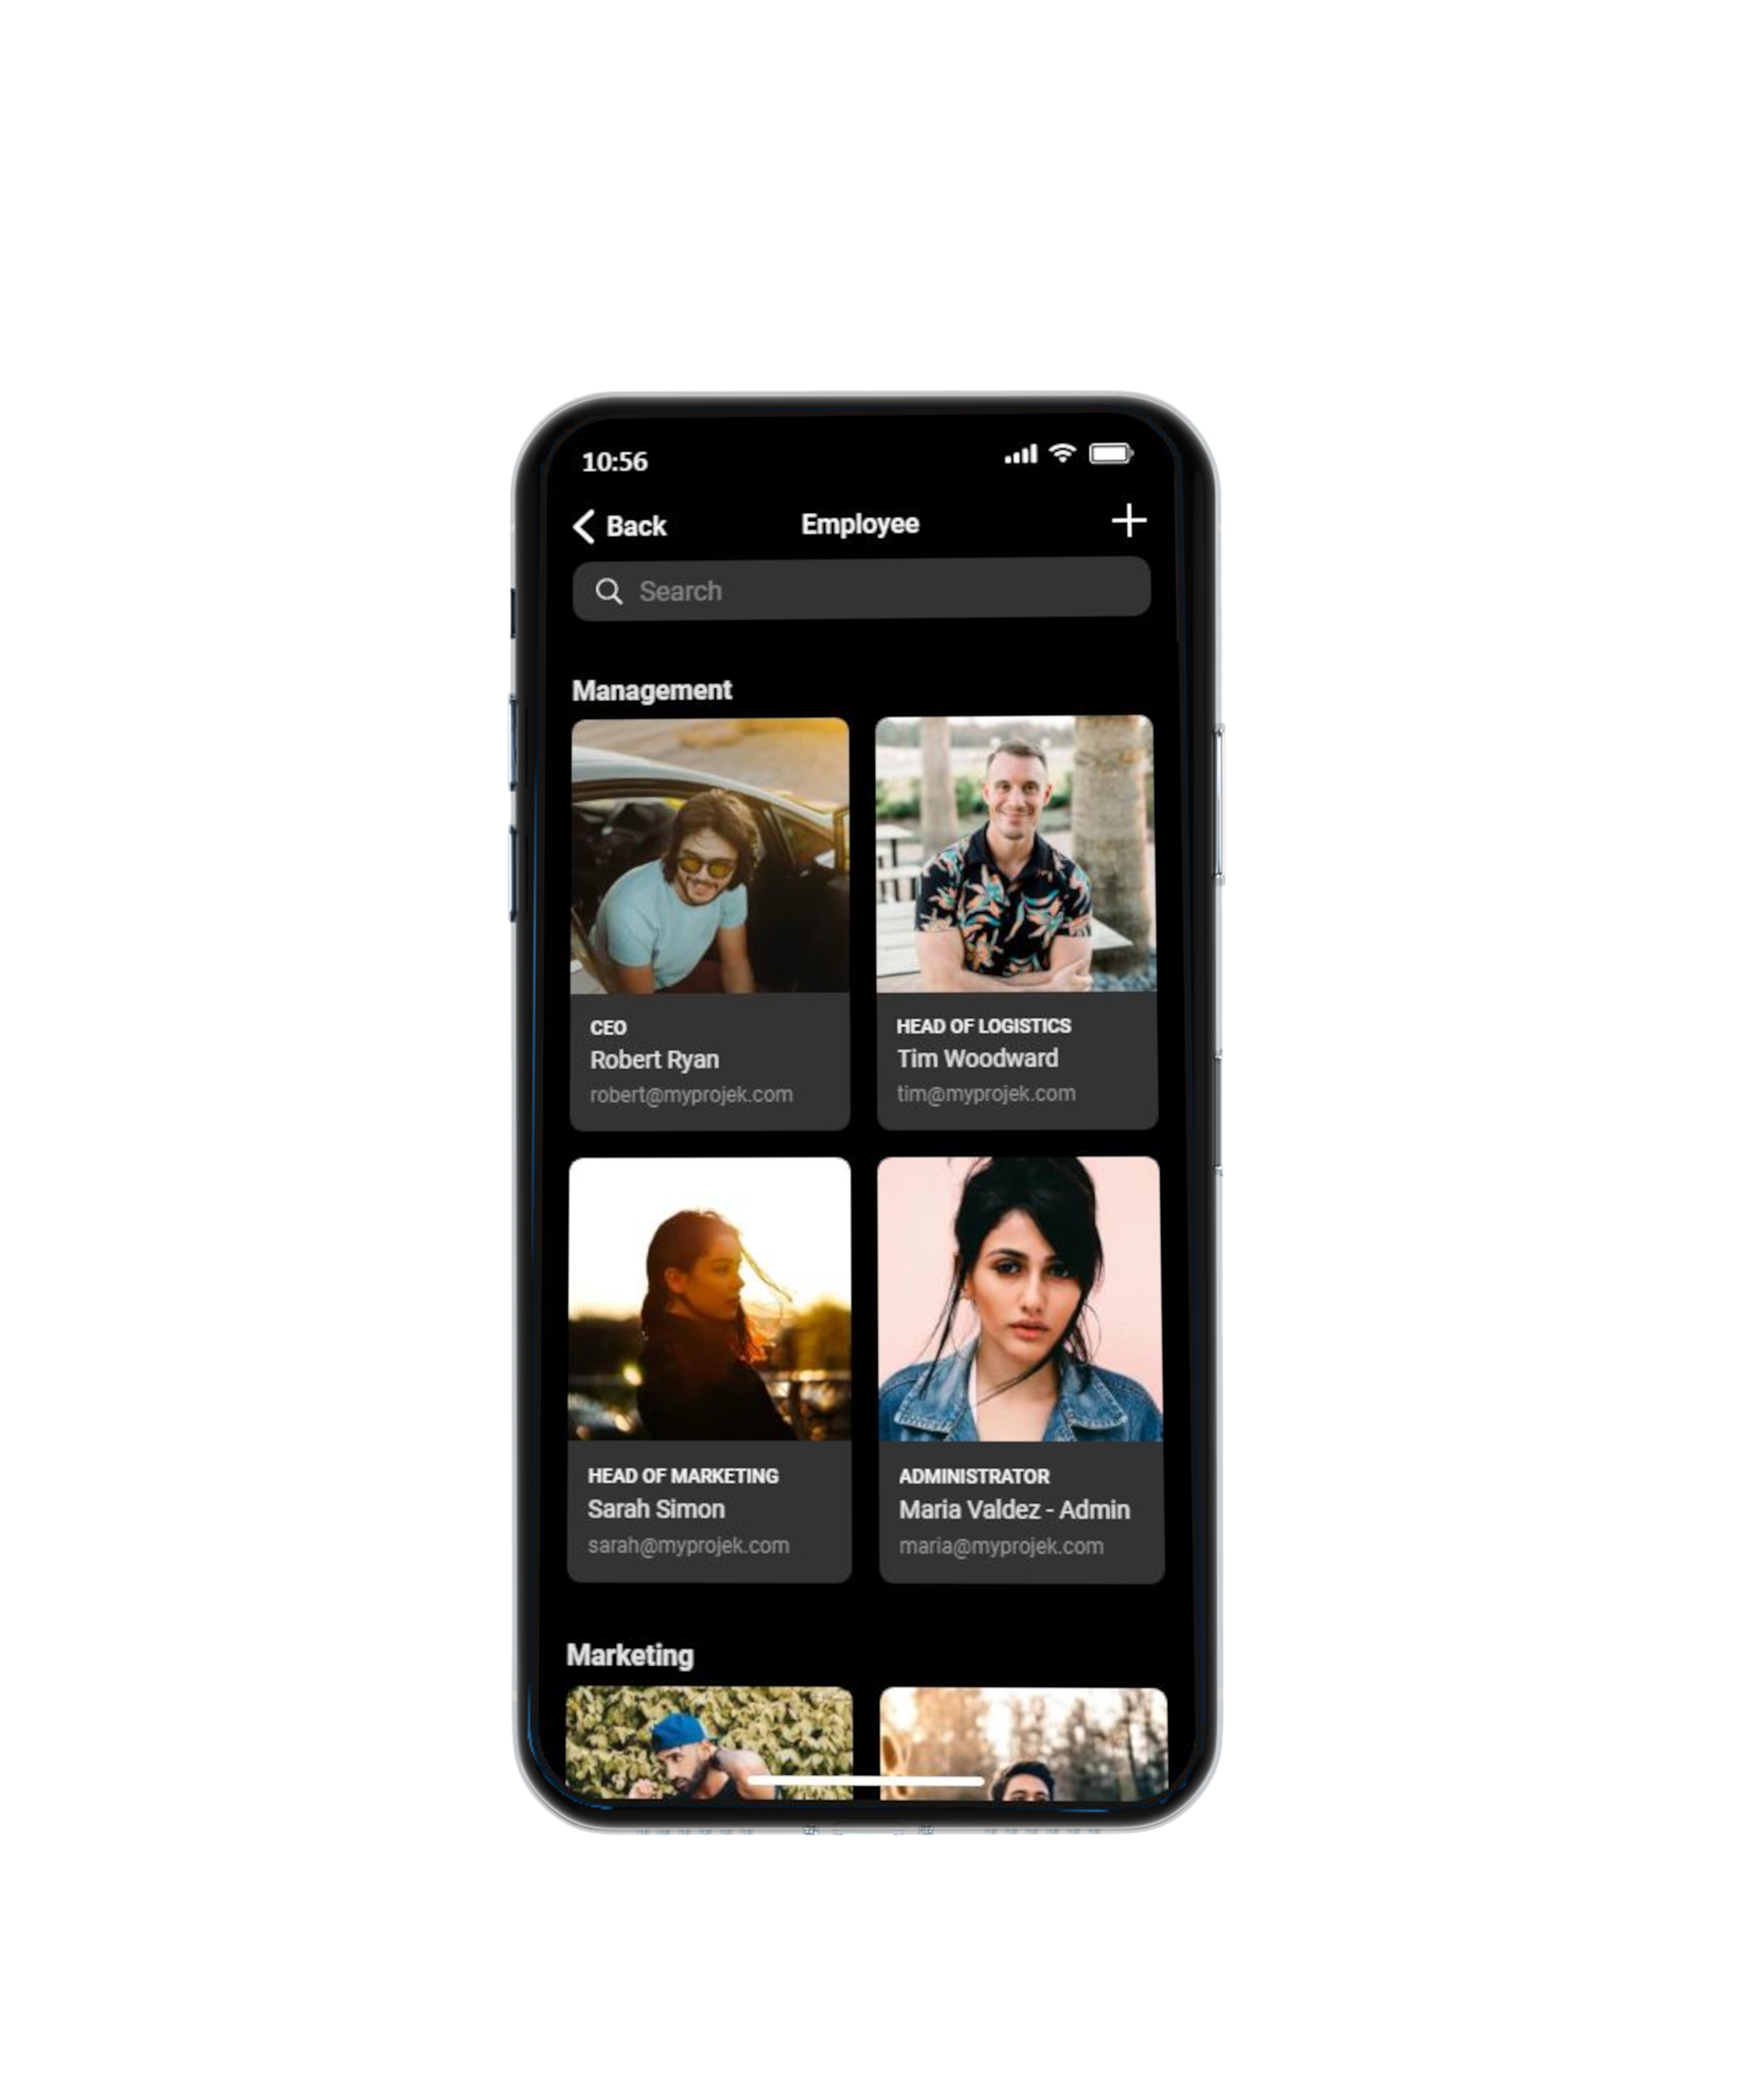
Tap the Employee icon on the Menu screen. The Employee screen displays a list of employees or organized by department. The list includes the employee's title, name, and email address.
When you tap the employee image on the Employee screen, the employee information appears. The employee name, title, and email address are included in the information.
When you tap the '+' icon in the upper right corner of the 'Employee' screen, the 'Add New Employee' screen form appears. This allows the user to add a new employee or user to the app database.
Return to the previous screen by touching the Back'or Left Arrow symbol in the top left corner of the screen.
Add User
Add User
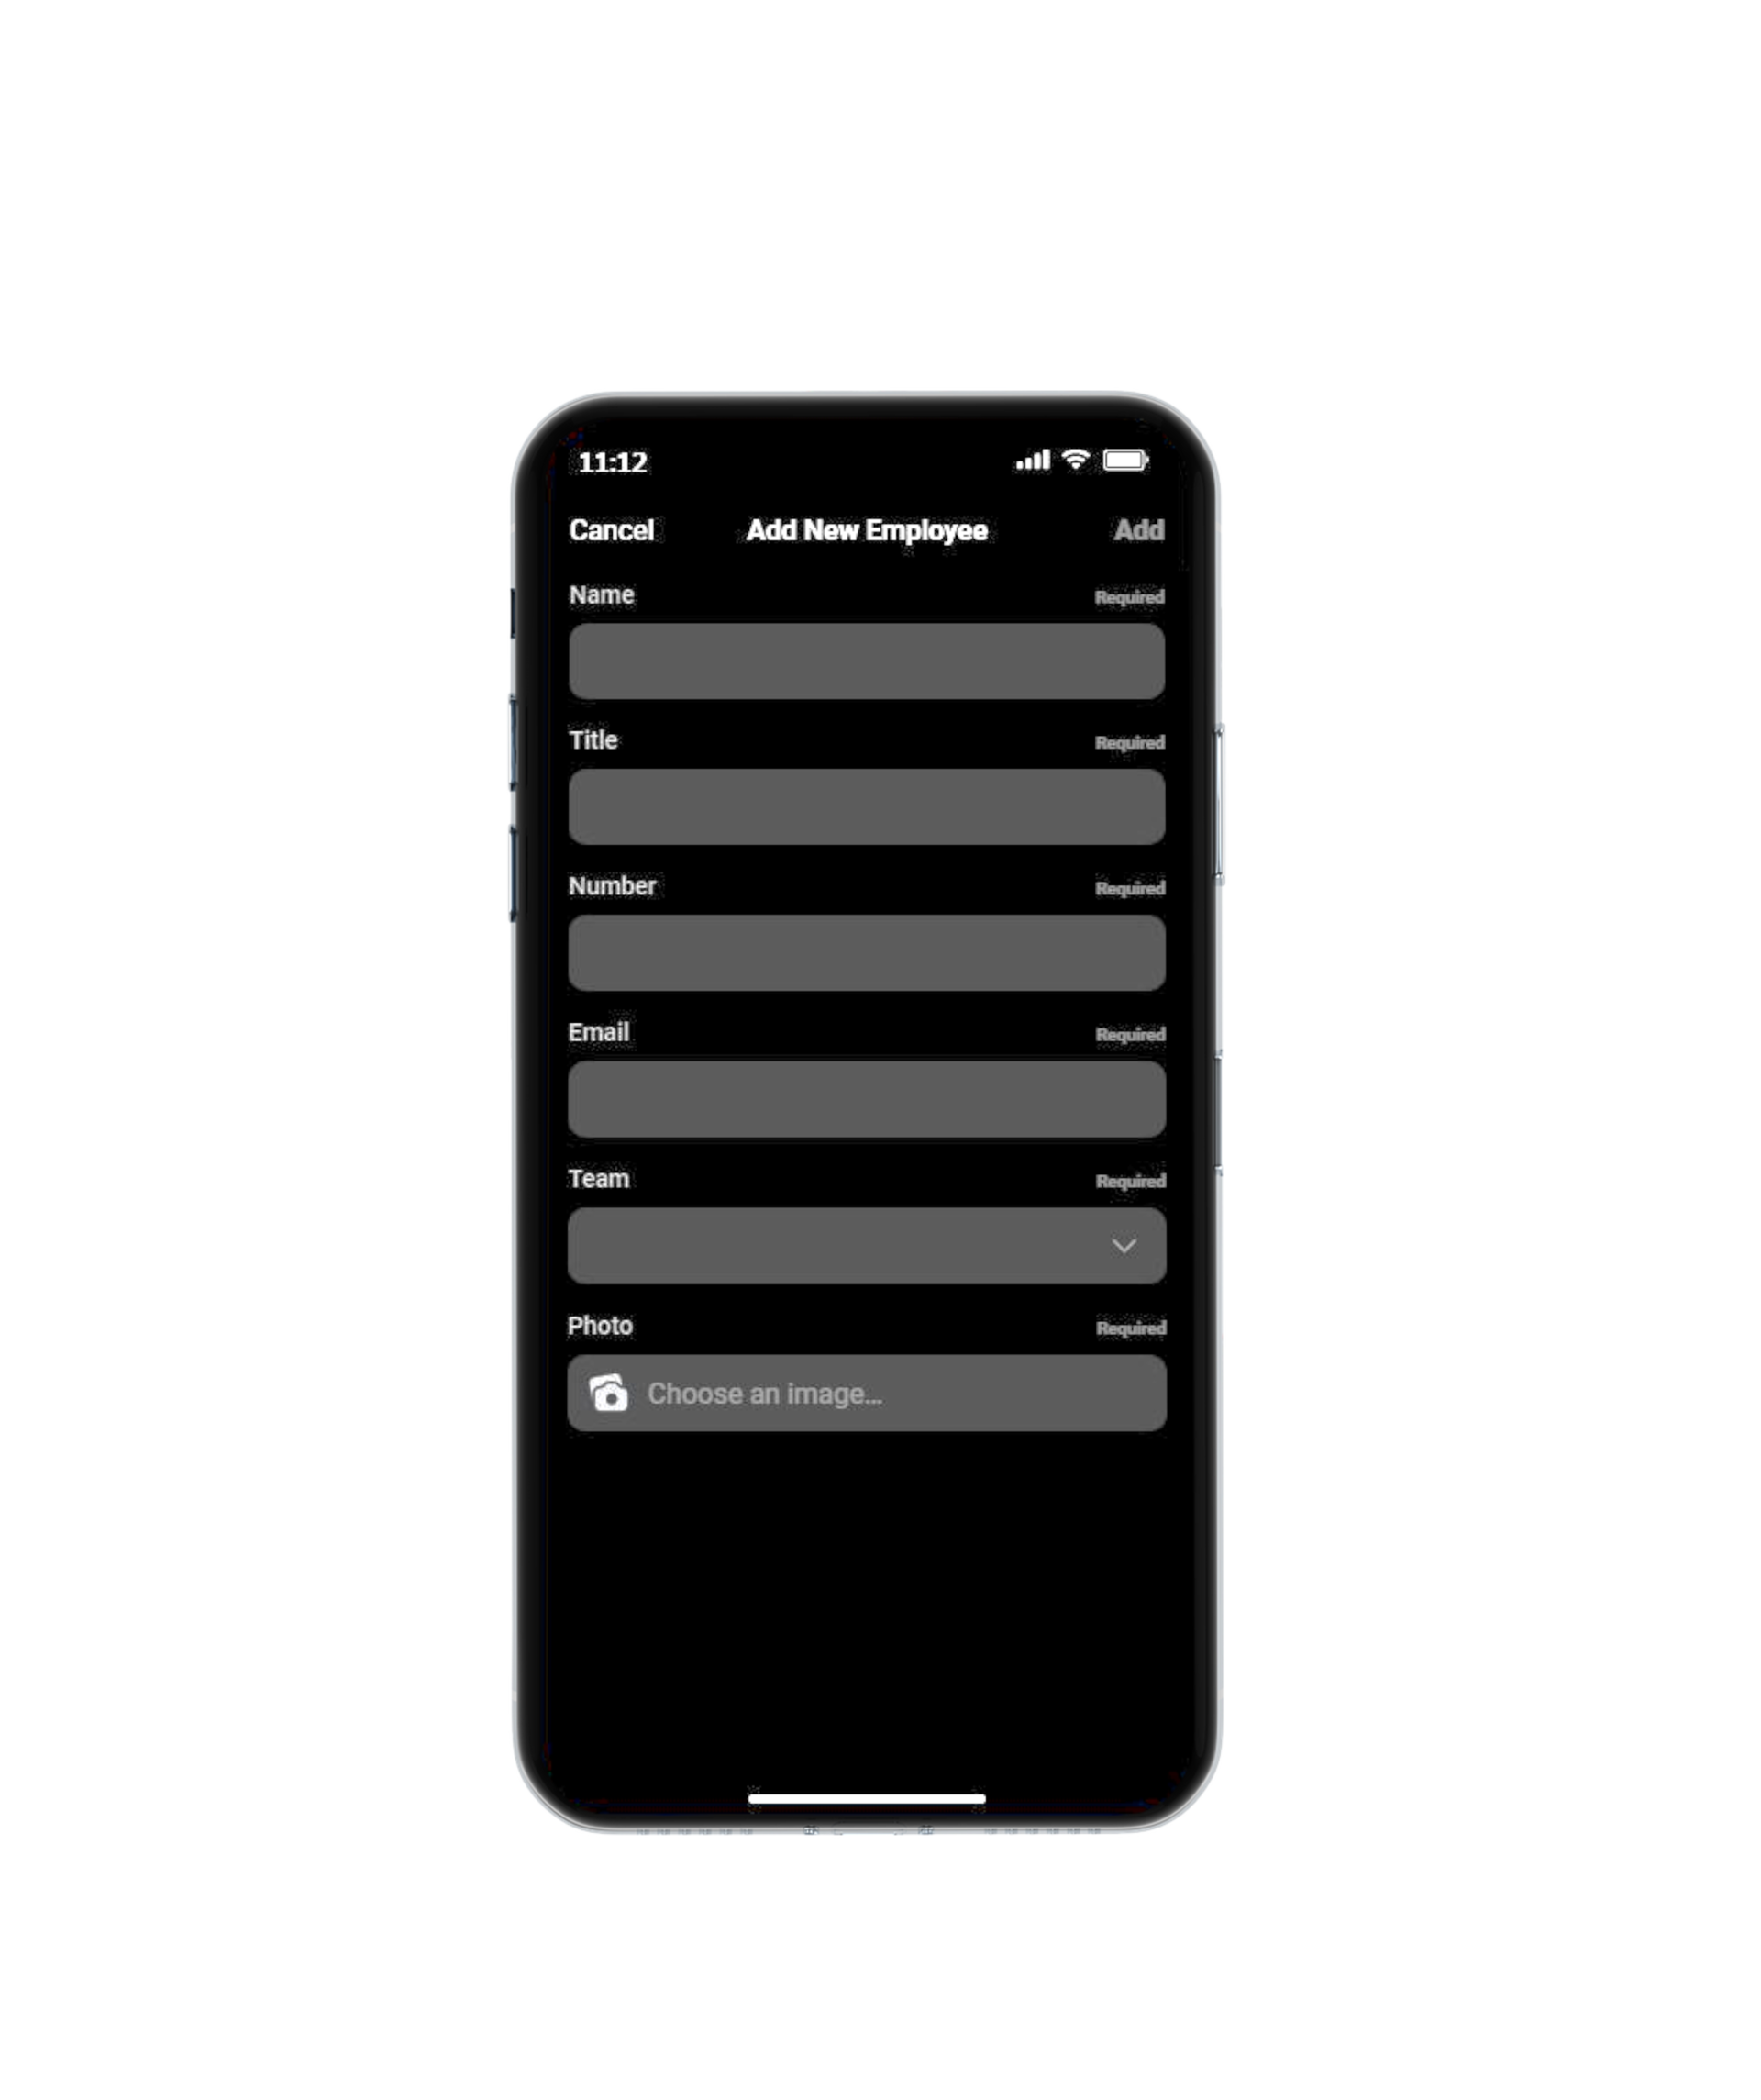
The user can add a new employee or user to the app database using the Add New Employee screen form.
Fill in the required fields with employee or user information.
Once done. Click the Add or tick mark symbol in the top right corner of the screen. The new user profile information will be saved in the app database.
To cancel and return to the previous screen, click Cancel or cross mark.
Add User Video
Create Project
Fill out the project information and you'll be set for the kickoff
Create Project
Categories
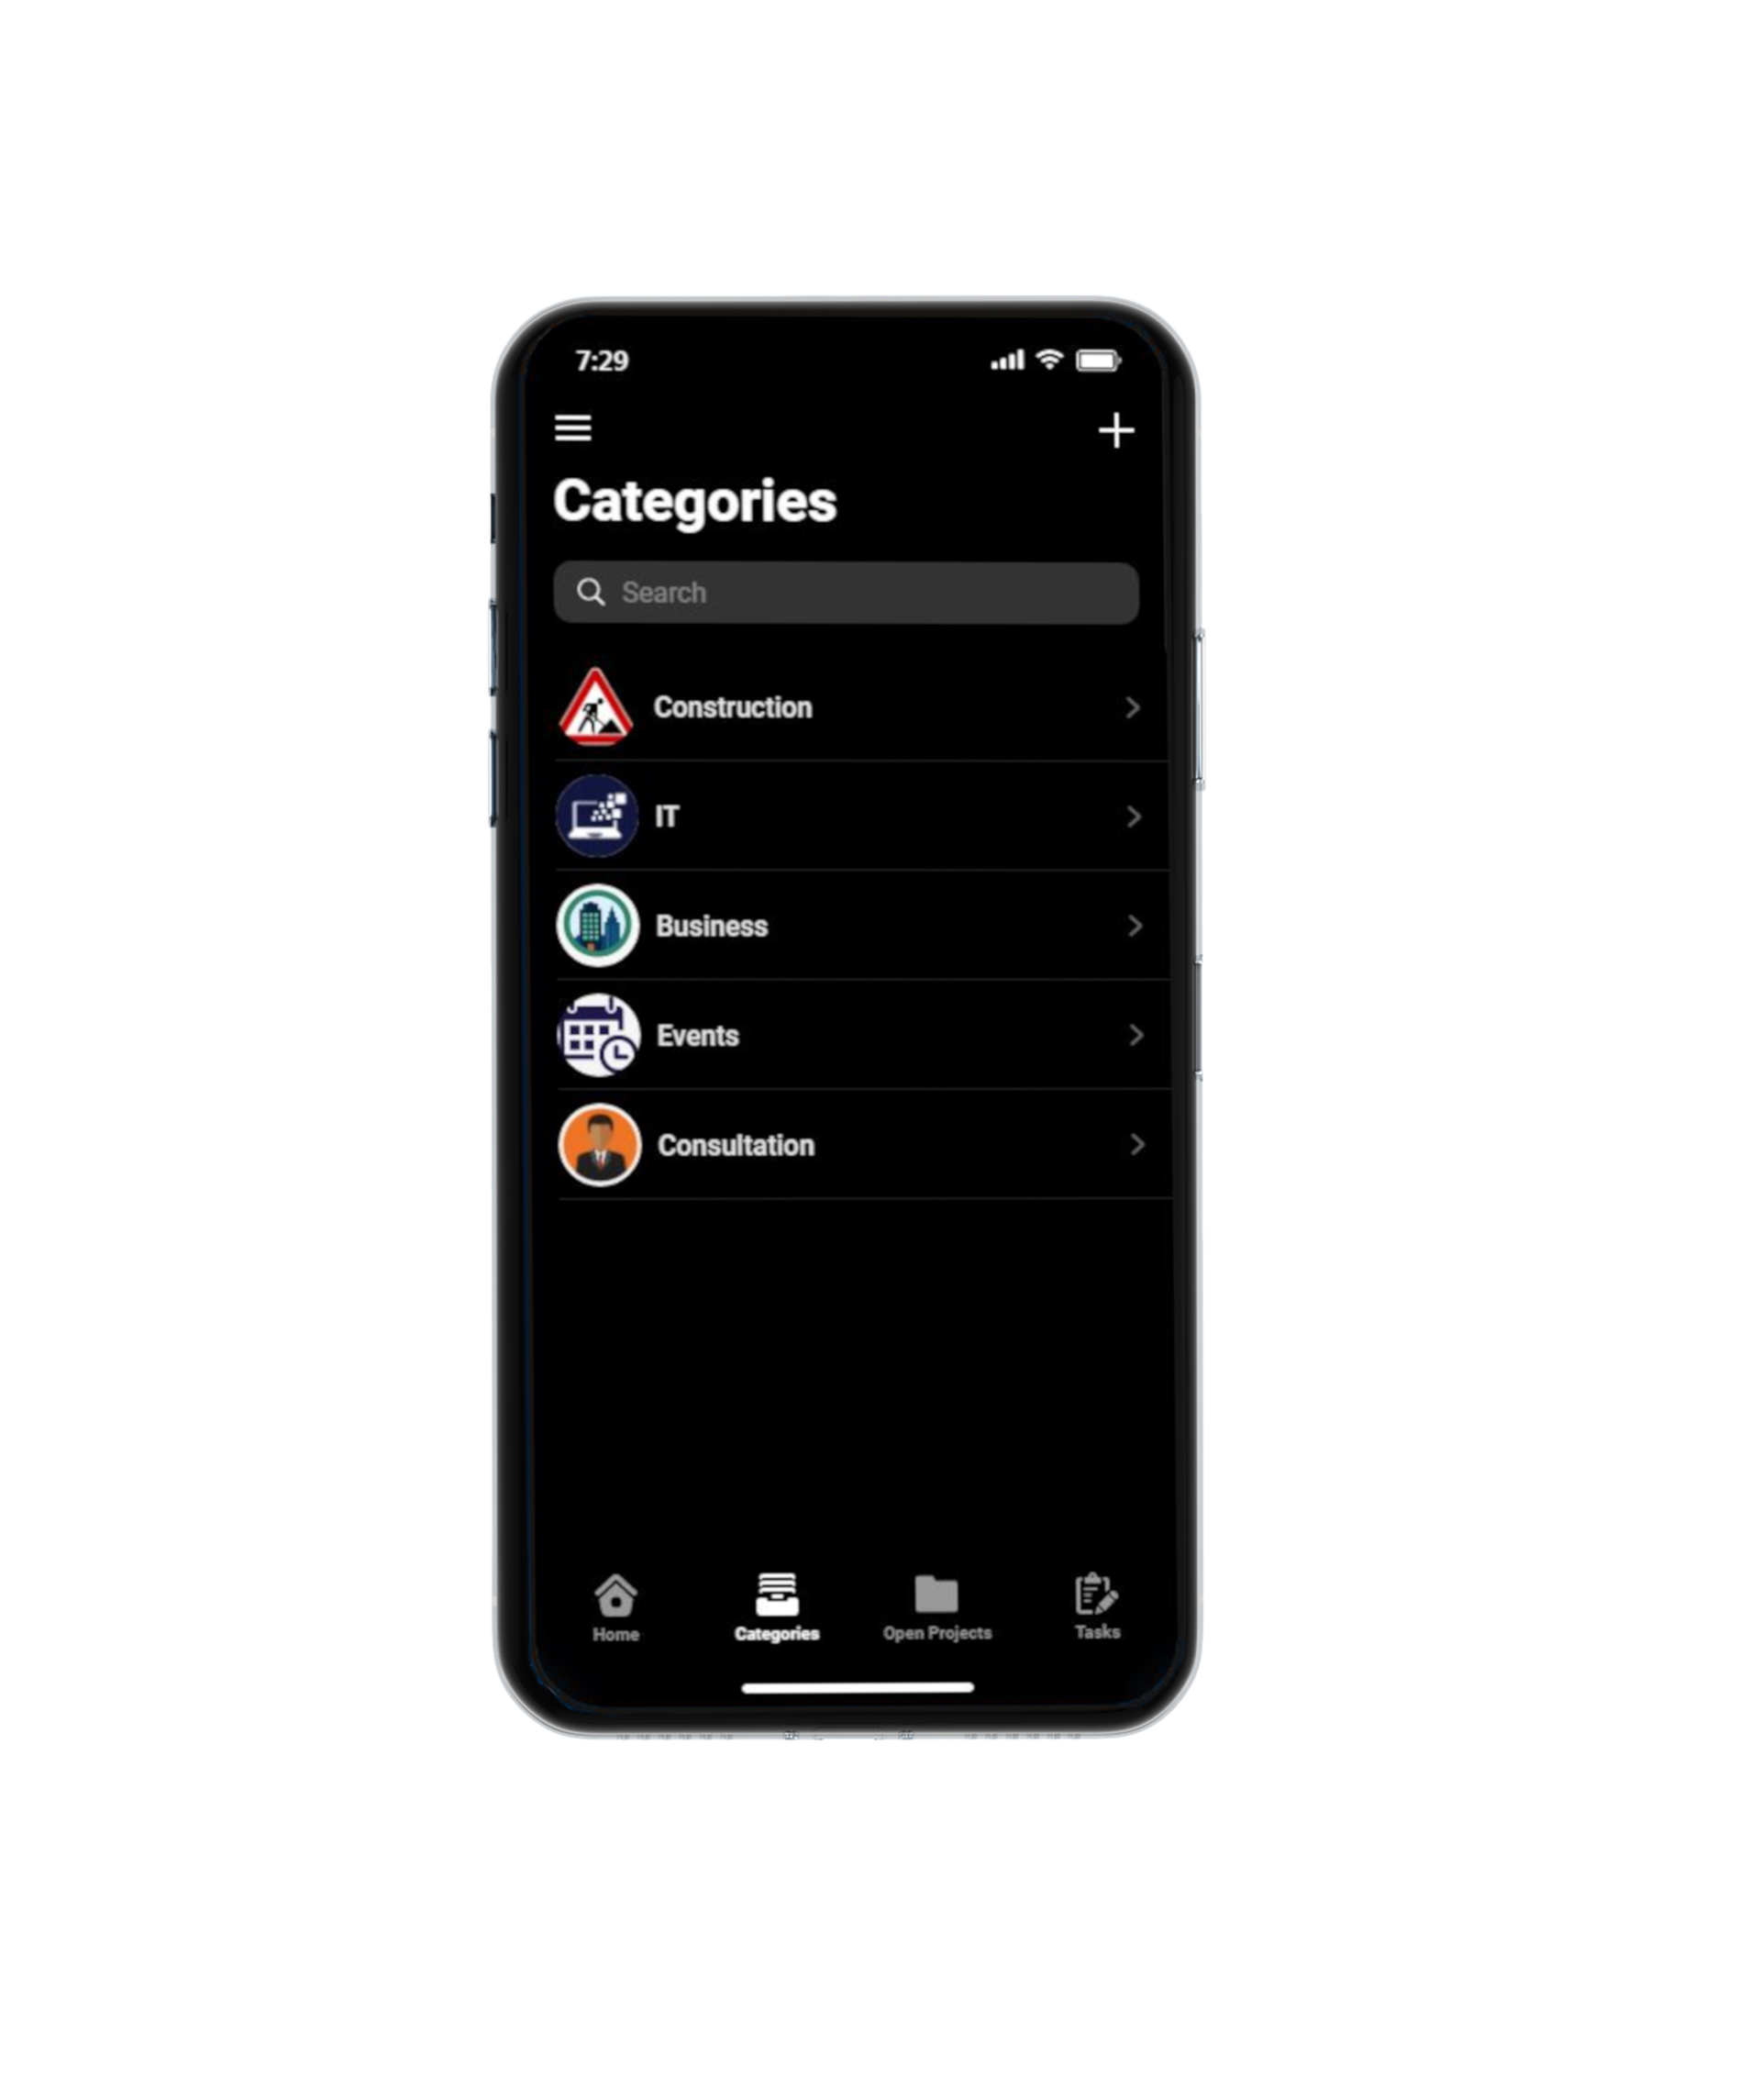
To open the Categories screen, tap the Categories icon on the bottom navigation bar.
The Categories screen displays a list of project categories. To choose your project category, tap on any of the offered options.
To add a new project category, tap the '+' sign in the top right corner of the screen. Enter the new category information. Once finished, tap the add or tick mark button. The new project category will be saved in the app.
Create Project
Add Project
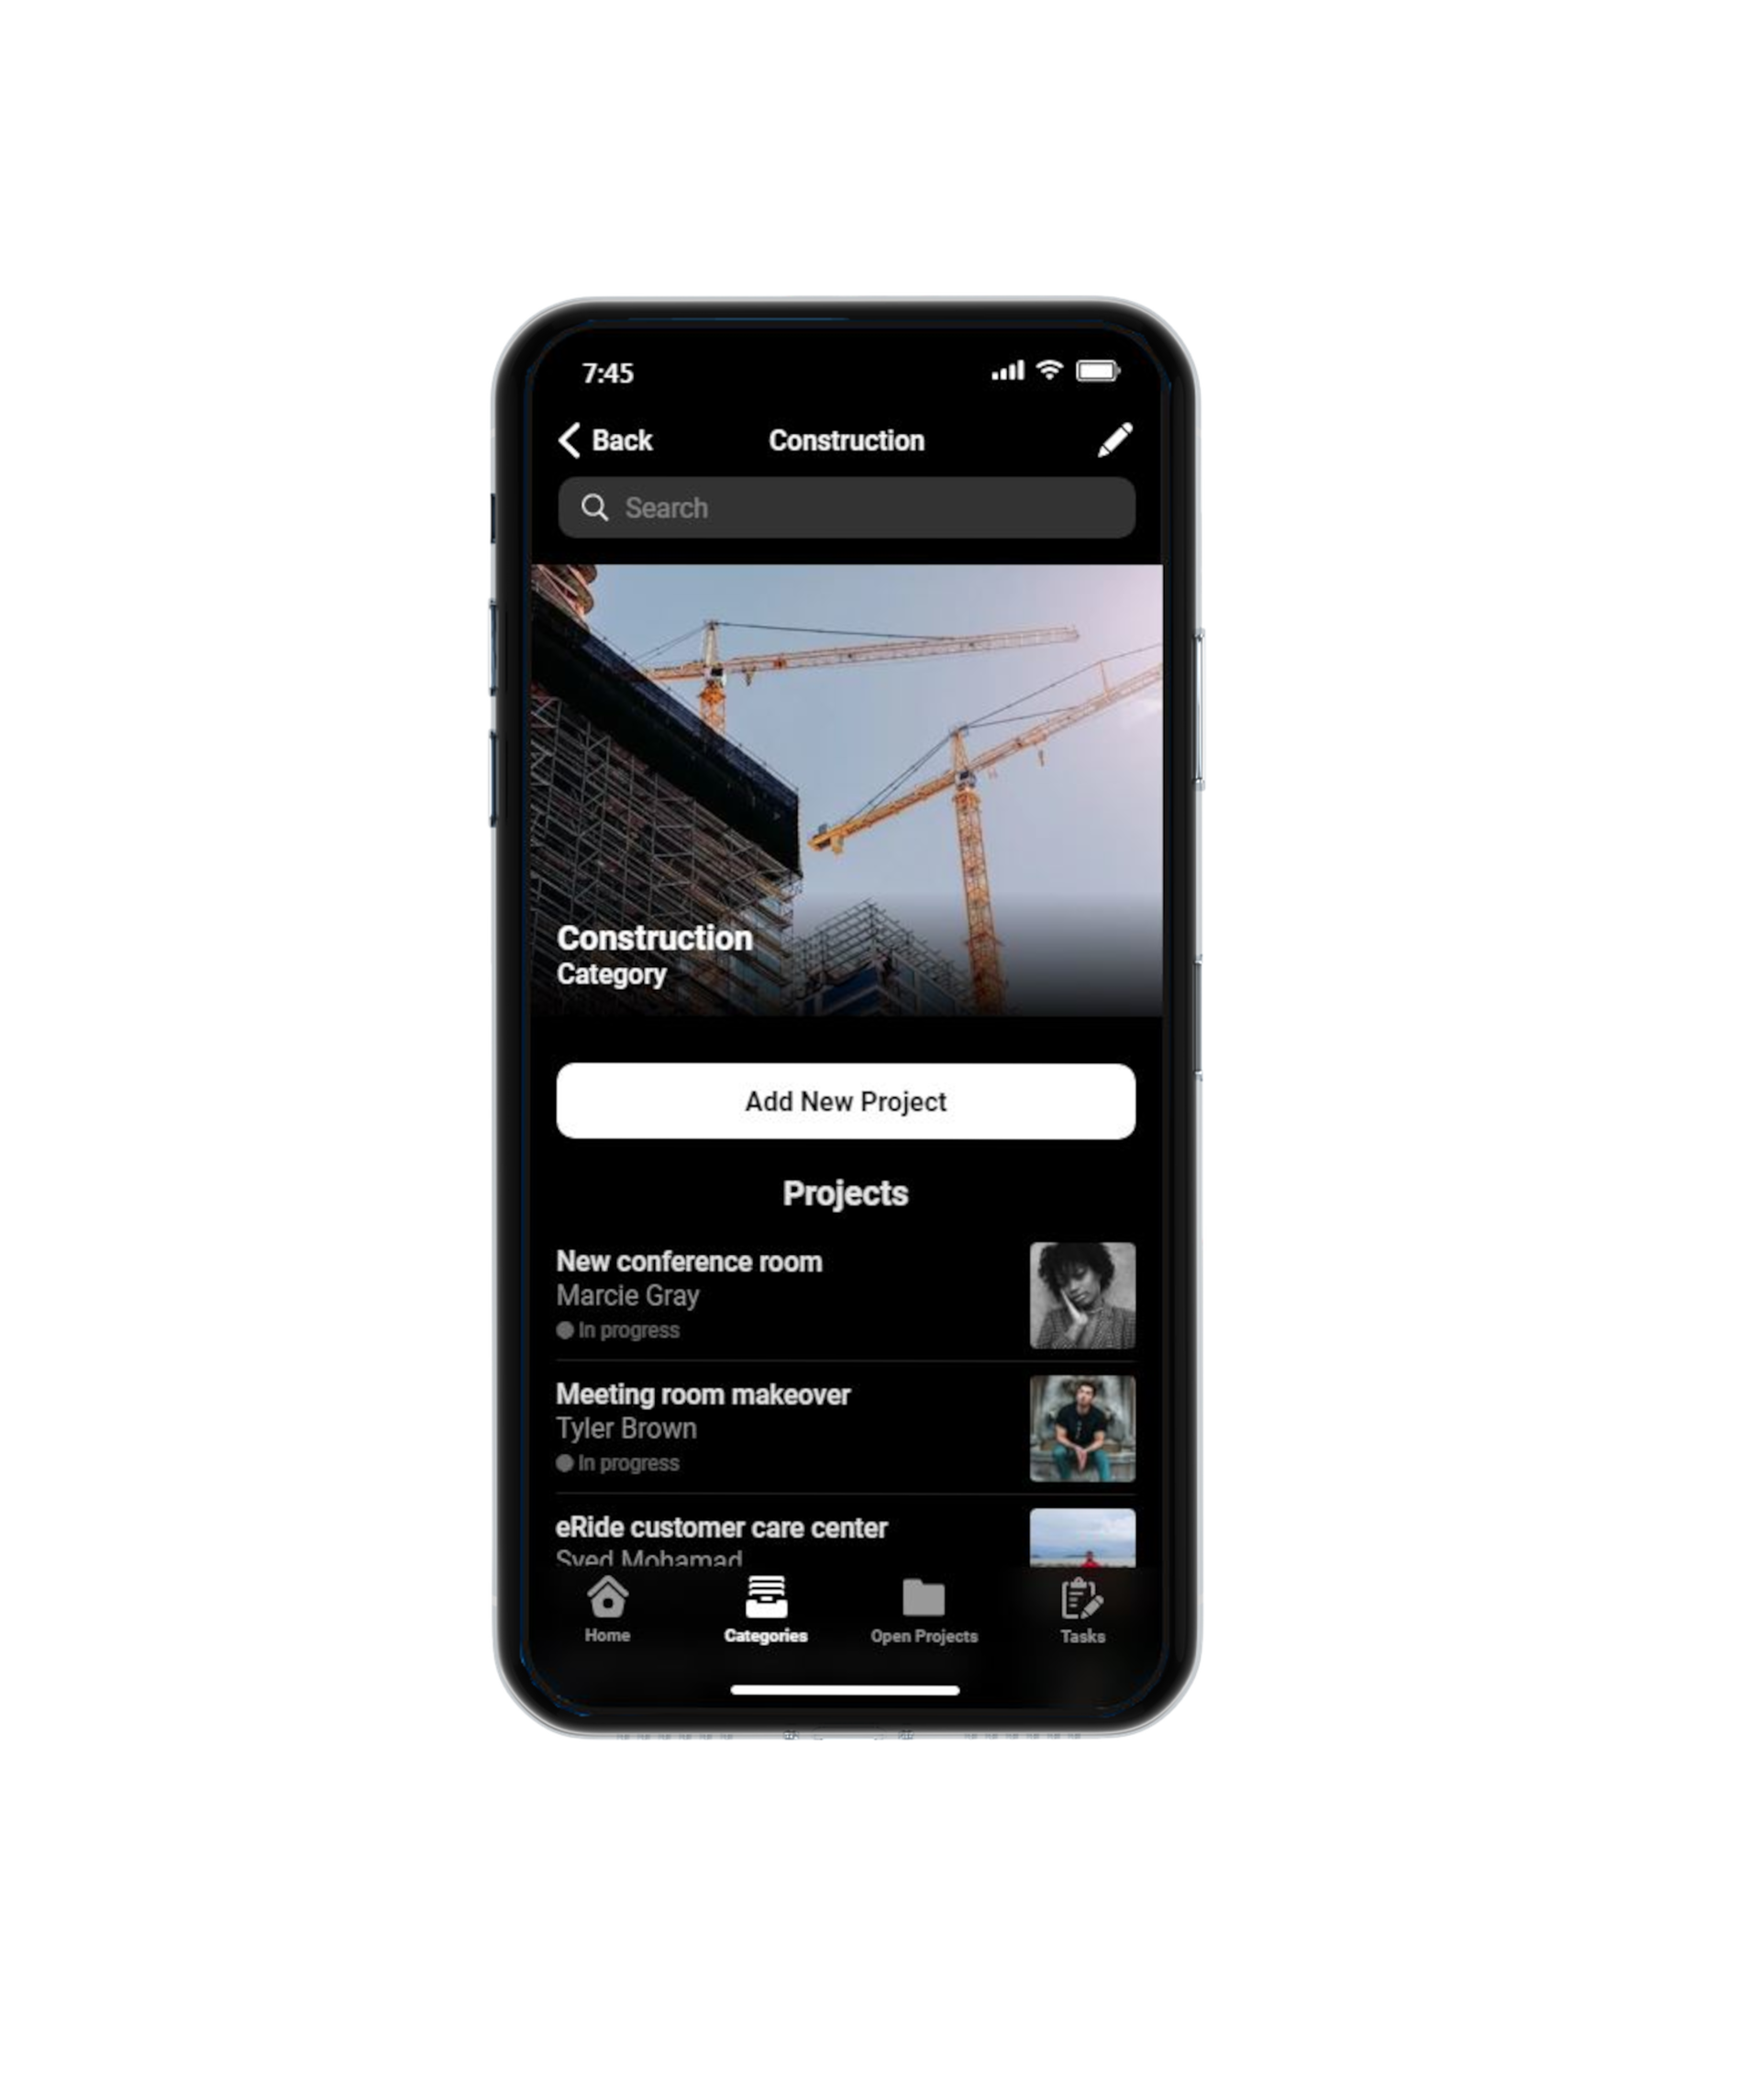
Tapping any project category on the Categories screen displays a list of projects in that category.
The user can add a new project to this category by tapping the Add New Project button.
The Projects section displays a list of project names, owners, owner photos, and project status.
The Search bar helps the user locate a specific project result in this category.
The Category Edit item screen is accessed by tapping the edit or 'pencil' icon.
Tap the Back or left-arrow icon in the top left corner of the screen to return to the previous screen.
Create Project
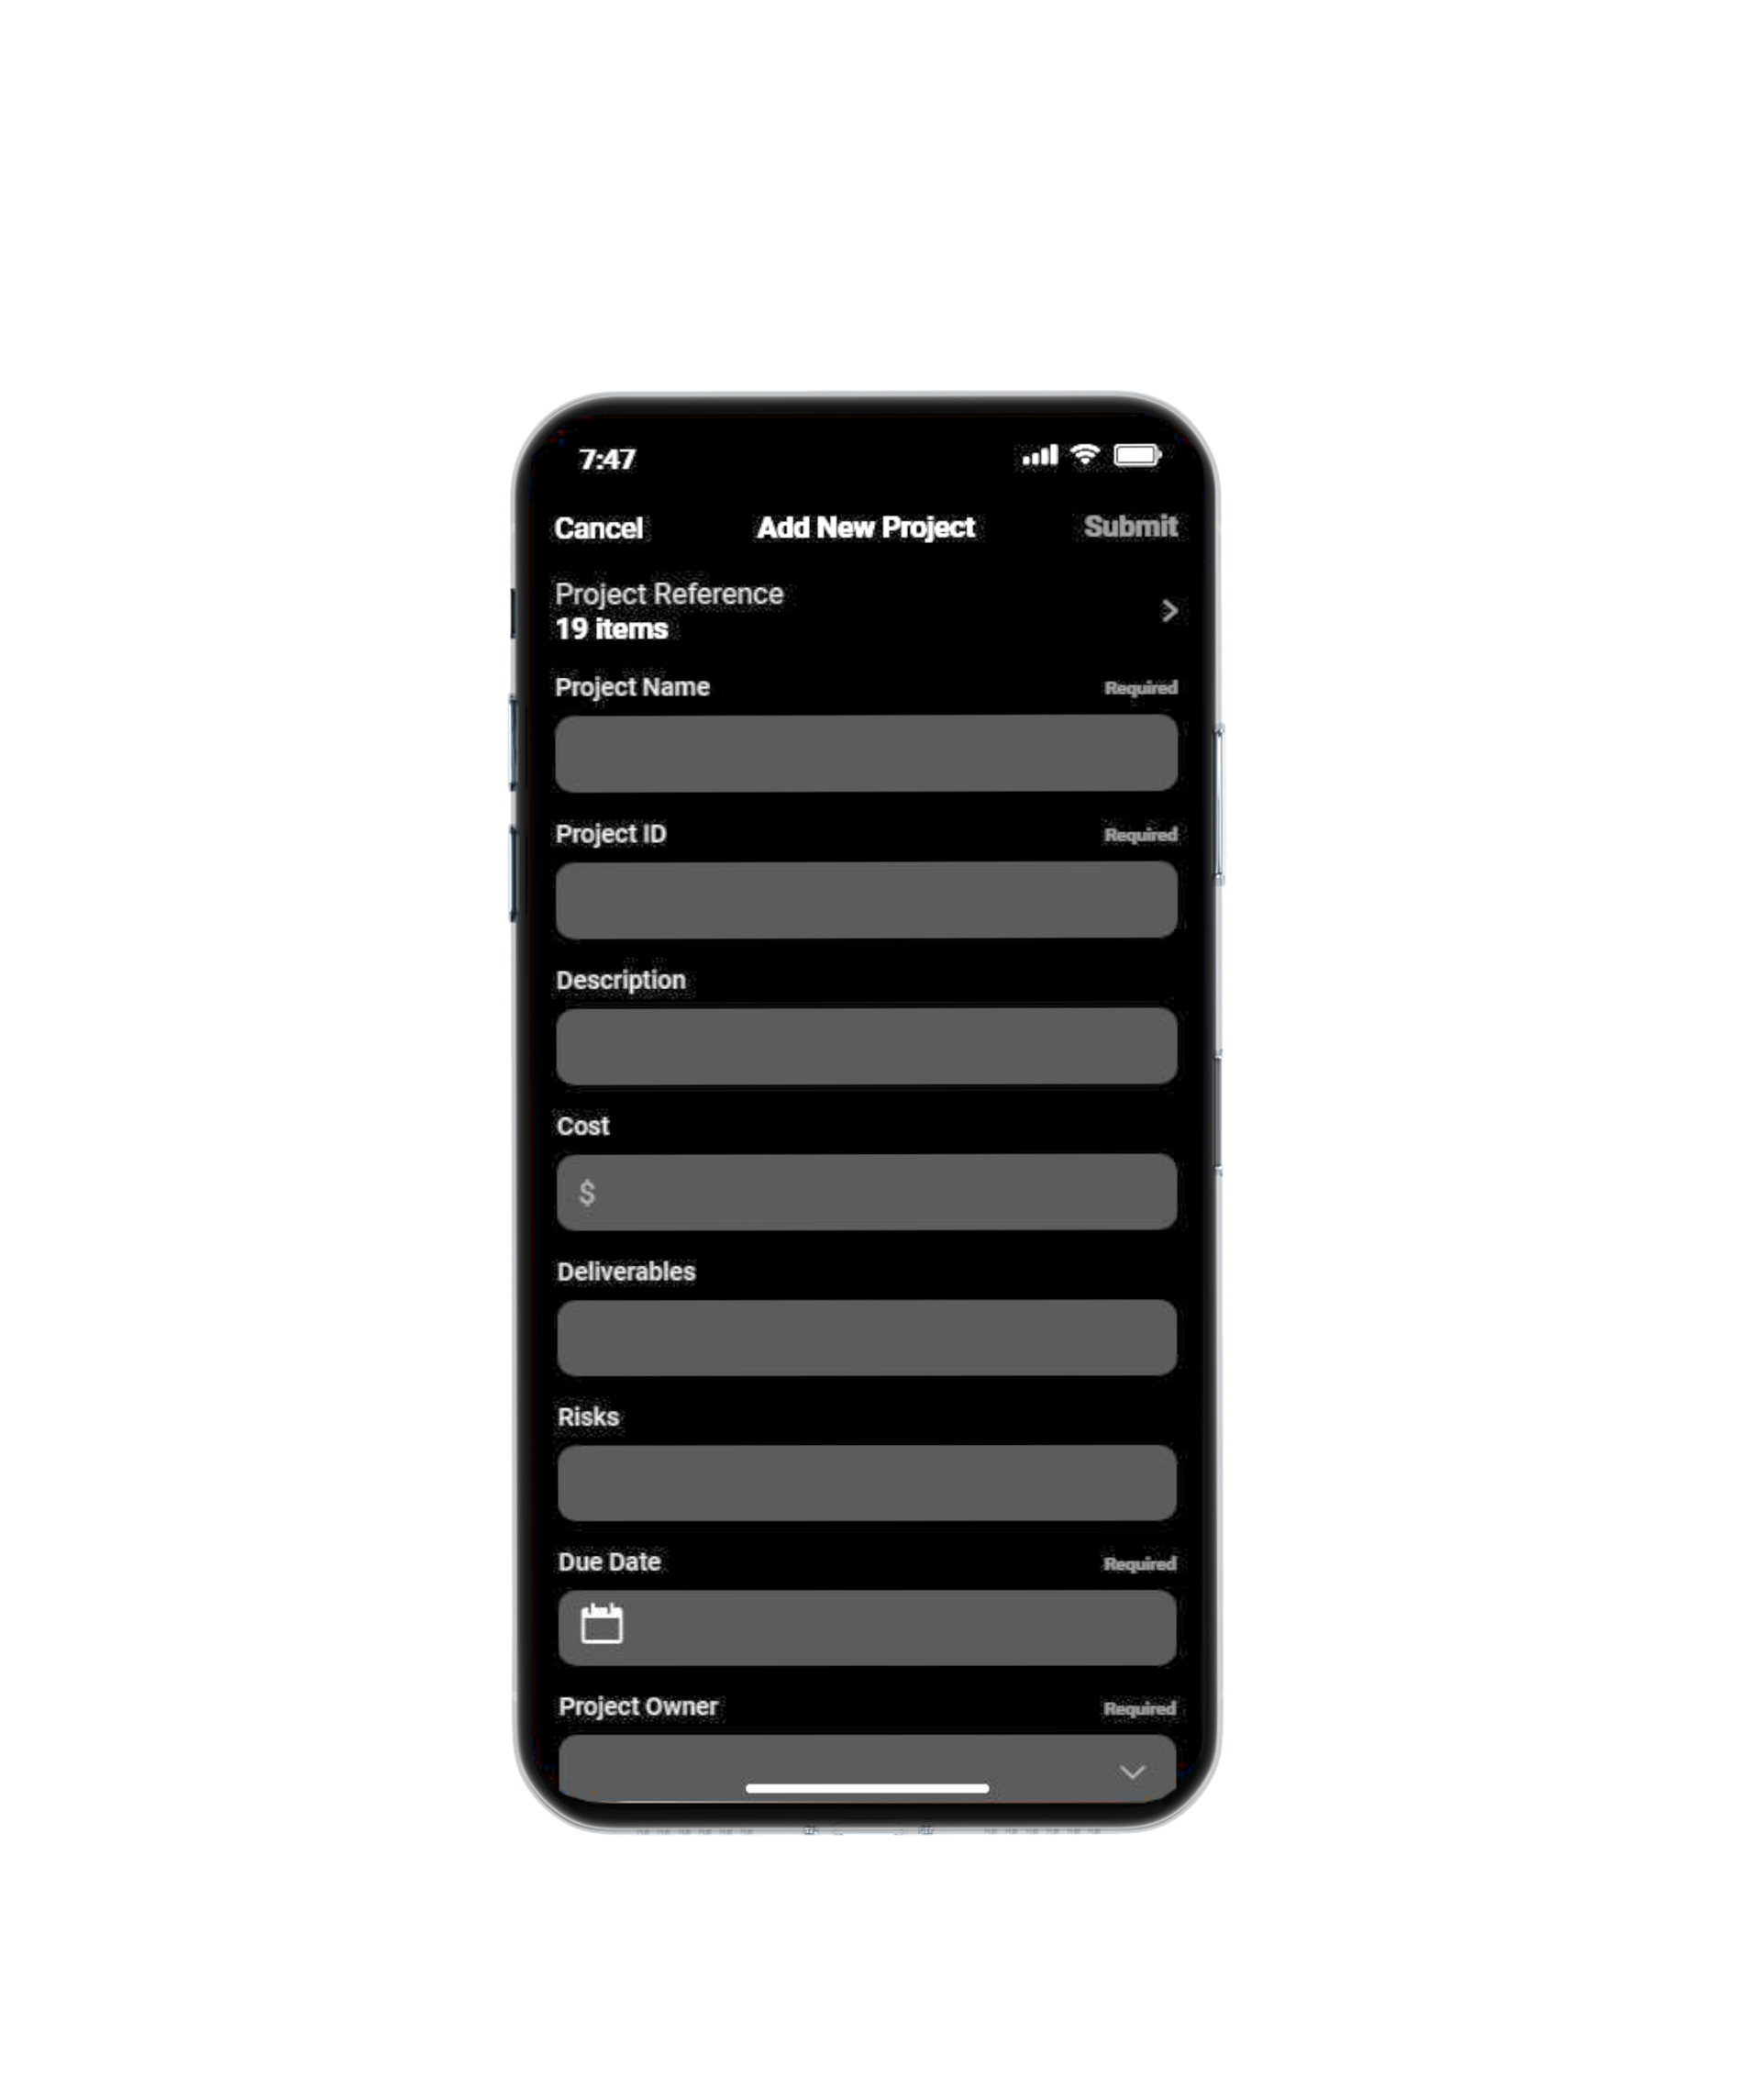
Enter Project Information
Tapping any project category on the Categories page brings up a list of projects in that category. When you tap the Add New Project button, the project form screen appears.
The user must enter and select the required project information. When finished, click the Submit or check mark icon in the top right corner of the screen. The new project information will be saved in the app database. To cancel, click Cancel or cross mark and return to the previous screen.
Project Reference provides the user with a list of existing project IDs. This is to avoid the user unintentionally entering an existing project ID, which would result in project information conflict.
To return to the previous screen, click Cancel or cross mark. Once a project is created, the user can edit it.
Create Project
Add Task
Once the project information has been entered, it will be listed under the specified category. The project owner can now assign project tasks to the team.
On the project information screen, scroll down to the Add New Task button. Press the button. The task form screen will be displayed. Enter and select the task information that is required.

Create Project
Enter Task Information
The Add New Task screen is where the user enters the new task information.
The user must fill out the required task information in the provided fields. The Required fields must be completed.
When finished. In the upper right corner of the screen, tap the 'Submit' button. The new task information will be saved in the app's database.
To return to the previous screen, click Cancel or cross mark. Once a task is created, the user can edit it.
Create Project And Task
Notify Project Owner
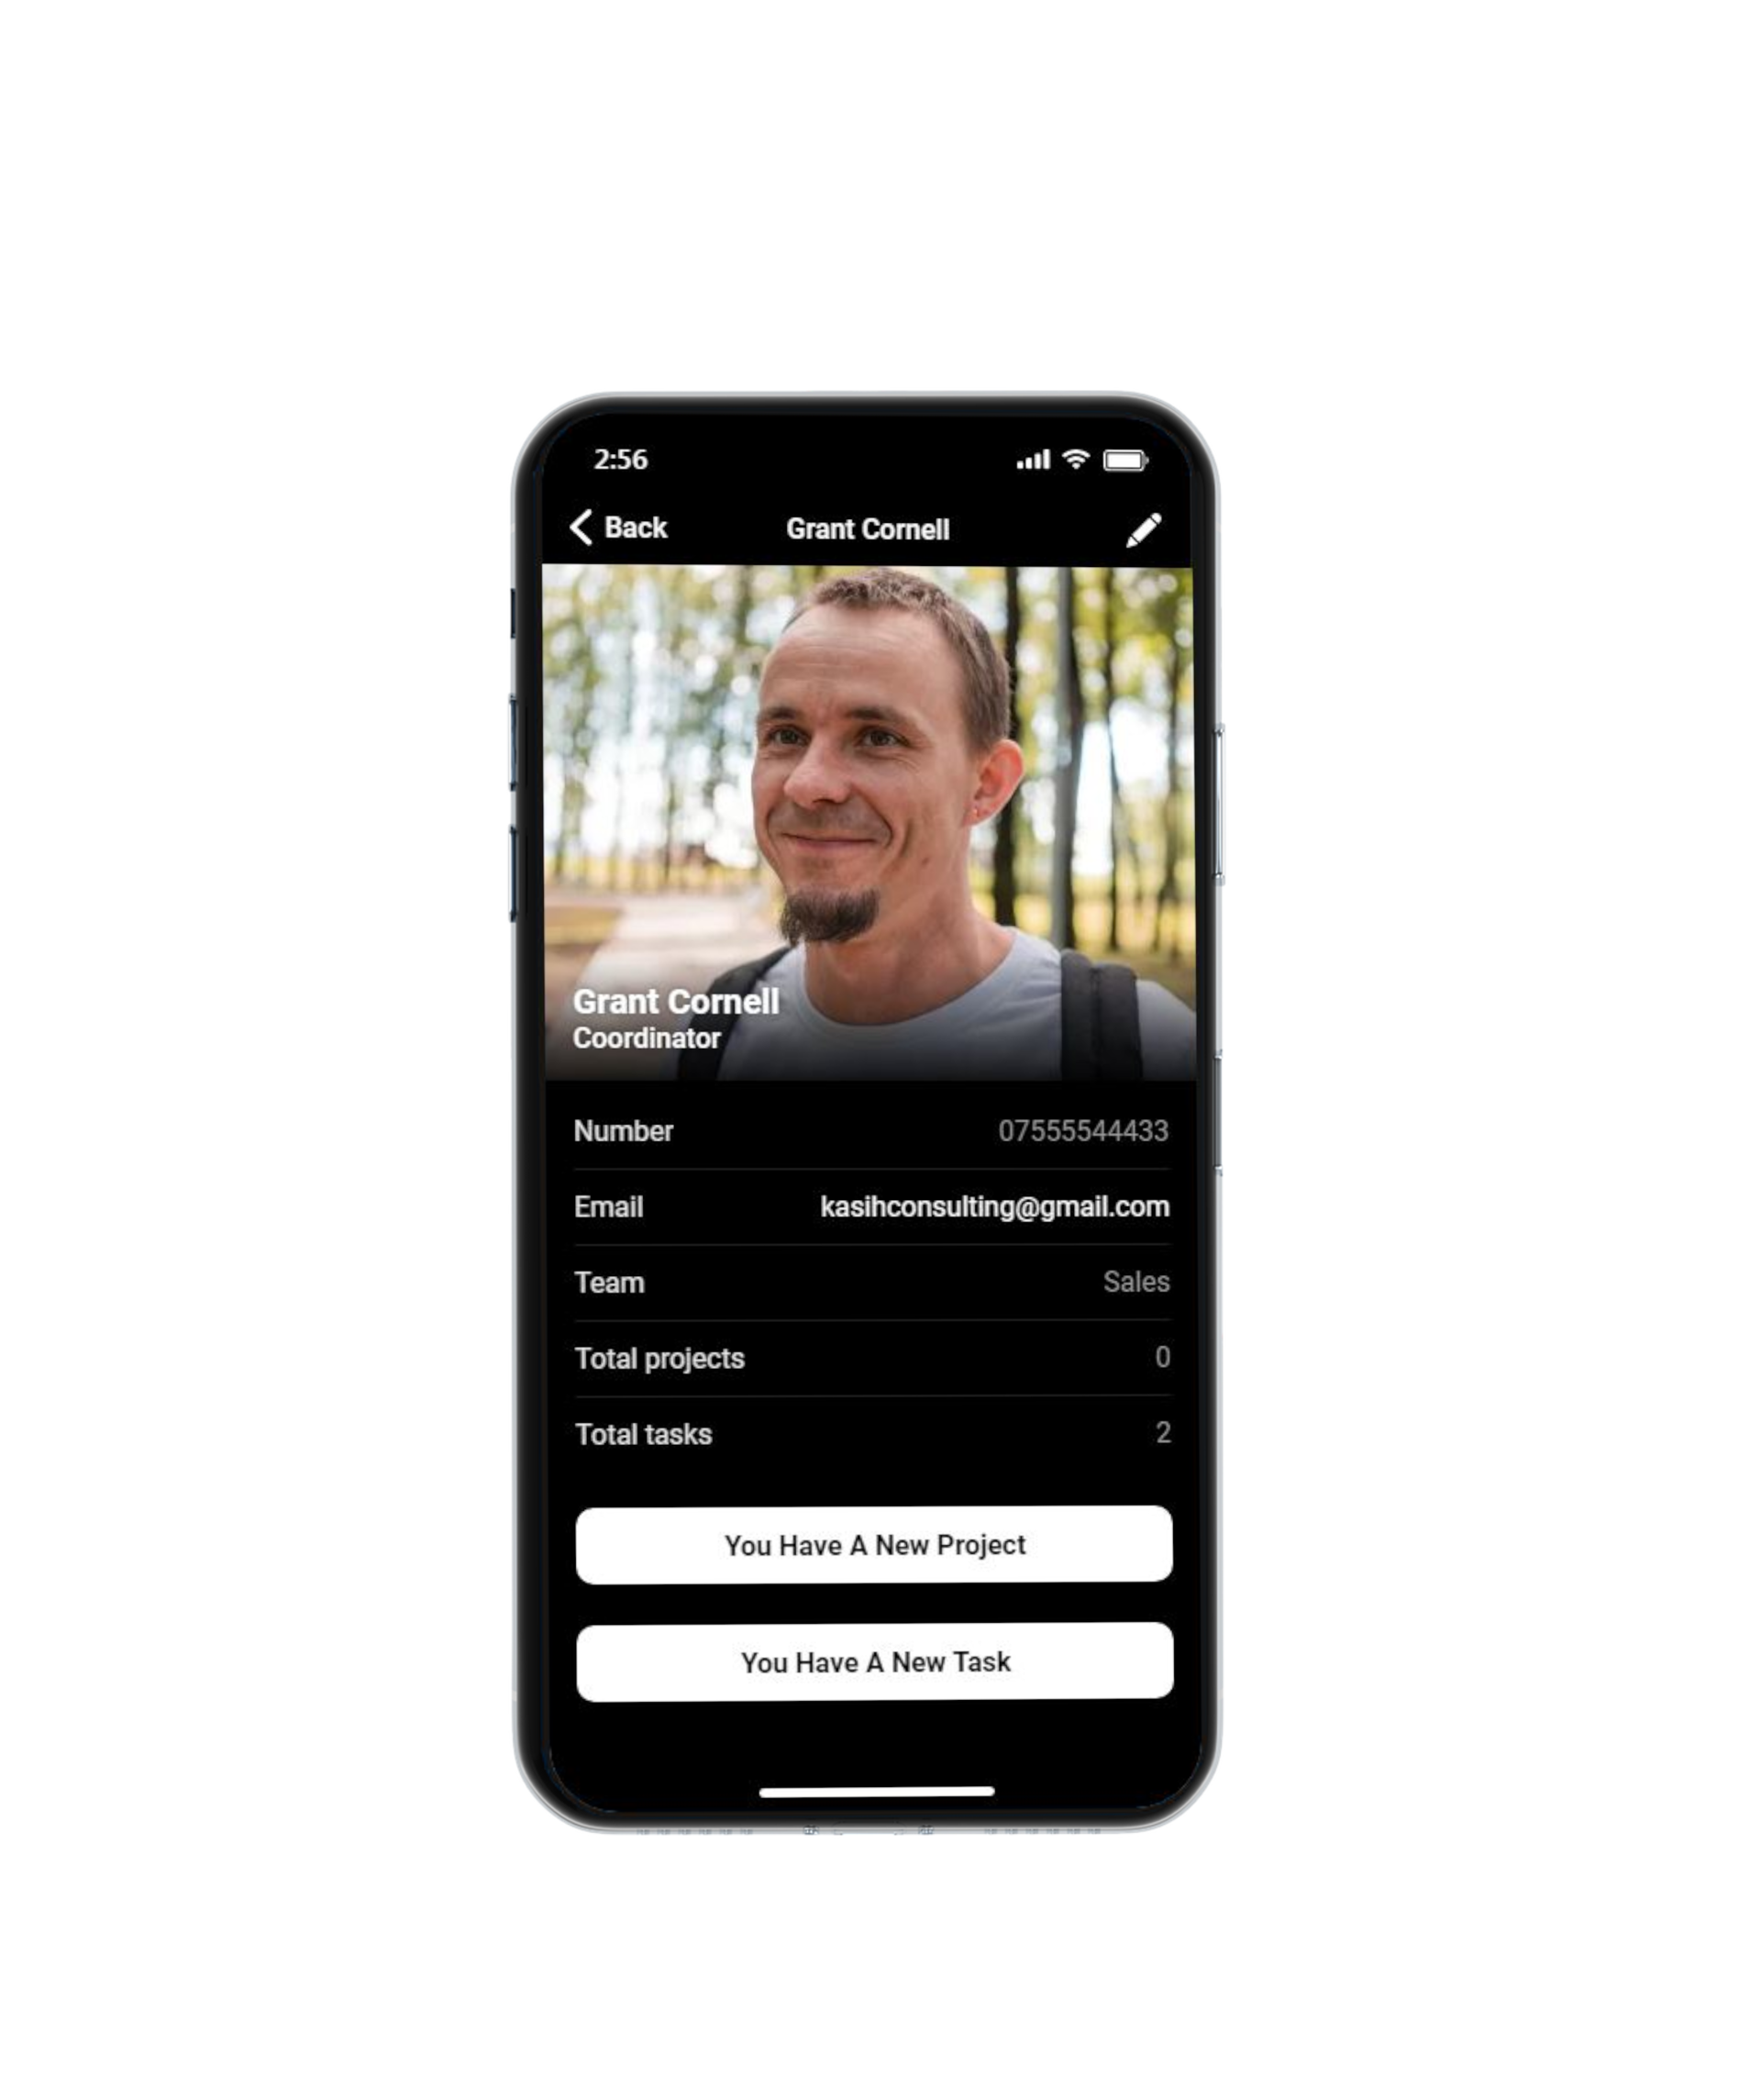
After you've created the project or task, tap the owner image in the project or task information. You can also go to the Menu screen and select Employee. This brings up the Employee screen. Choose the project or task owner.
Tap the You Have A New Project or You Have A New Task button to notify the project or task owner. The new project or task assignment will be notified via email.
This is an optional action. It is up to the user whether or not to use it. It is suggested that only authorized users, such as Admin, do this activity.
Tap Back or arrow mark to return to the previous screen.
Create Project Videos
Categories
Add Project
Add Task
Be In Control
Don't be caught off guard. Keep track of the key project indicators
Be In Control
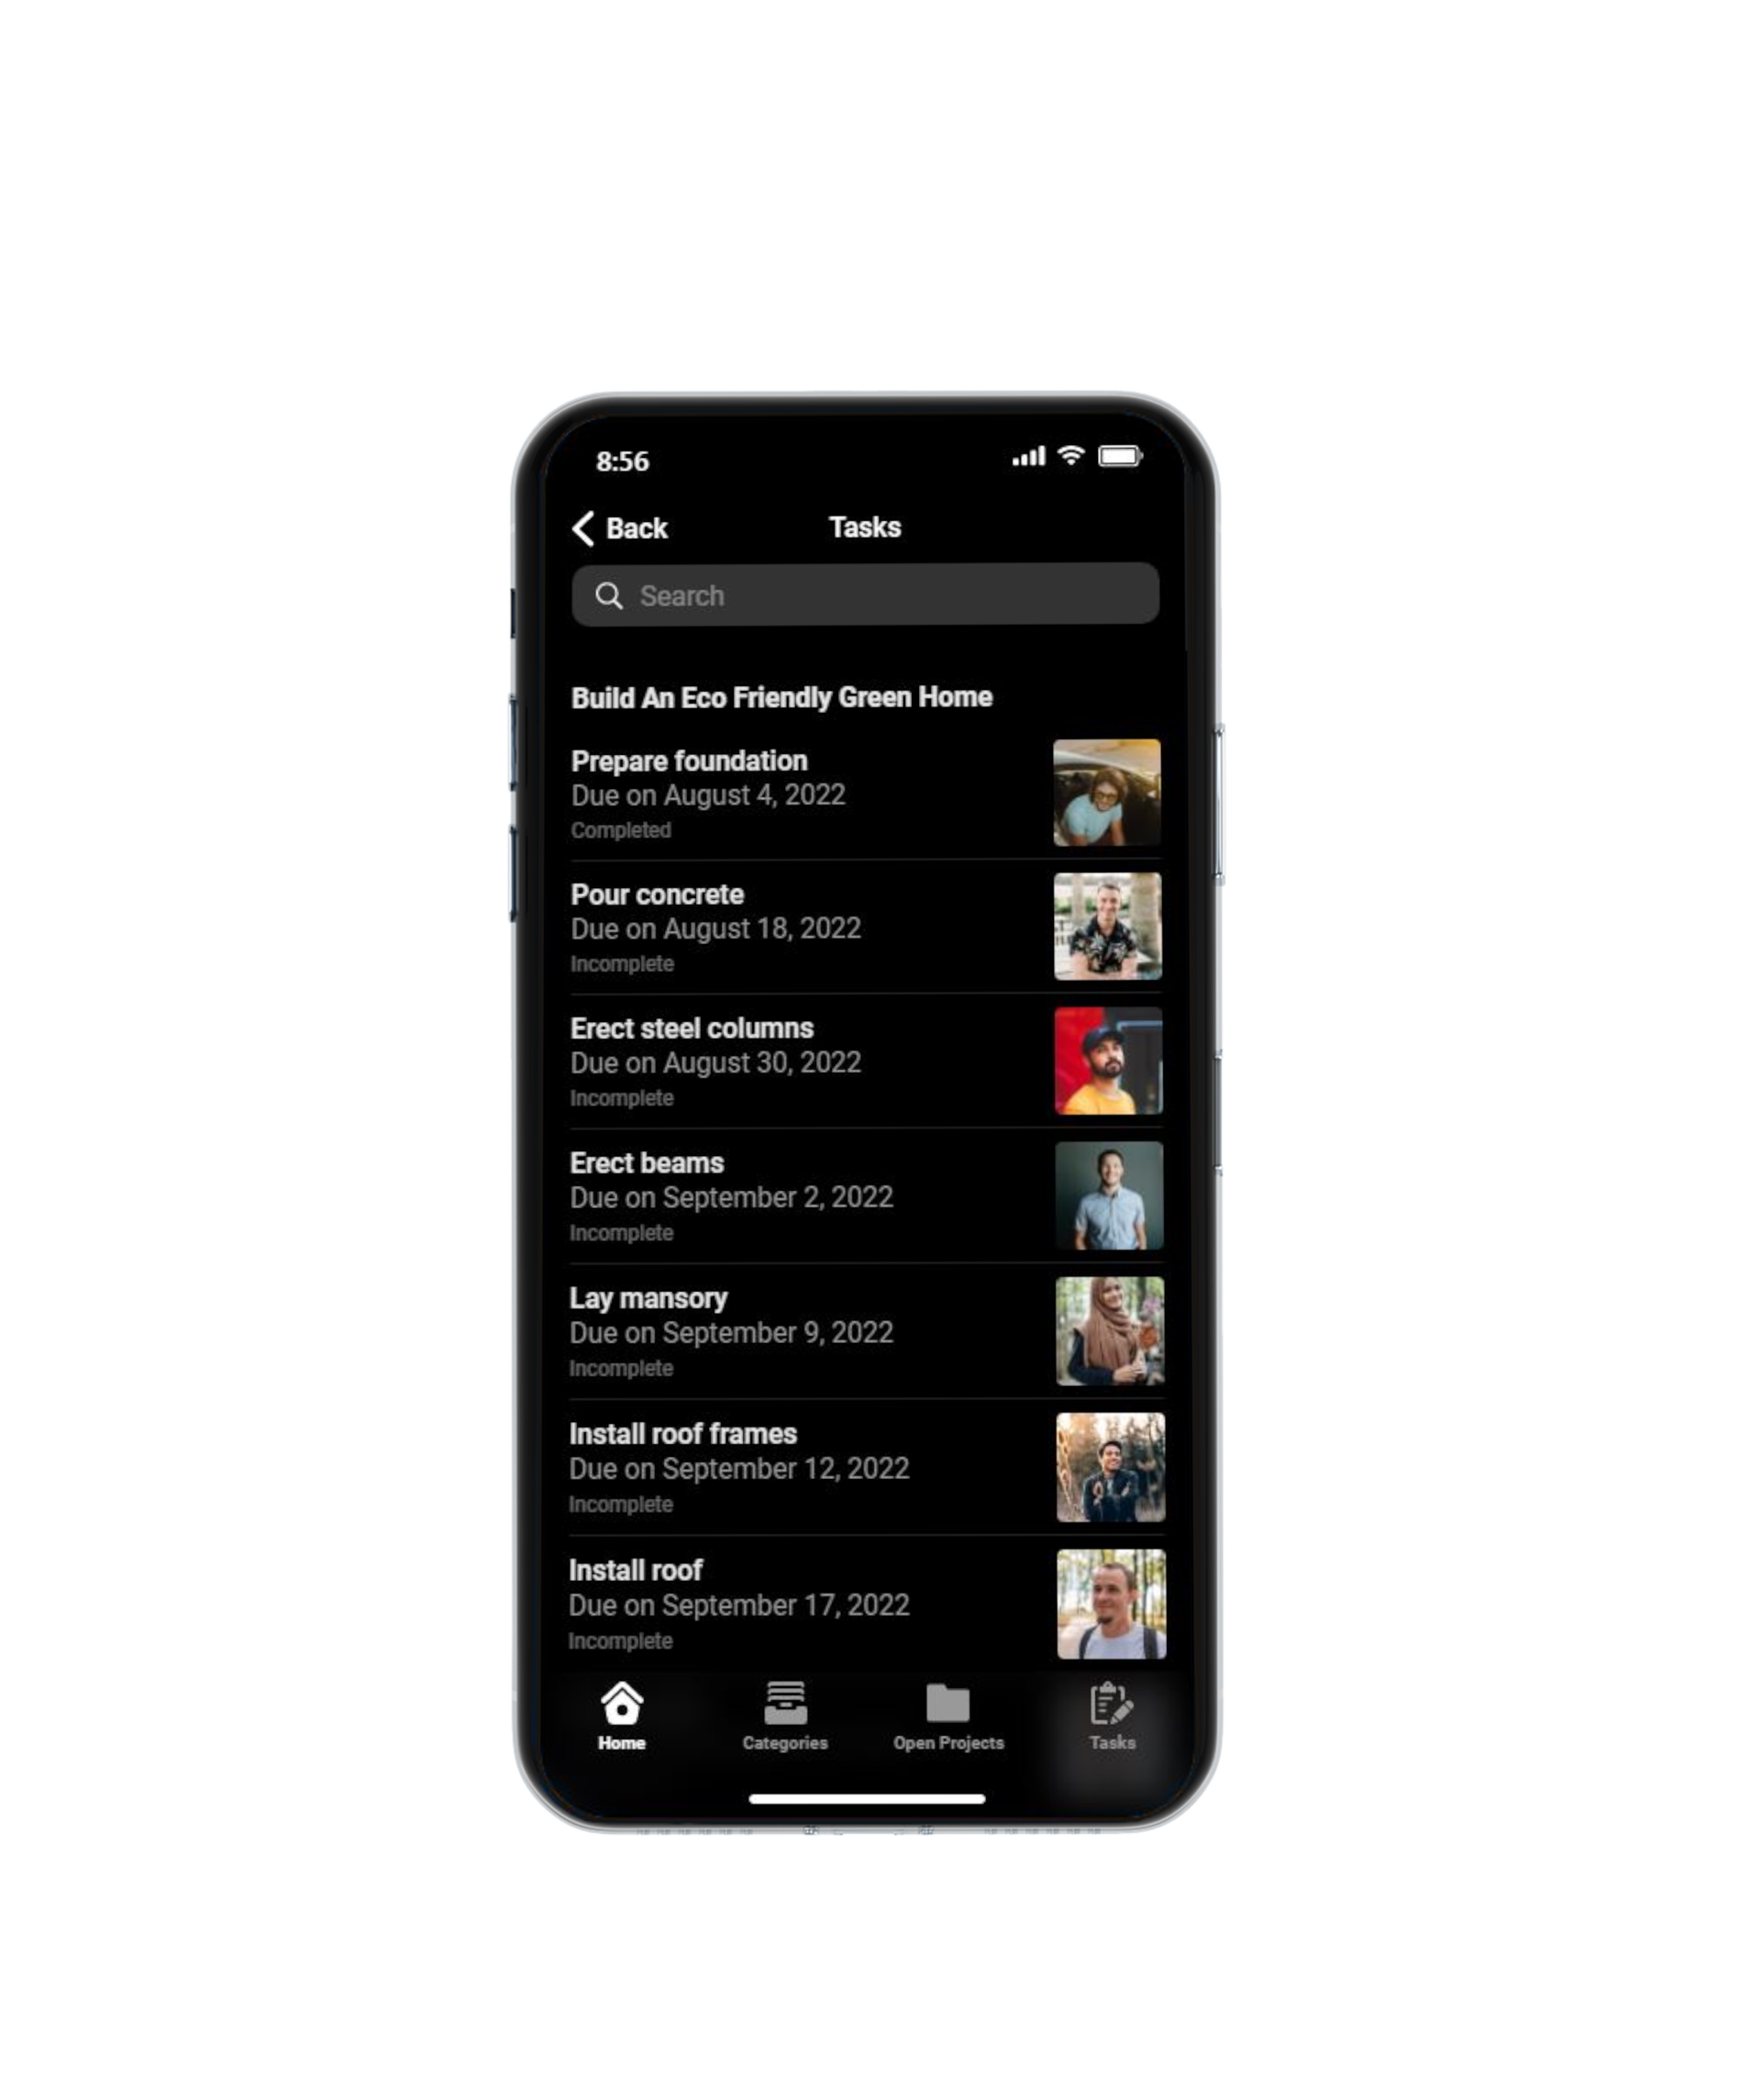
Track Task Progress
When you tap the Tasks item on the Project Information screen, a list of projects' tasks will be displayed.
Tapping the project task displays its information.
It also includes information on the task owner, the due date, and the task status.
More task information is revealed by tapping the task owner image.
To return to the previous screen, tap the Back or Left Arrow icon in the top left corner of the screen.
Be In Control
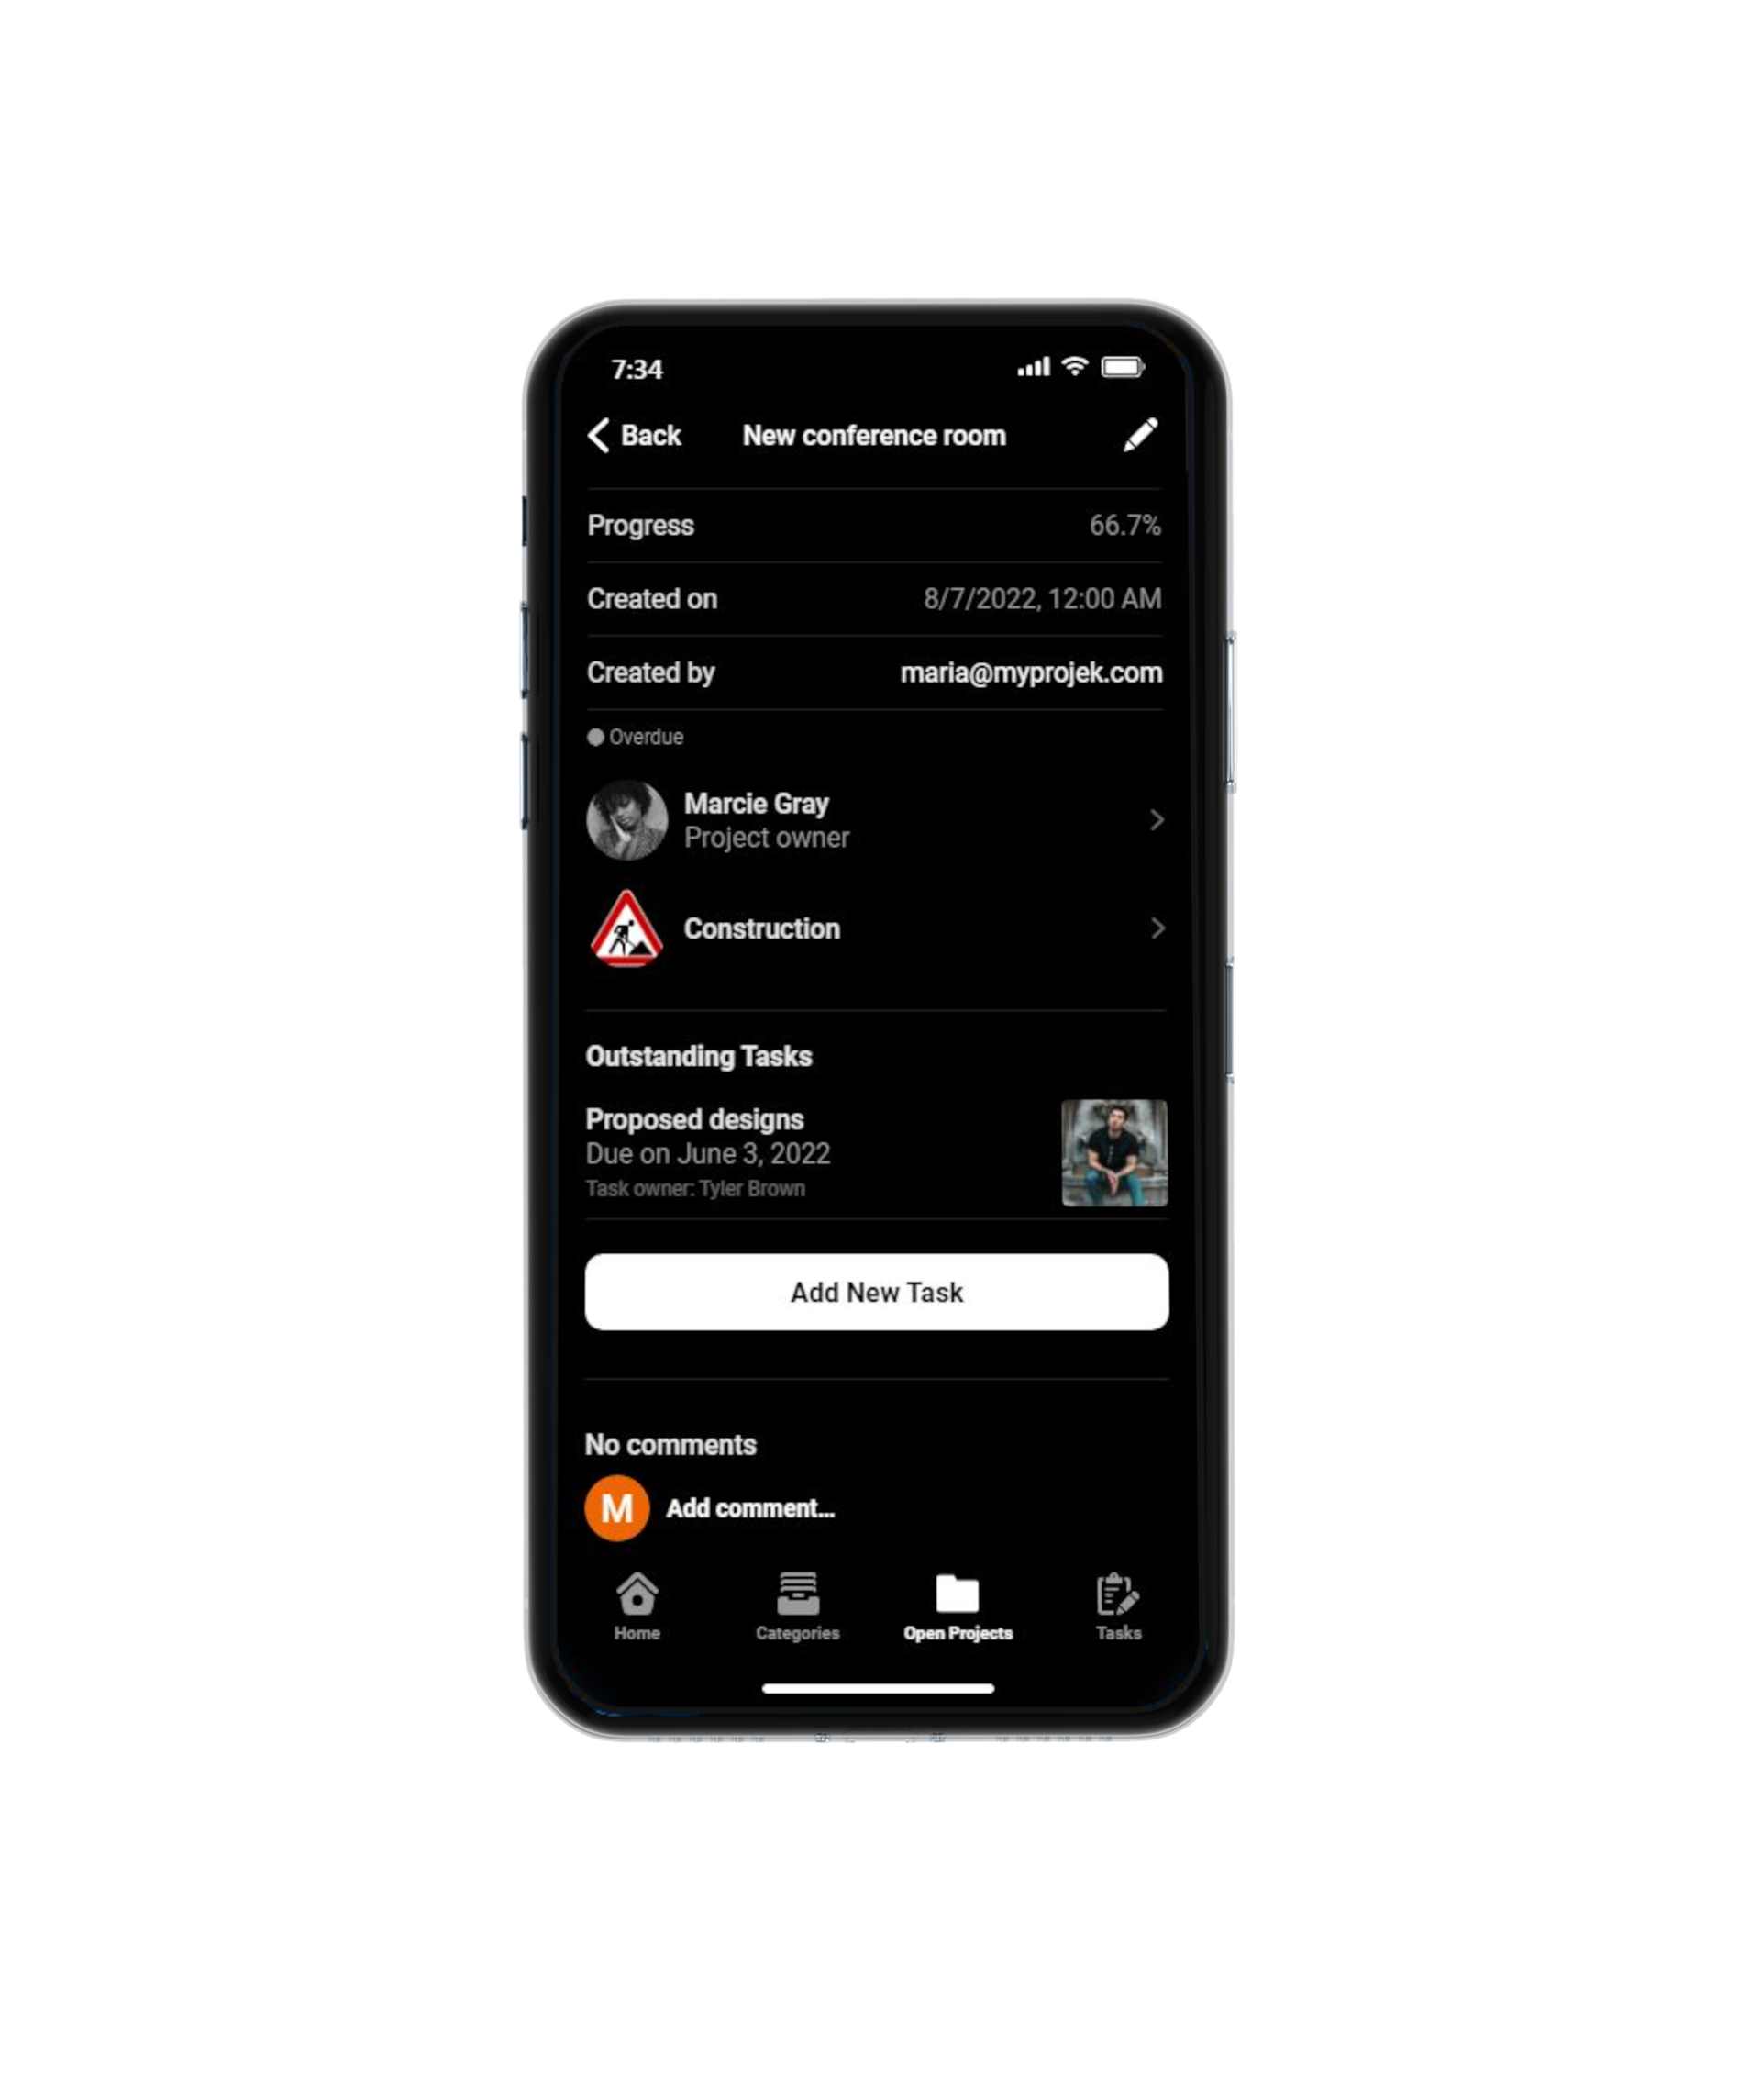
Track Project Progress
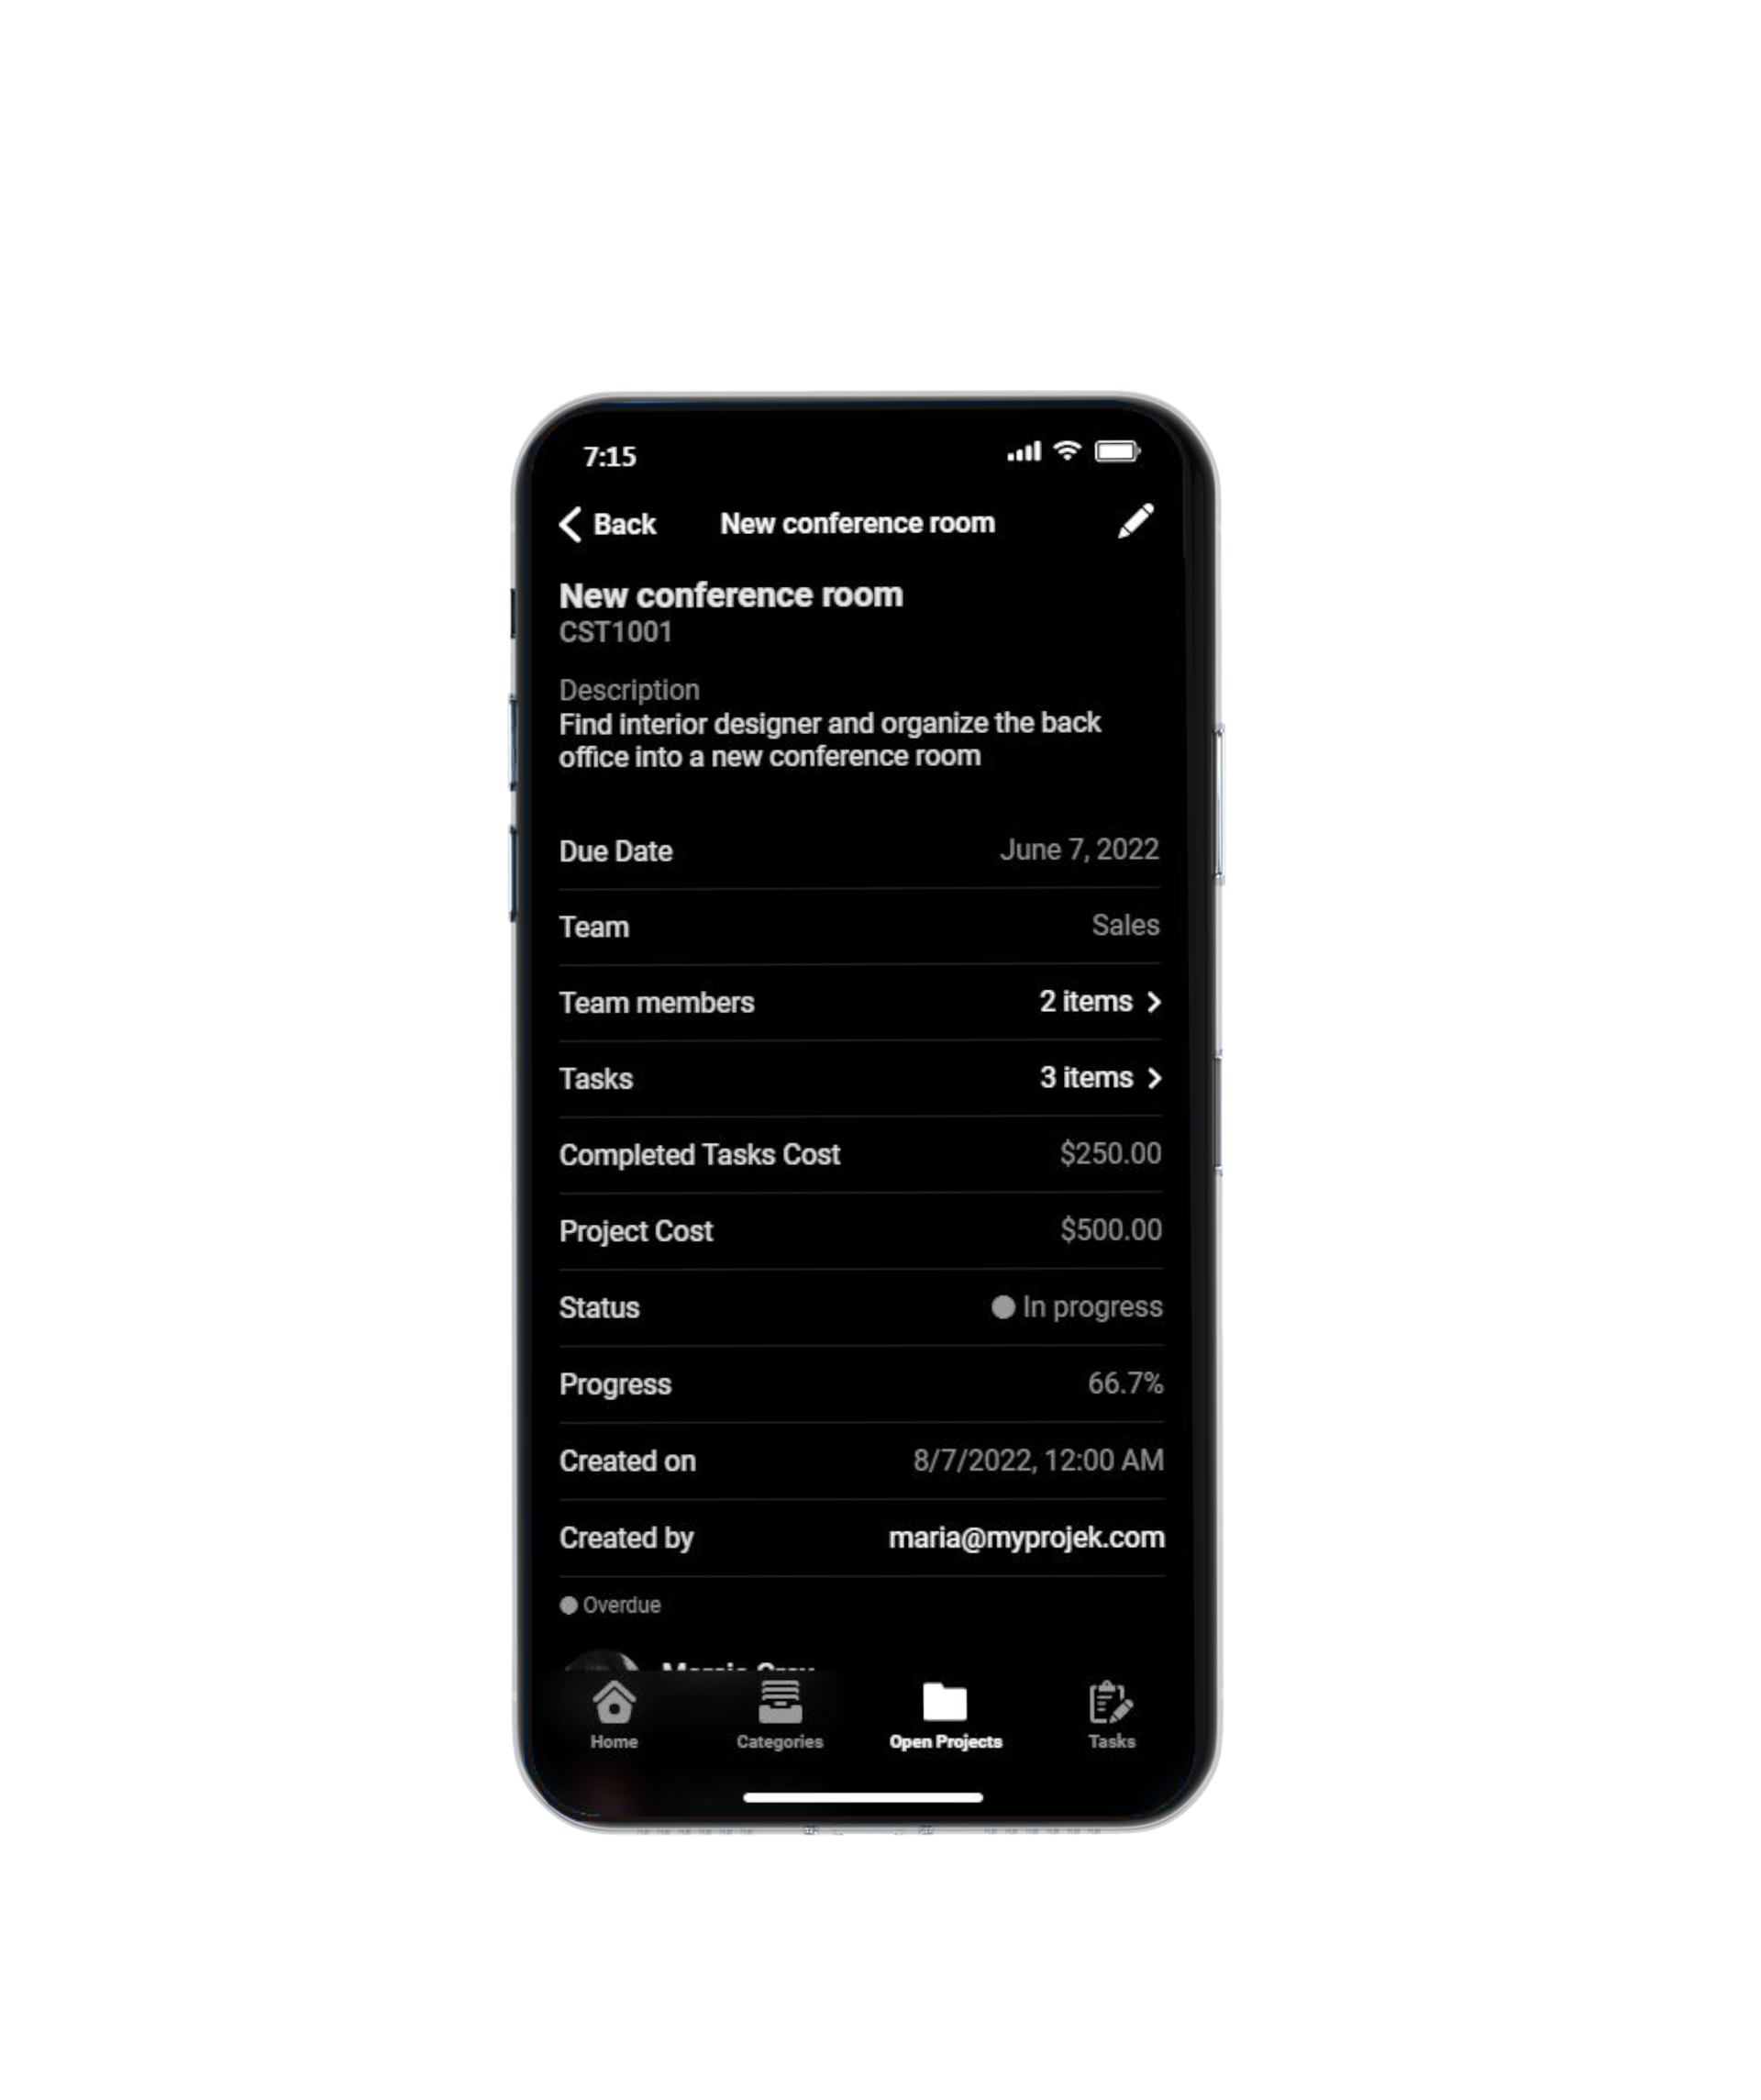
When you tap the project owner image on the 'Open Projects' screen, the 'Project Information' screen appears. It contains critical project detail.
It also contains information about the project's team members, tasks, and costs.
Scroll down to find out more about the project.
Tap the 'Back' or 'Left Arrow' icon in the top left corner of the screen to return to the previous screen.
Be In Control
Track Workload
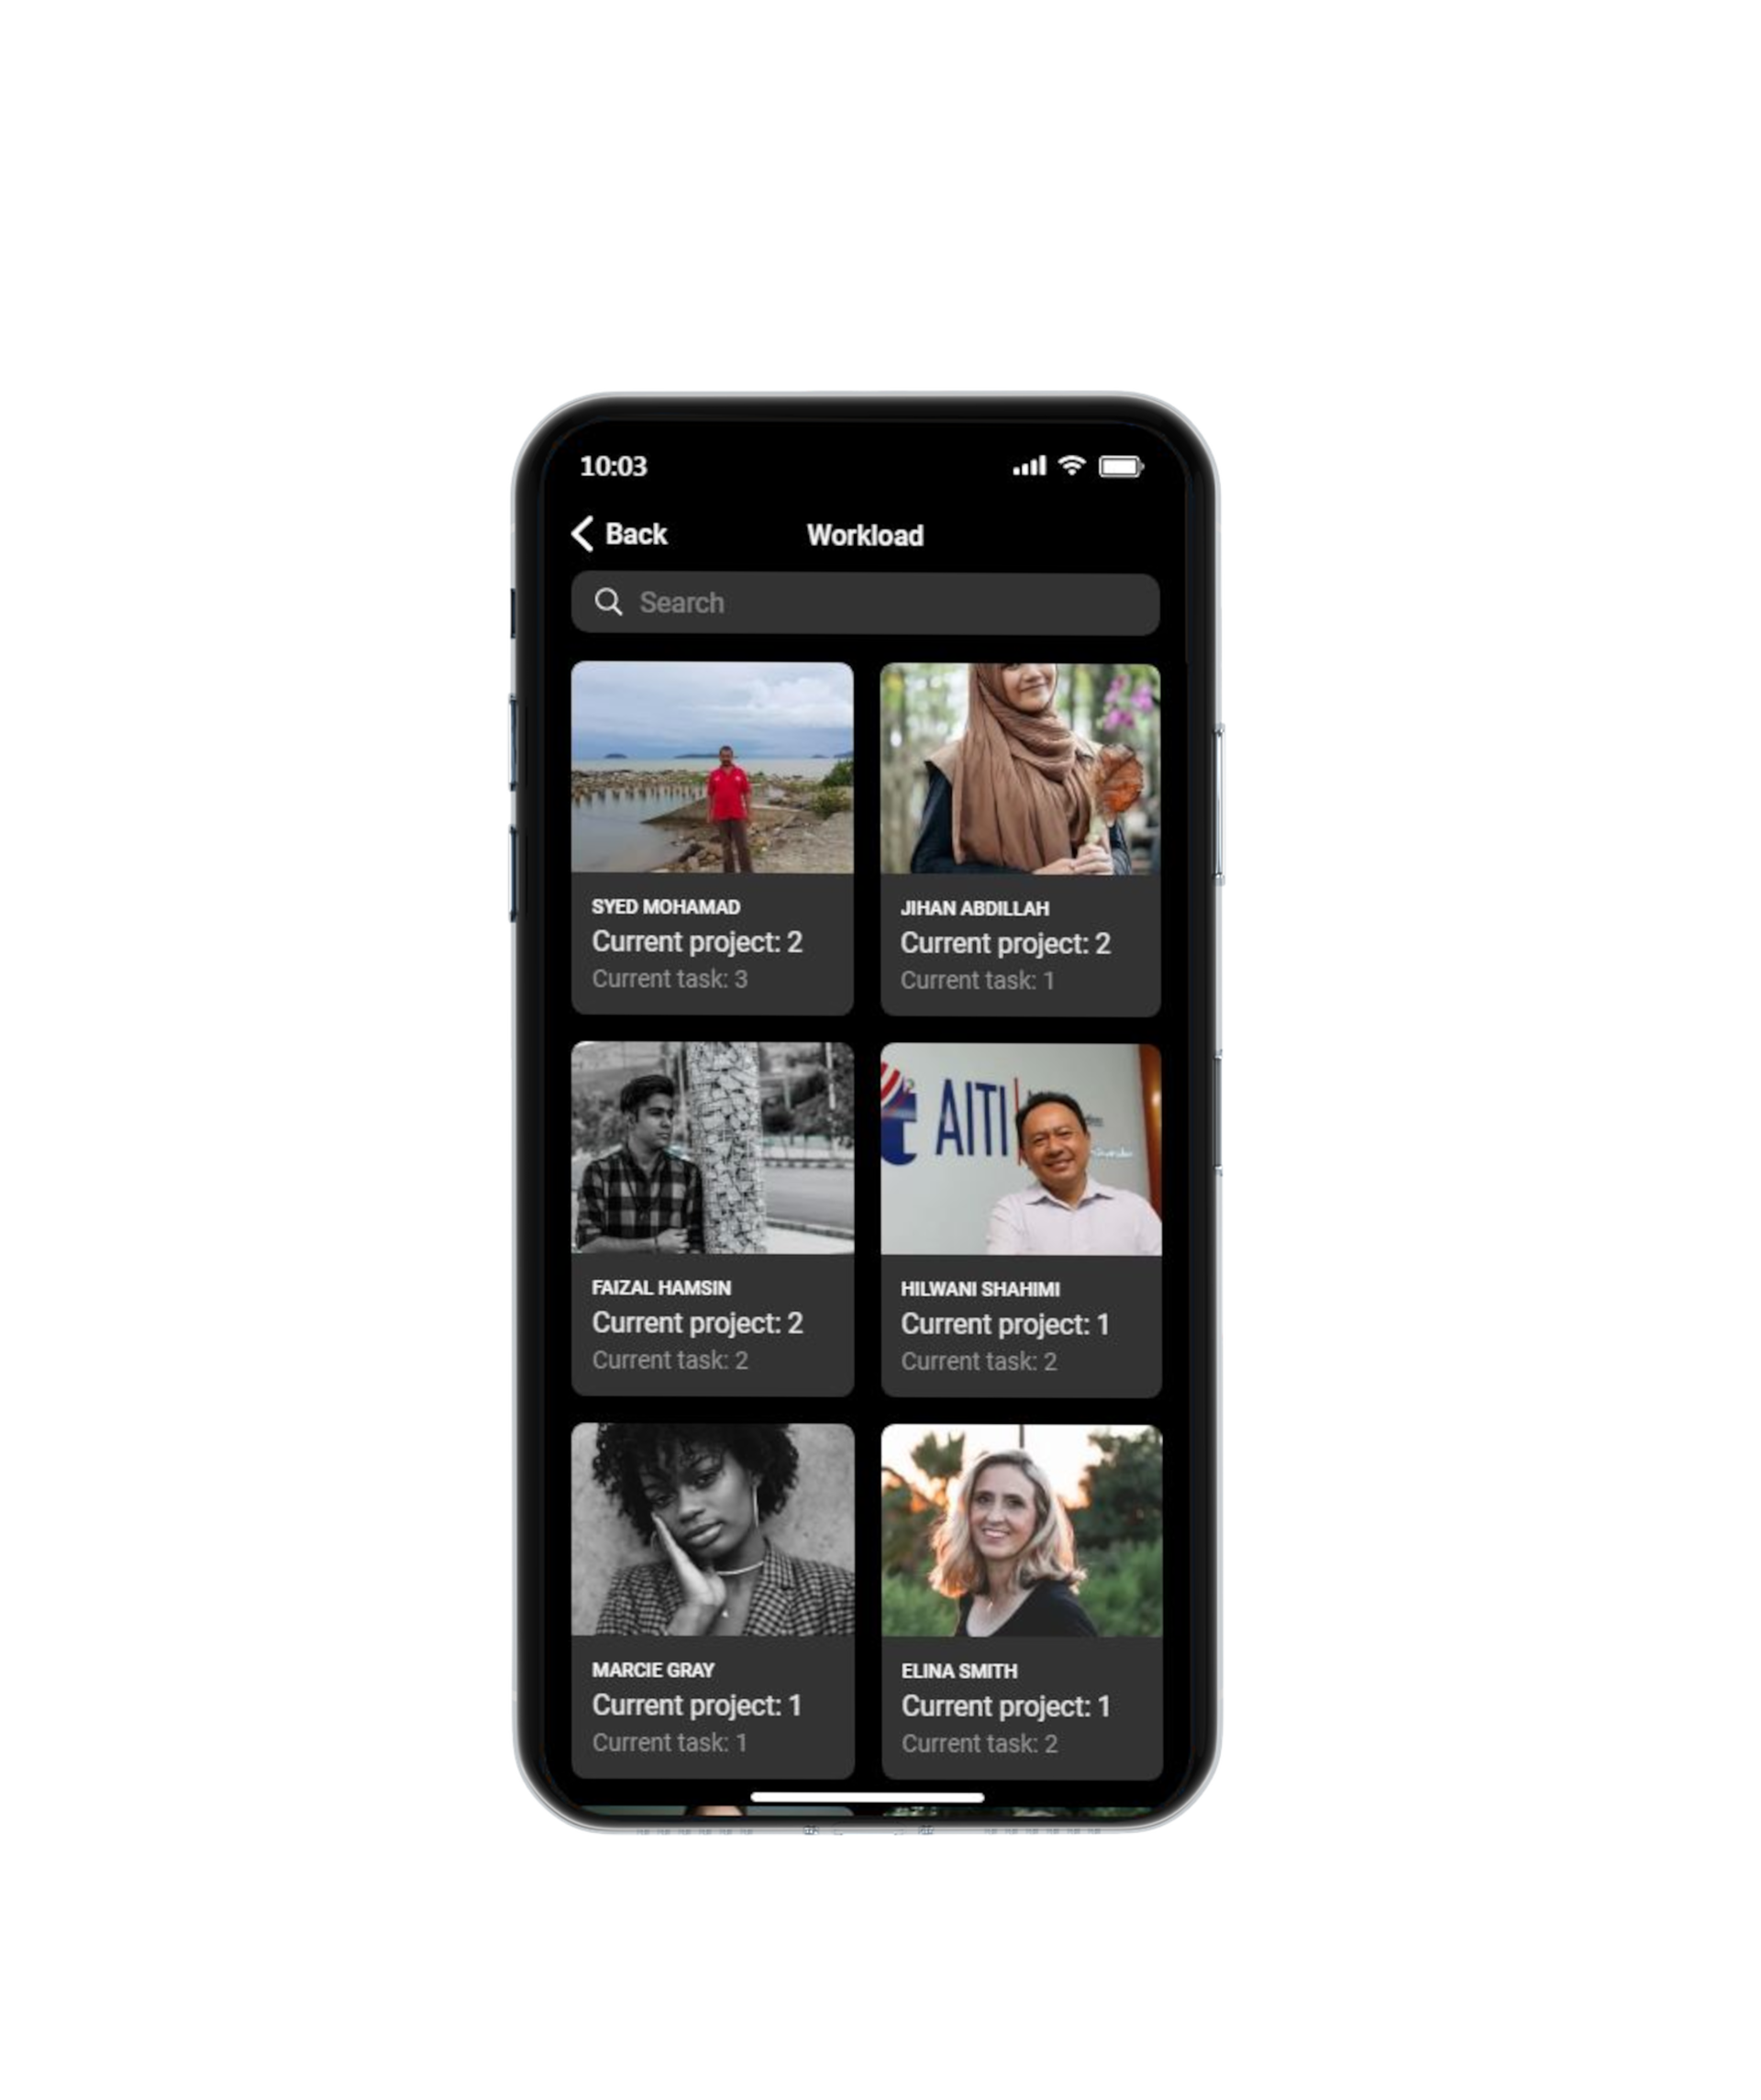
The Workload screen is accessed by tapping the Workload icon on the Menu screen. Employee or User photos, names, and the current number of projects and tasks are displayed on the screen.
The workload is organized based on the number of projects and tasks currently assigned to each employee or user.
The Search bar supports the user in accessing a specific employee search result on the screen.
Return to the previous screen by touching the Back or Left Arrow symbol in the top left corner of the screen.
Be In Control Videos
Task Completion Process
Tracking Task Progress
Tracking Project Progress
Tracking Workload
Project Overview
Get a better project perspective to make informed decisions and stay on top of your projects
Project Overview
Project Menu
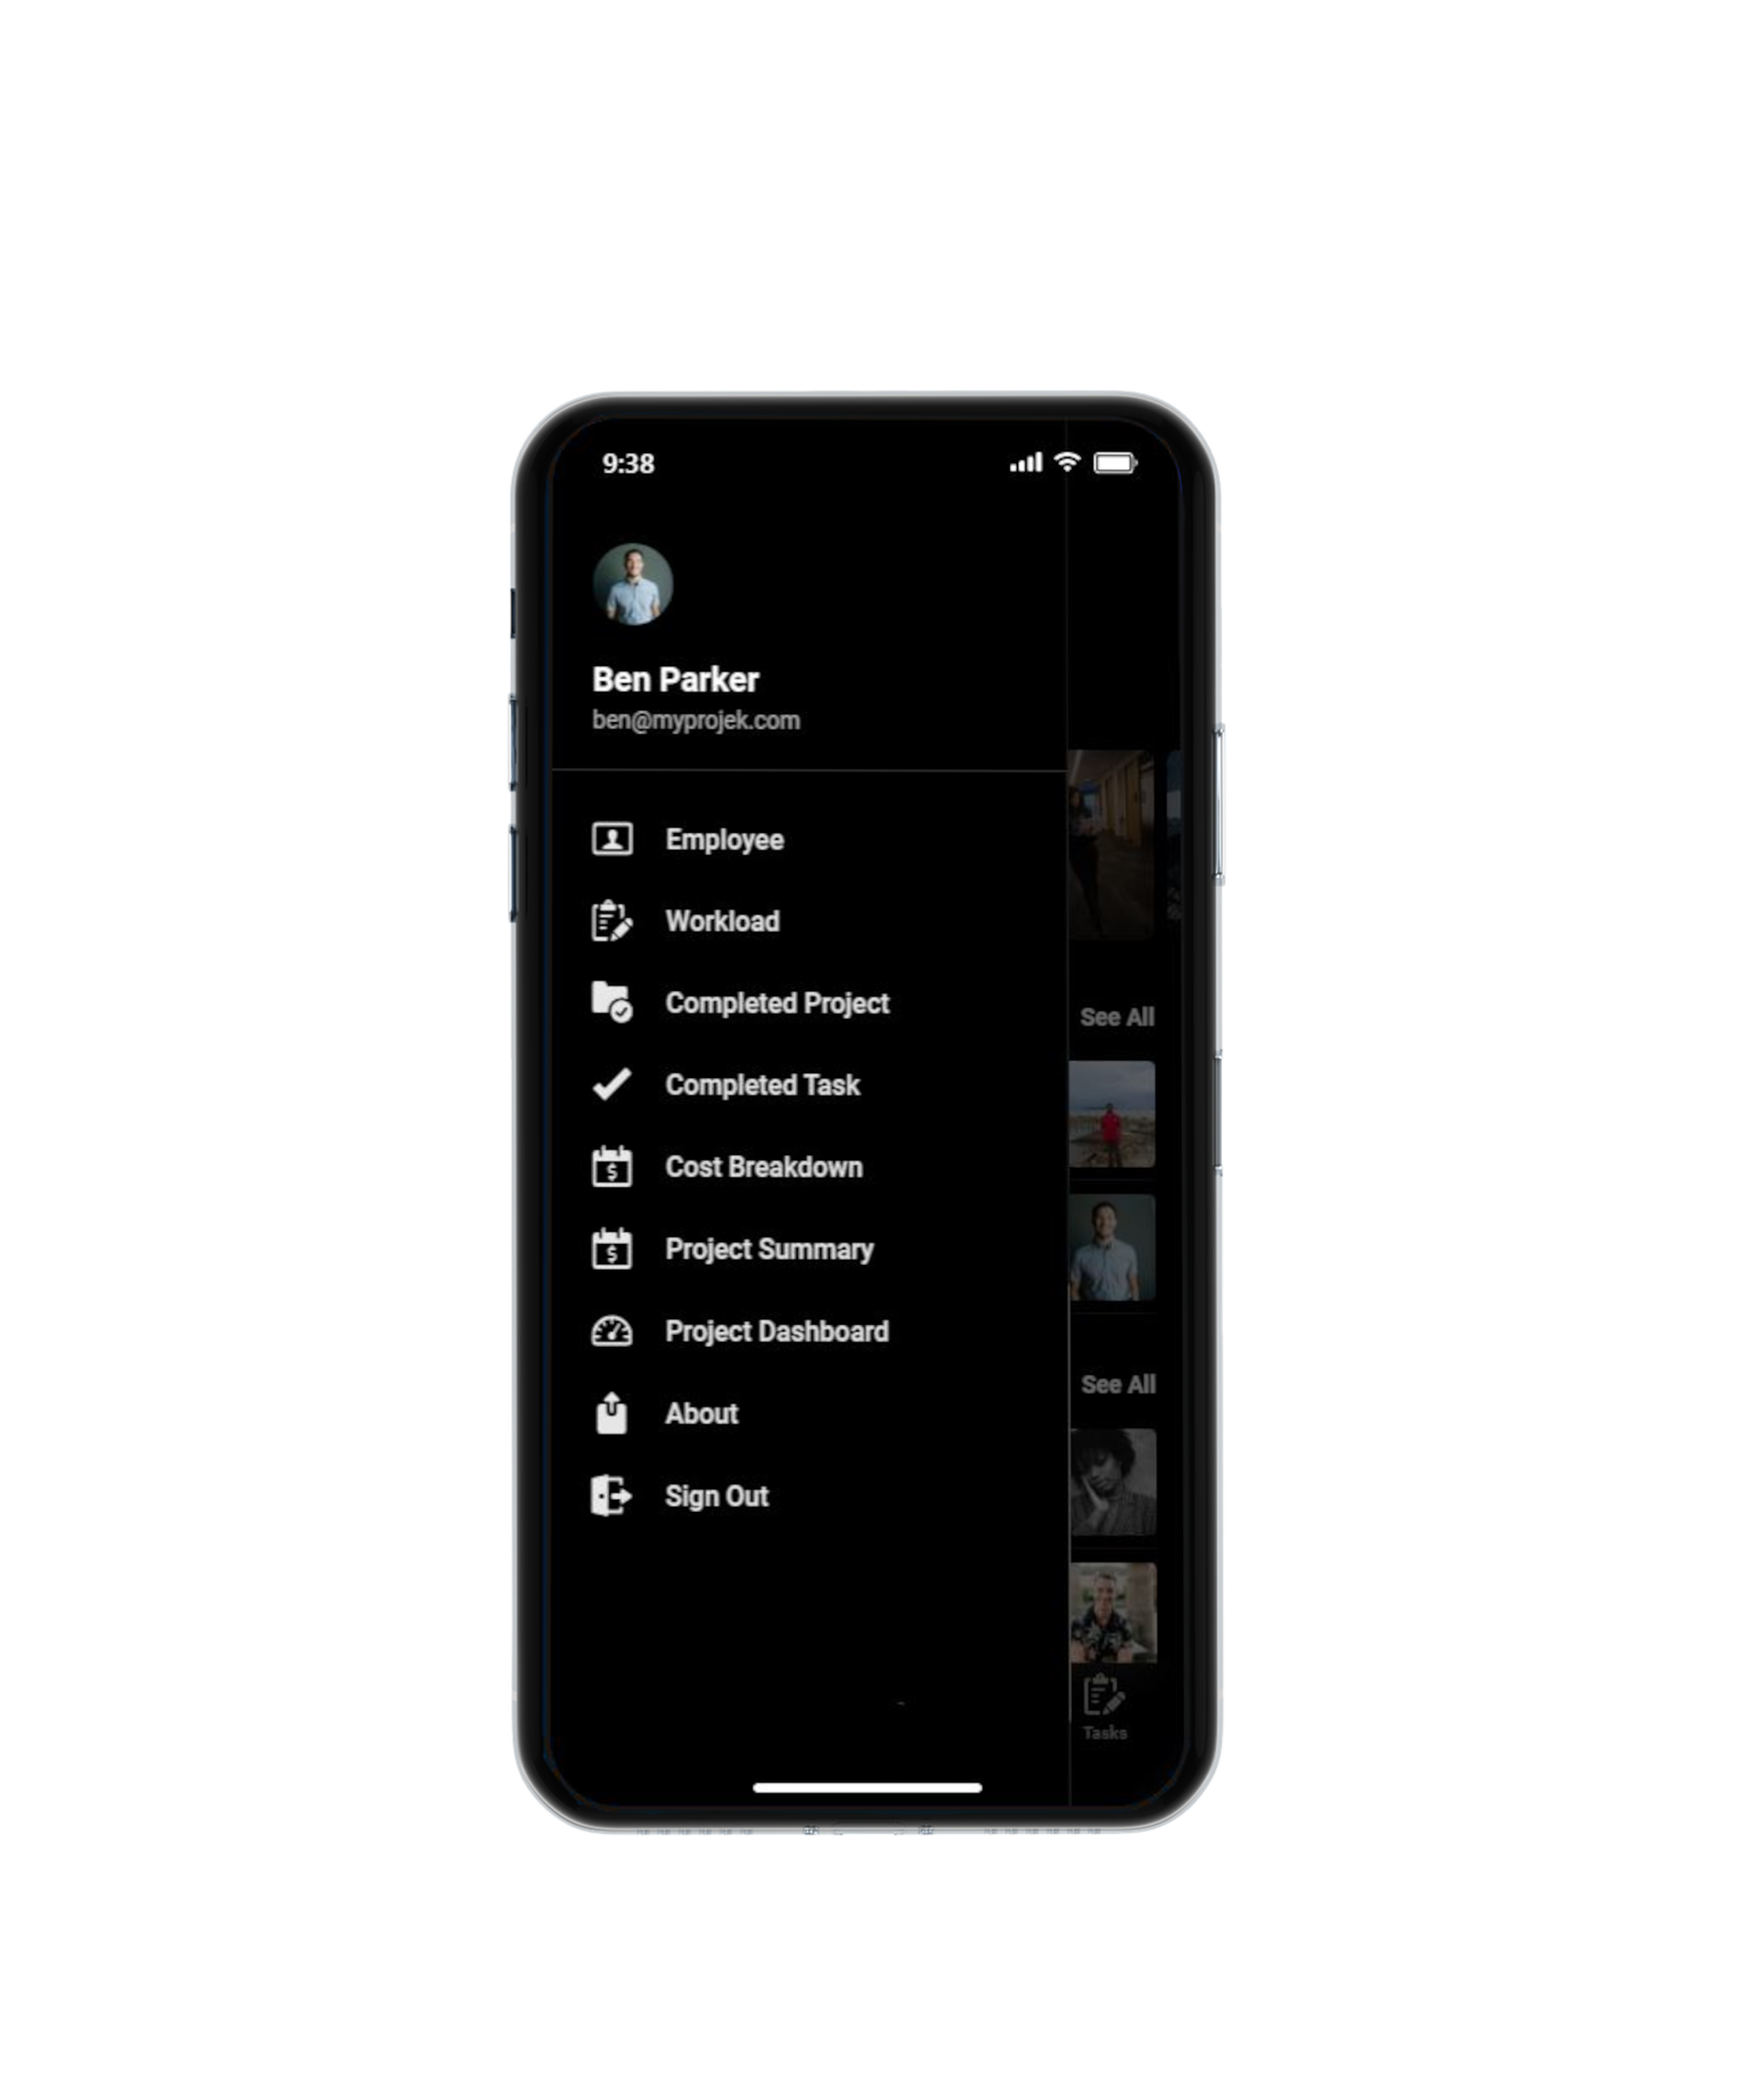
The Menu icon is represented by three horizontal lines and is found in the upper left corner of the Home screen.
Tapping the Men icon displays a list of project information, including the signed-in user.
The project information section contains a summary of all projects on specific subjects.
Project Overview
Project Summary
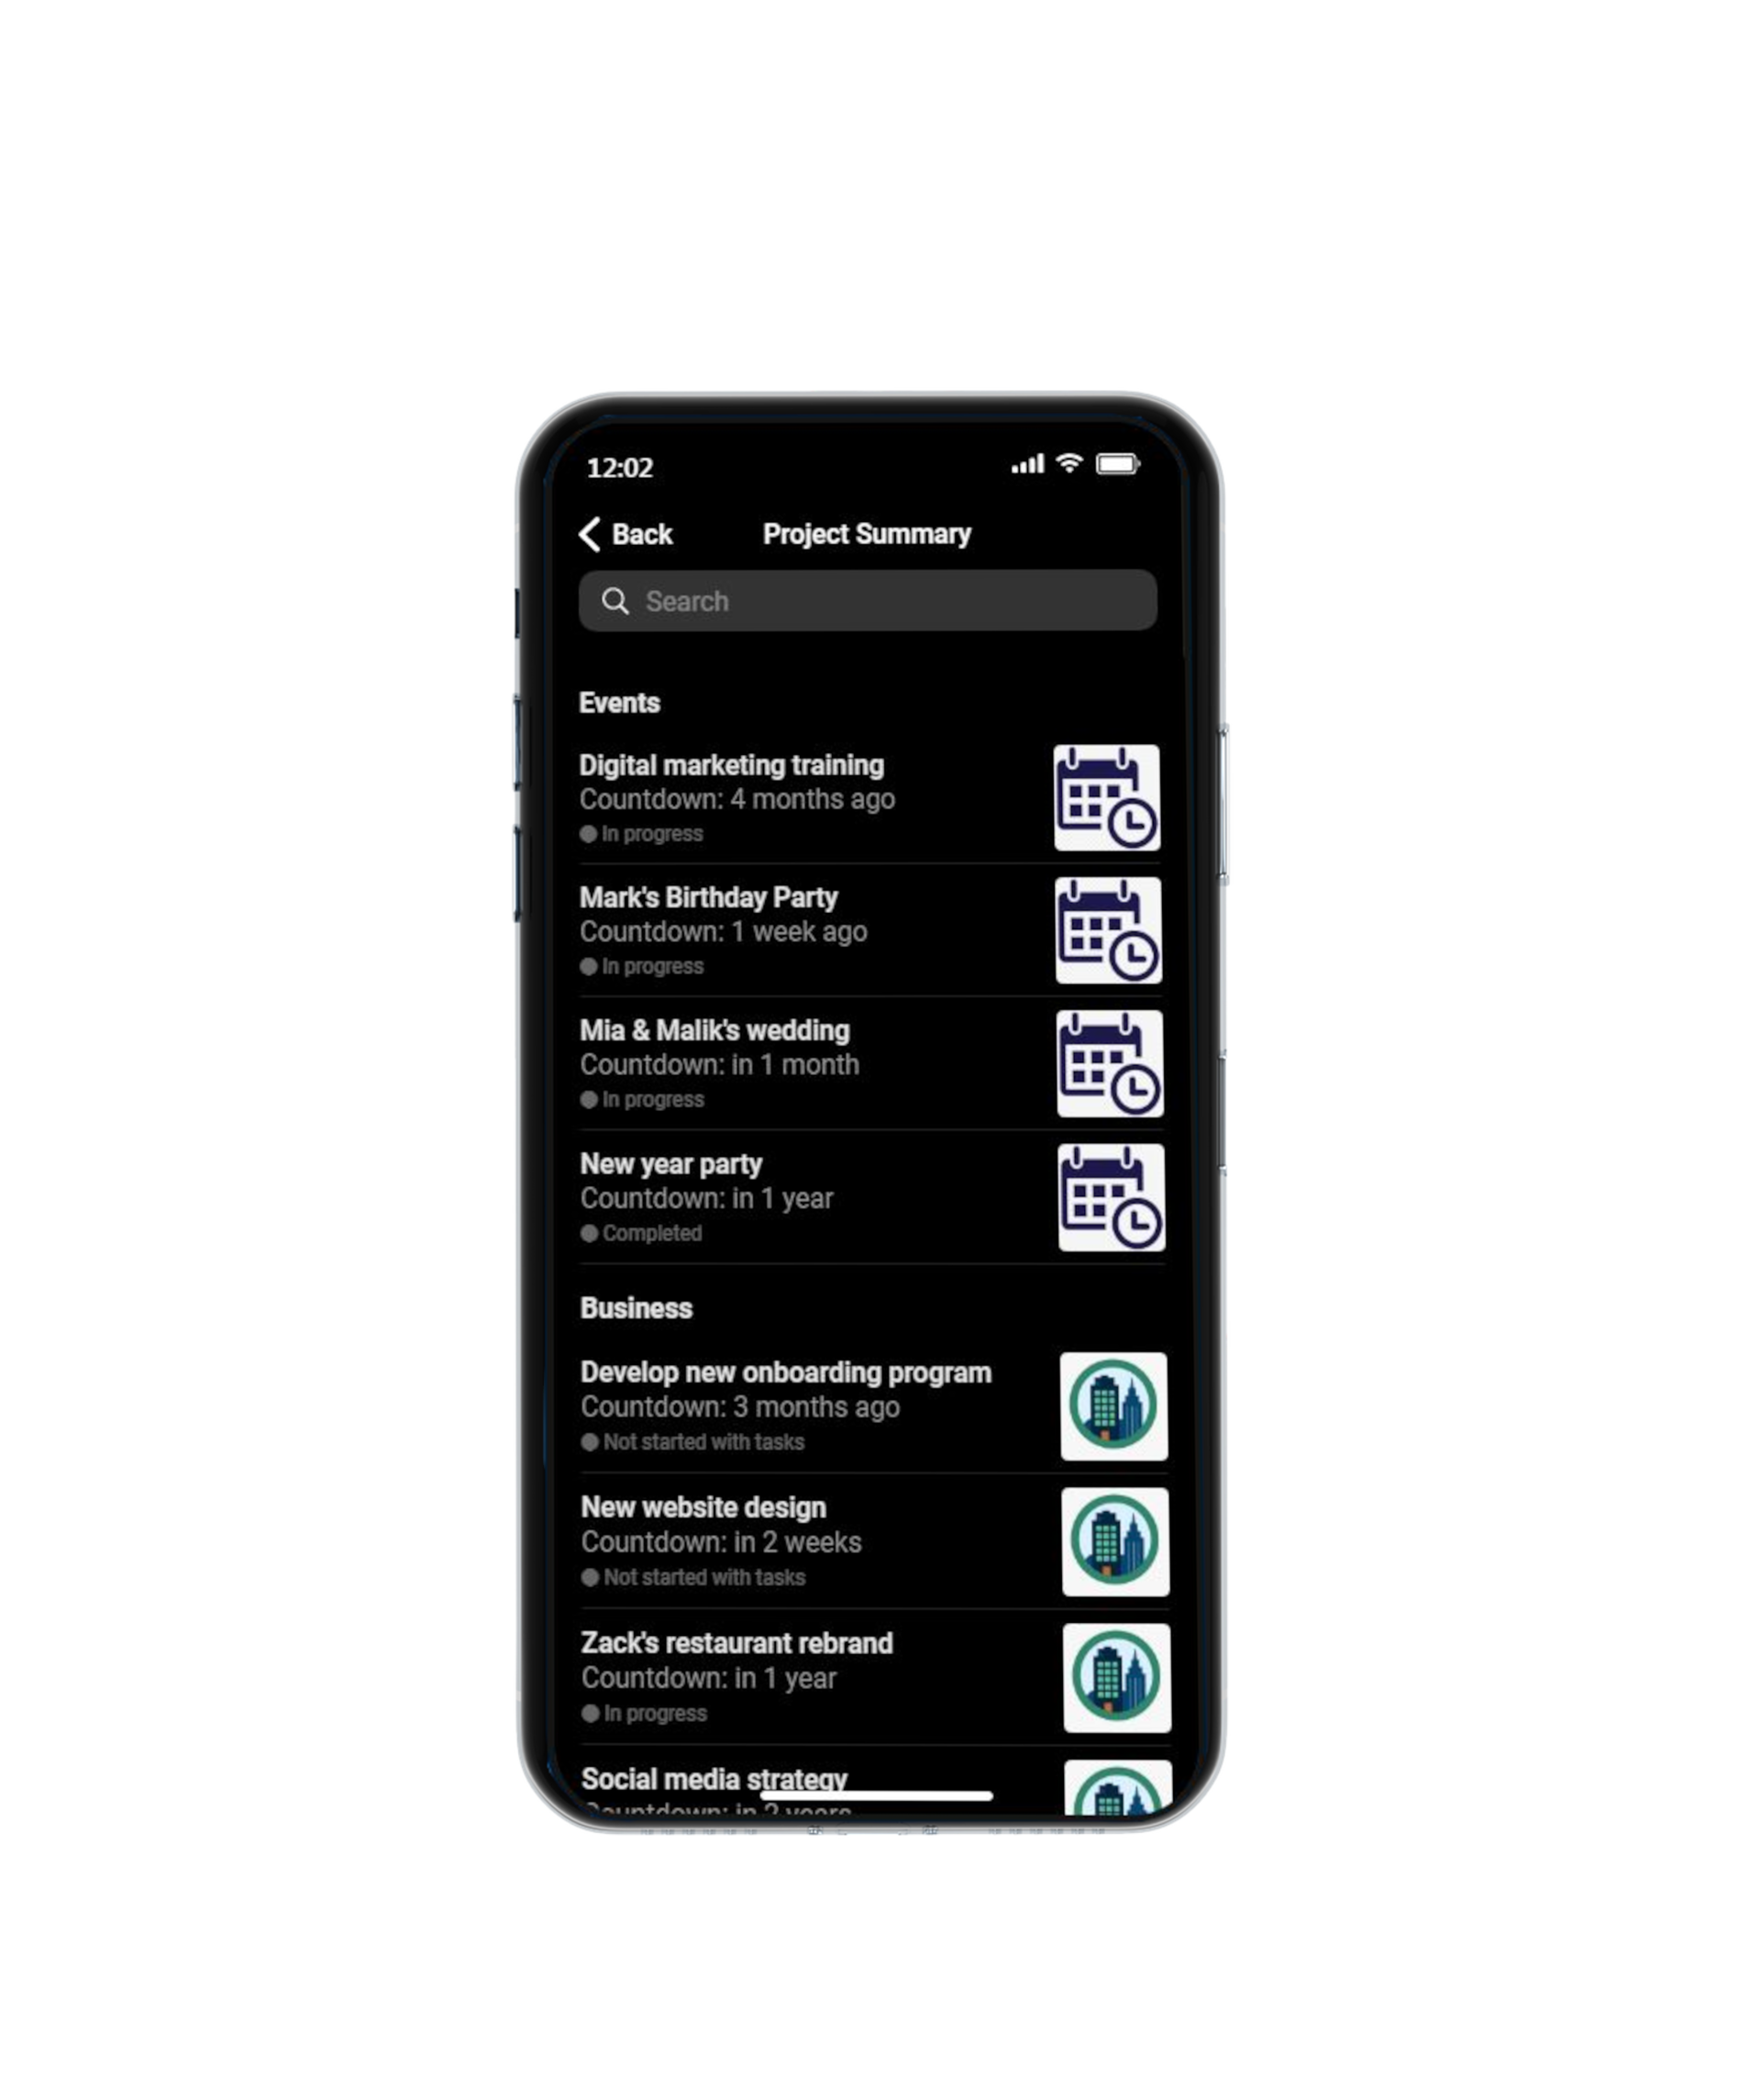
Tap the Project Summary icon on the Menu screen to bring up the Project Summary screen.
The screen displays a list of project summaries organized by project category, including information such as project name, remaining days, and project status.
The Search box on the screen assists the user in locating a specific project summary search result.
Tap the Back or Left Arrow icon in the top left corner of the screen to return to the previous screen.
Project Overview
Project Progress
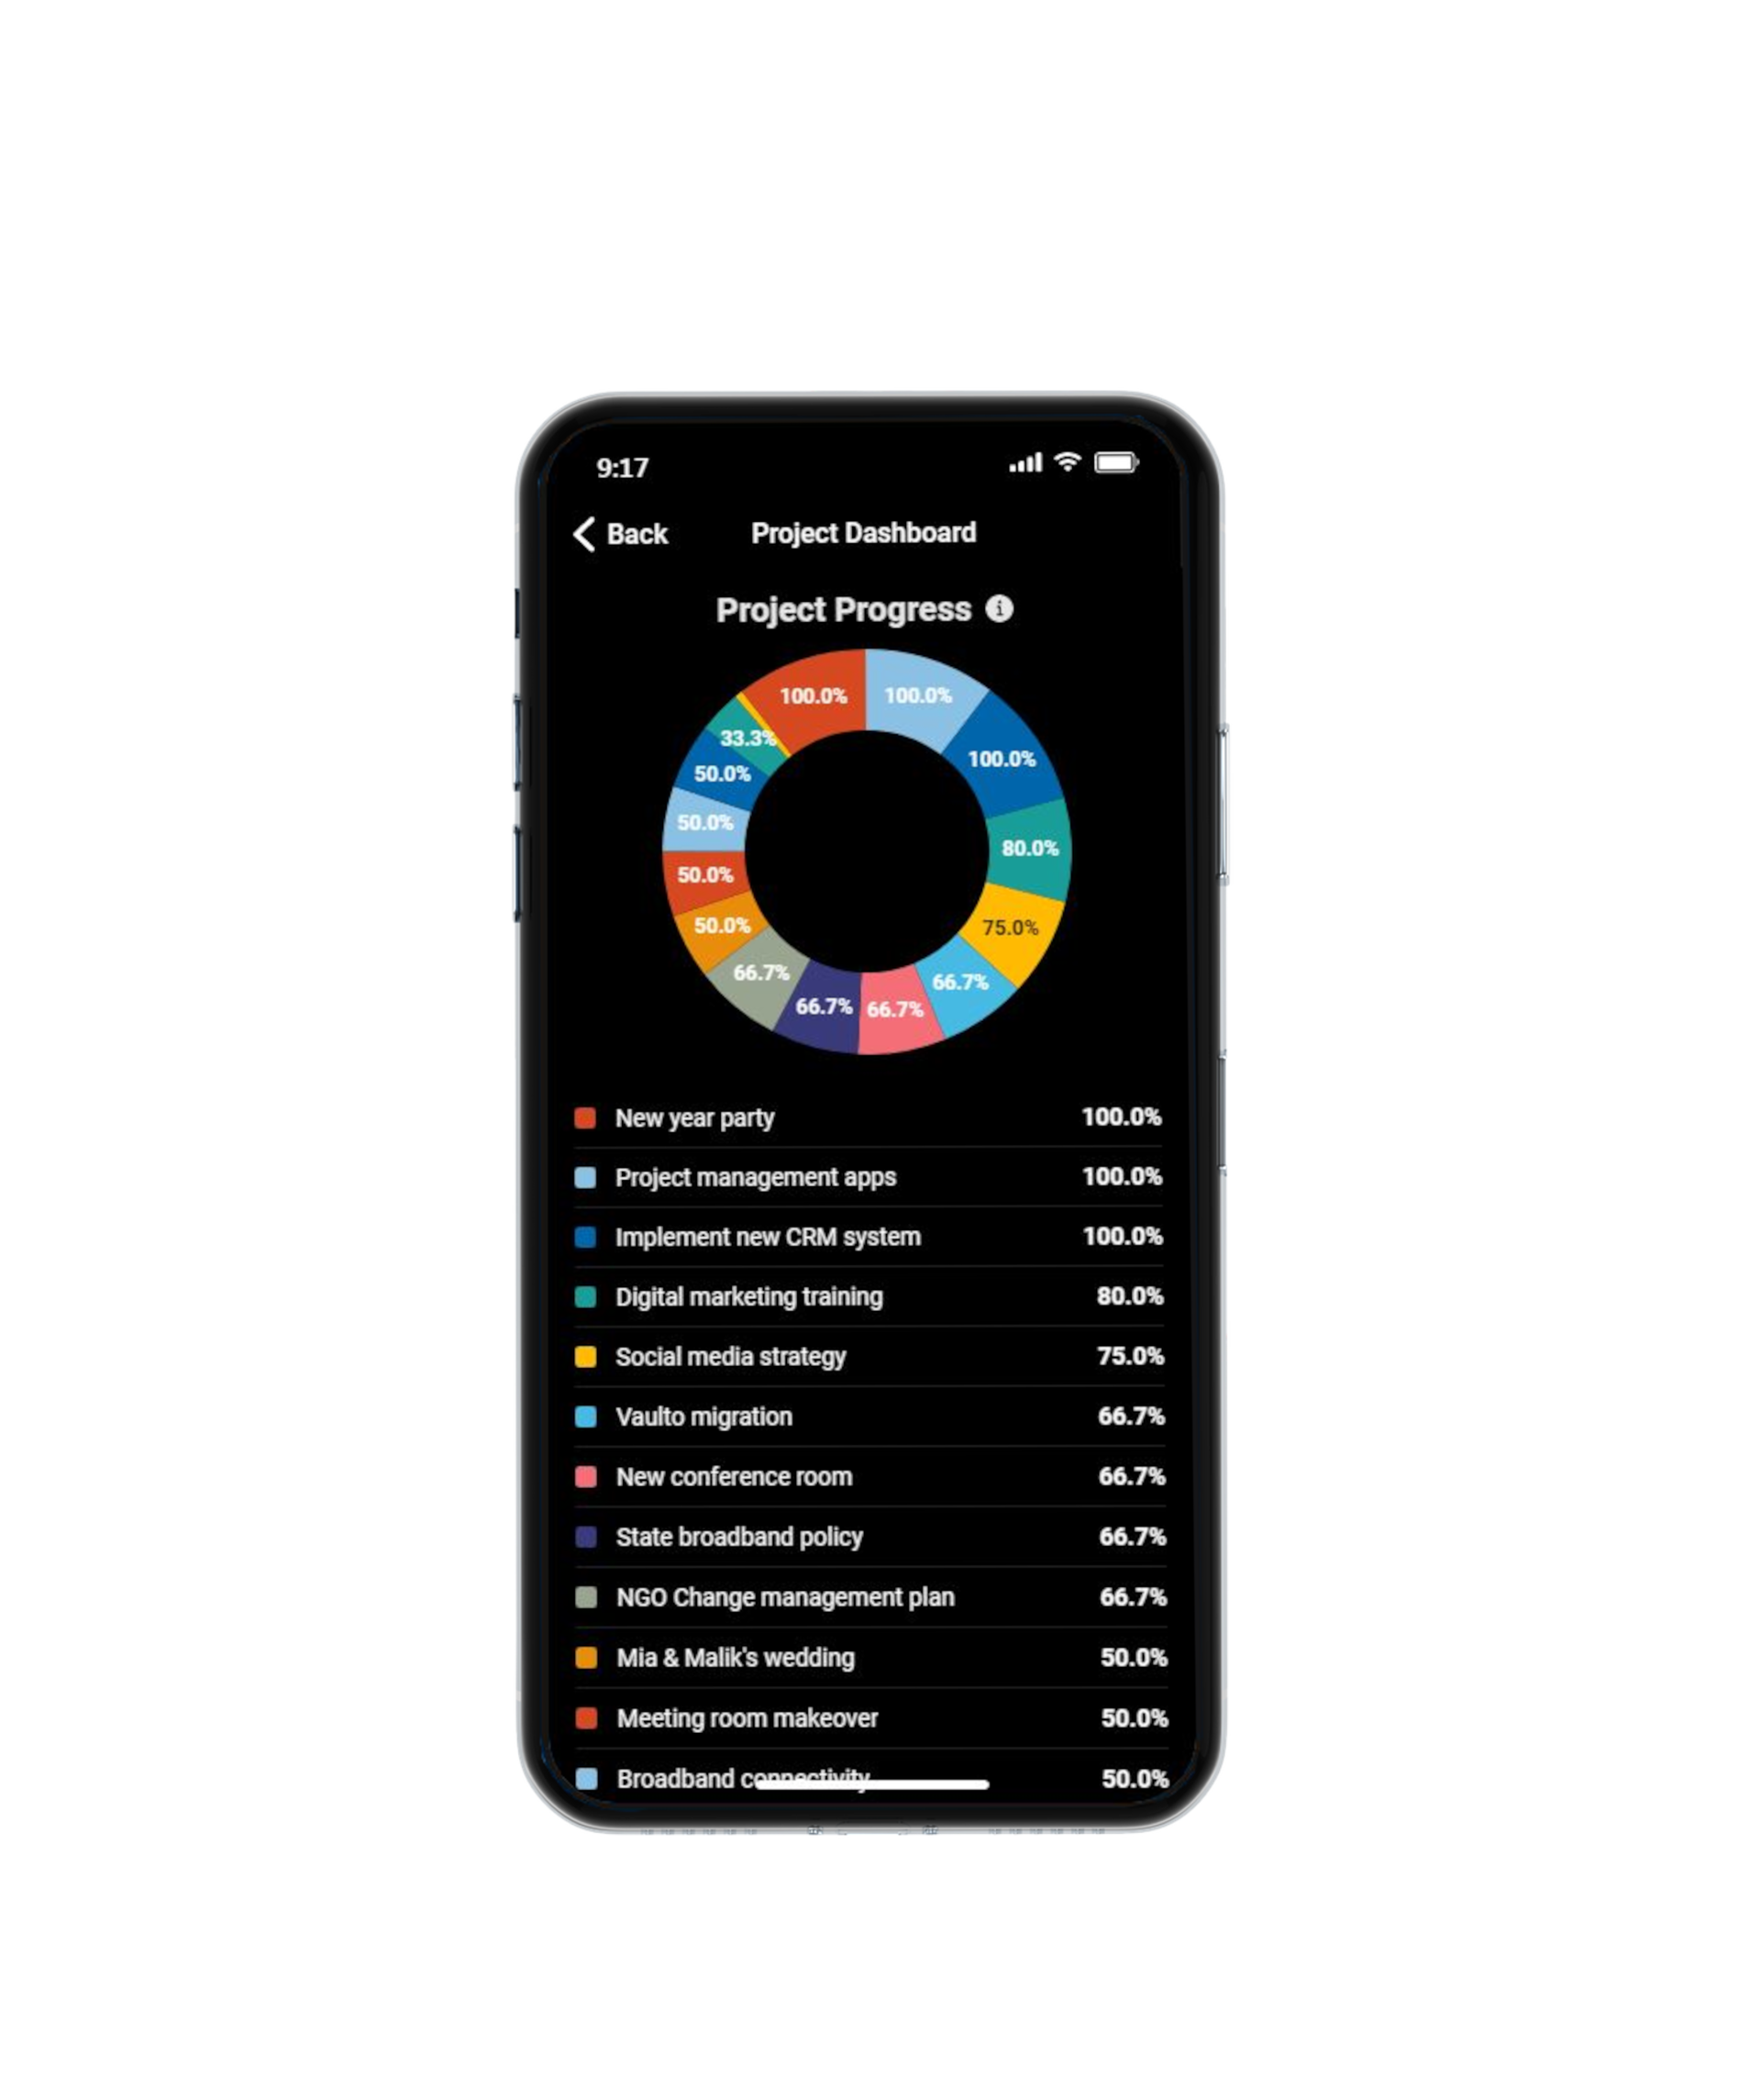
Tap the Project Dashboard icon on the Menu screen to open the Project Dashboard screen. A list of project visualizations appears on the screen. Scroll down to reveal more project indicators including project status, updated project cost, current owner project, and task.
The screen titled Project Progress displays a list of projects' progress. The project has been completed when it reaches 100% project progress. If the progress is greater than 0% but less than 100%, the project is in progress. The 0% value indicates that the project has not yet begun.
Tap the Back or Left Arrow icon in the top left corner of the screen to return to the previous screen.
Project Overview
Project Cost
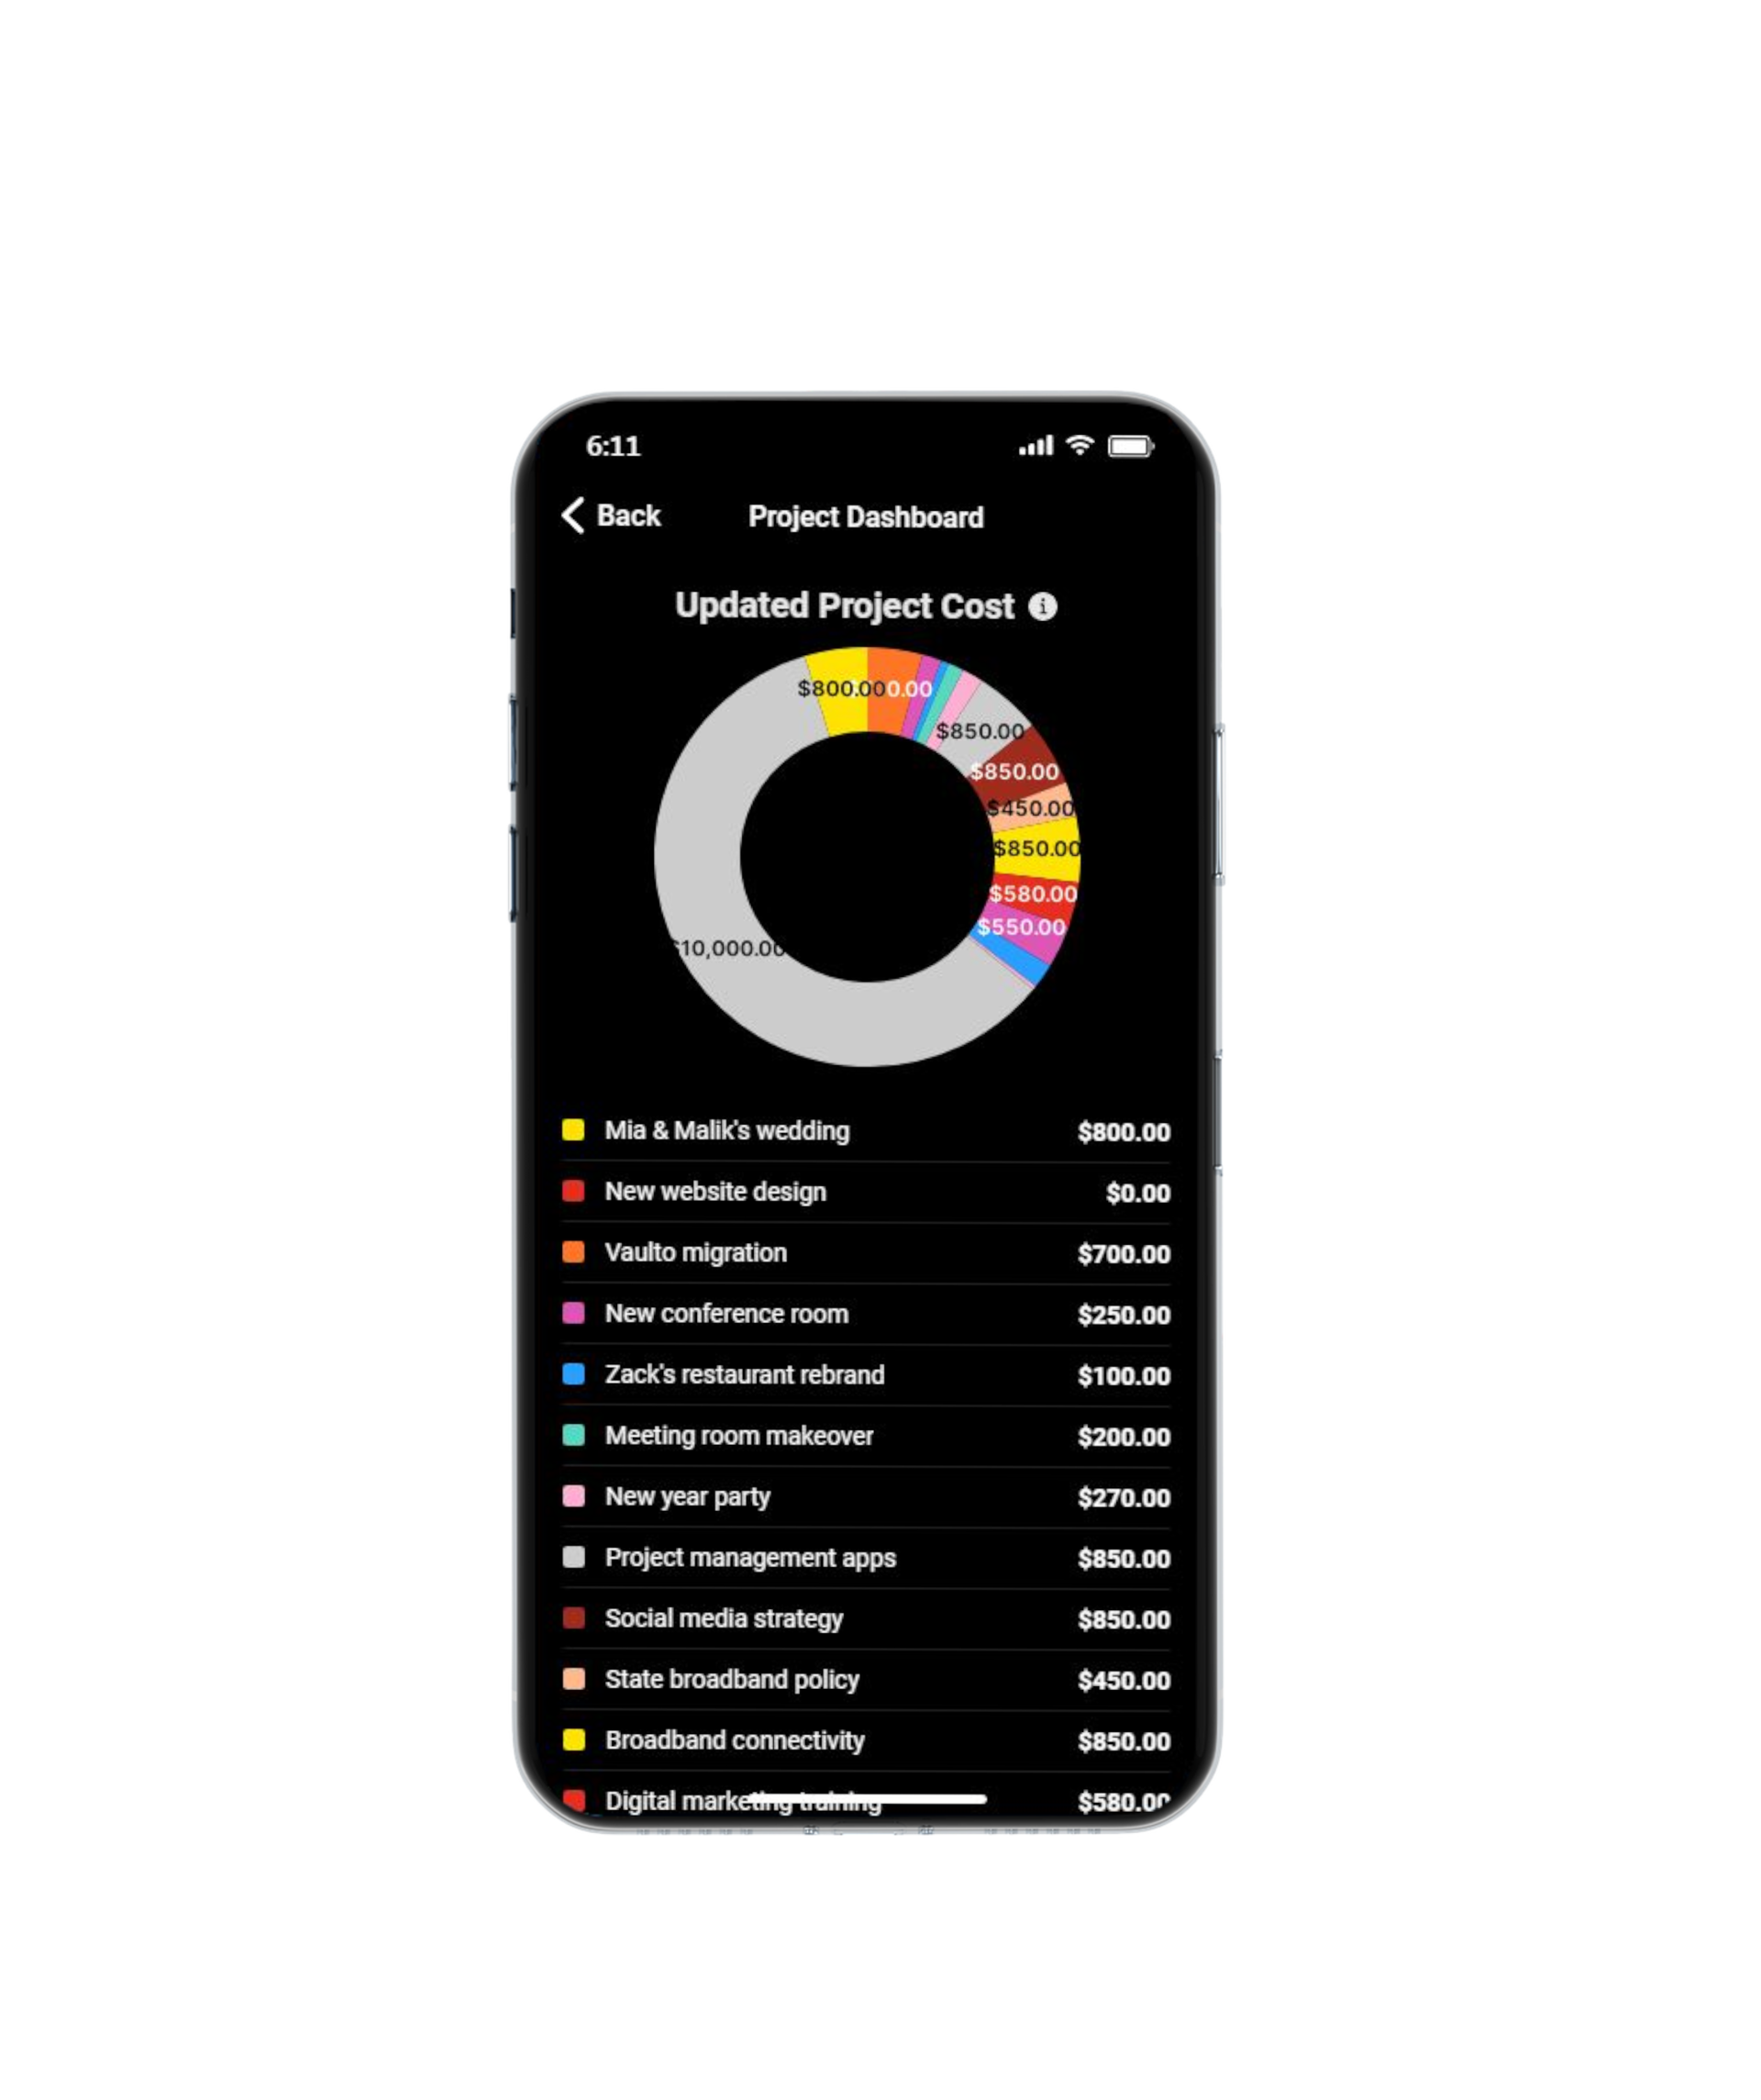
Tap the Project Dashboard icon on the Menu screen to bring up the Project Dashboard screen. On the screen is a list of project visualizations, including project status, updated project cost, current owner project, and current owner task.
The screen titled Updated Project Cost displays a list of projects cost.
Tapping any legend (color) on the graph displays a floating bar of the project cost.
Tap the Back or Left Arrow icon in the top left corner of the screen to return to the previous screen.
Project Overview
Project Workload
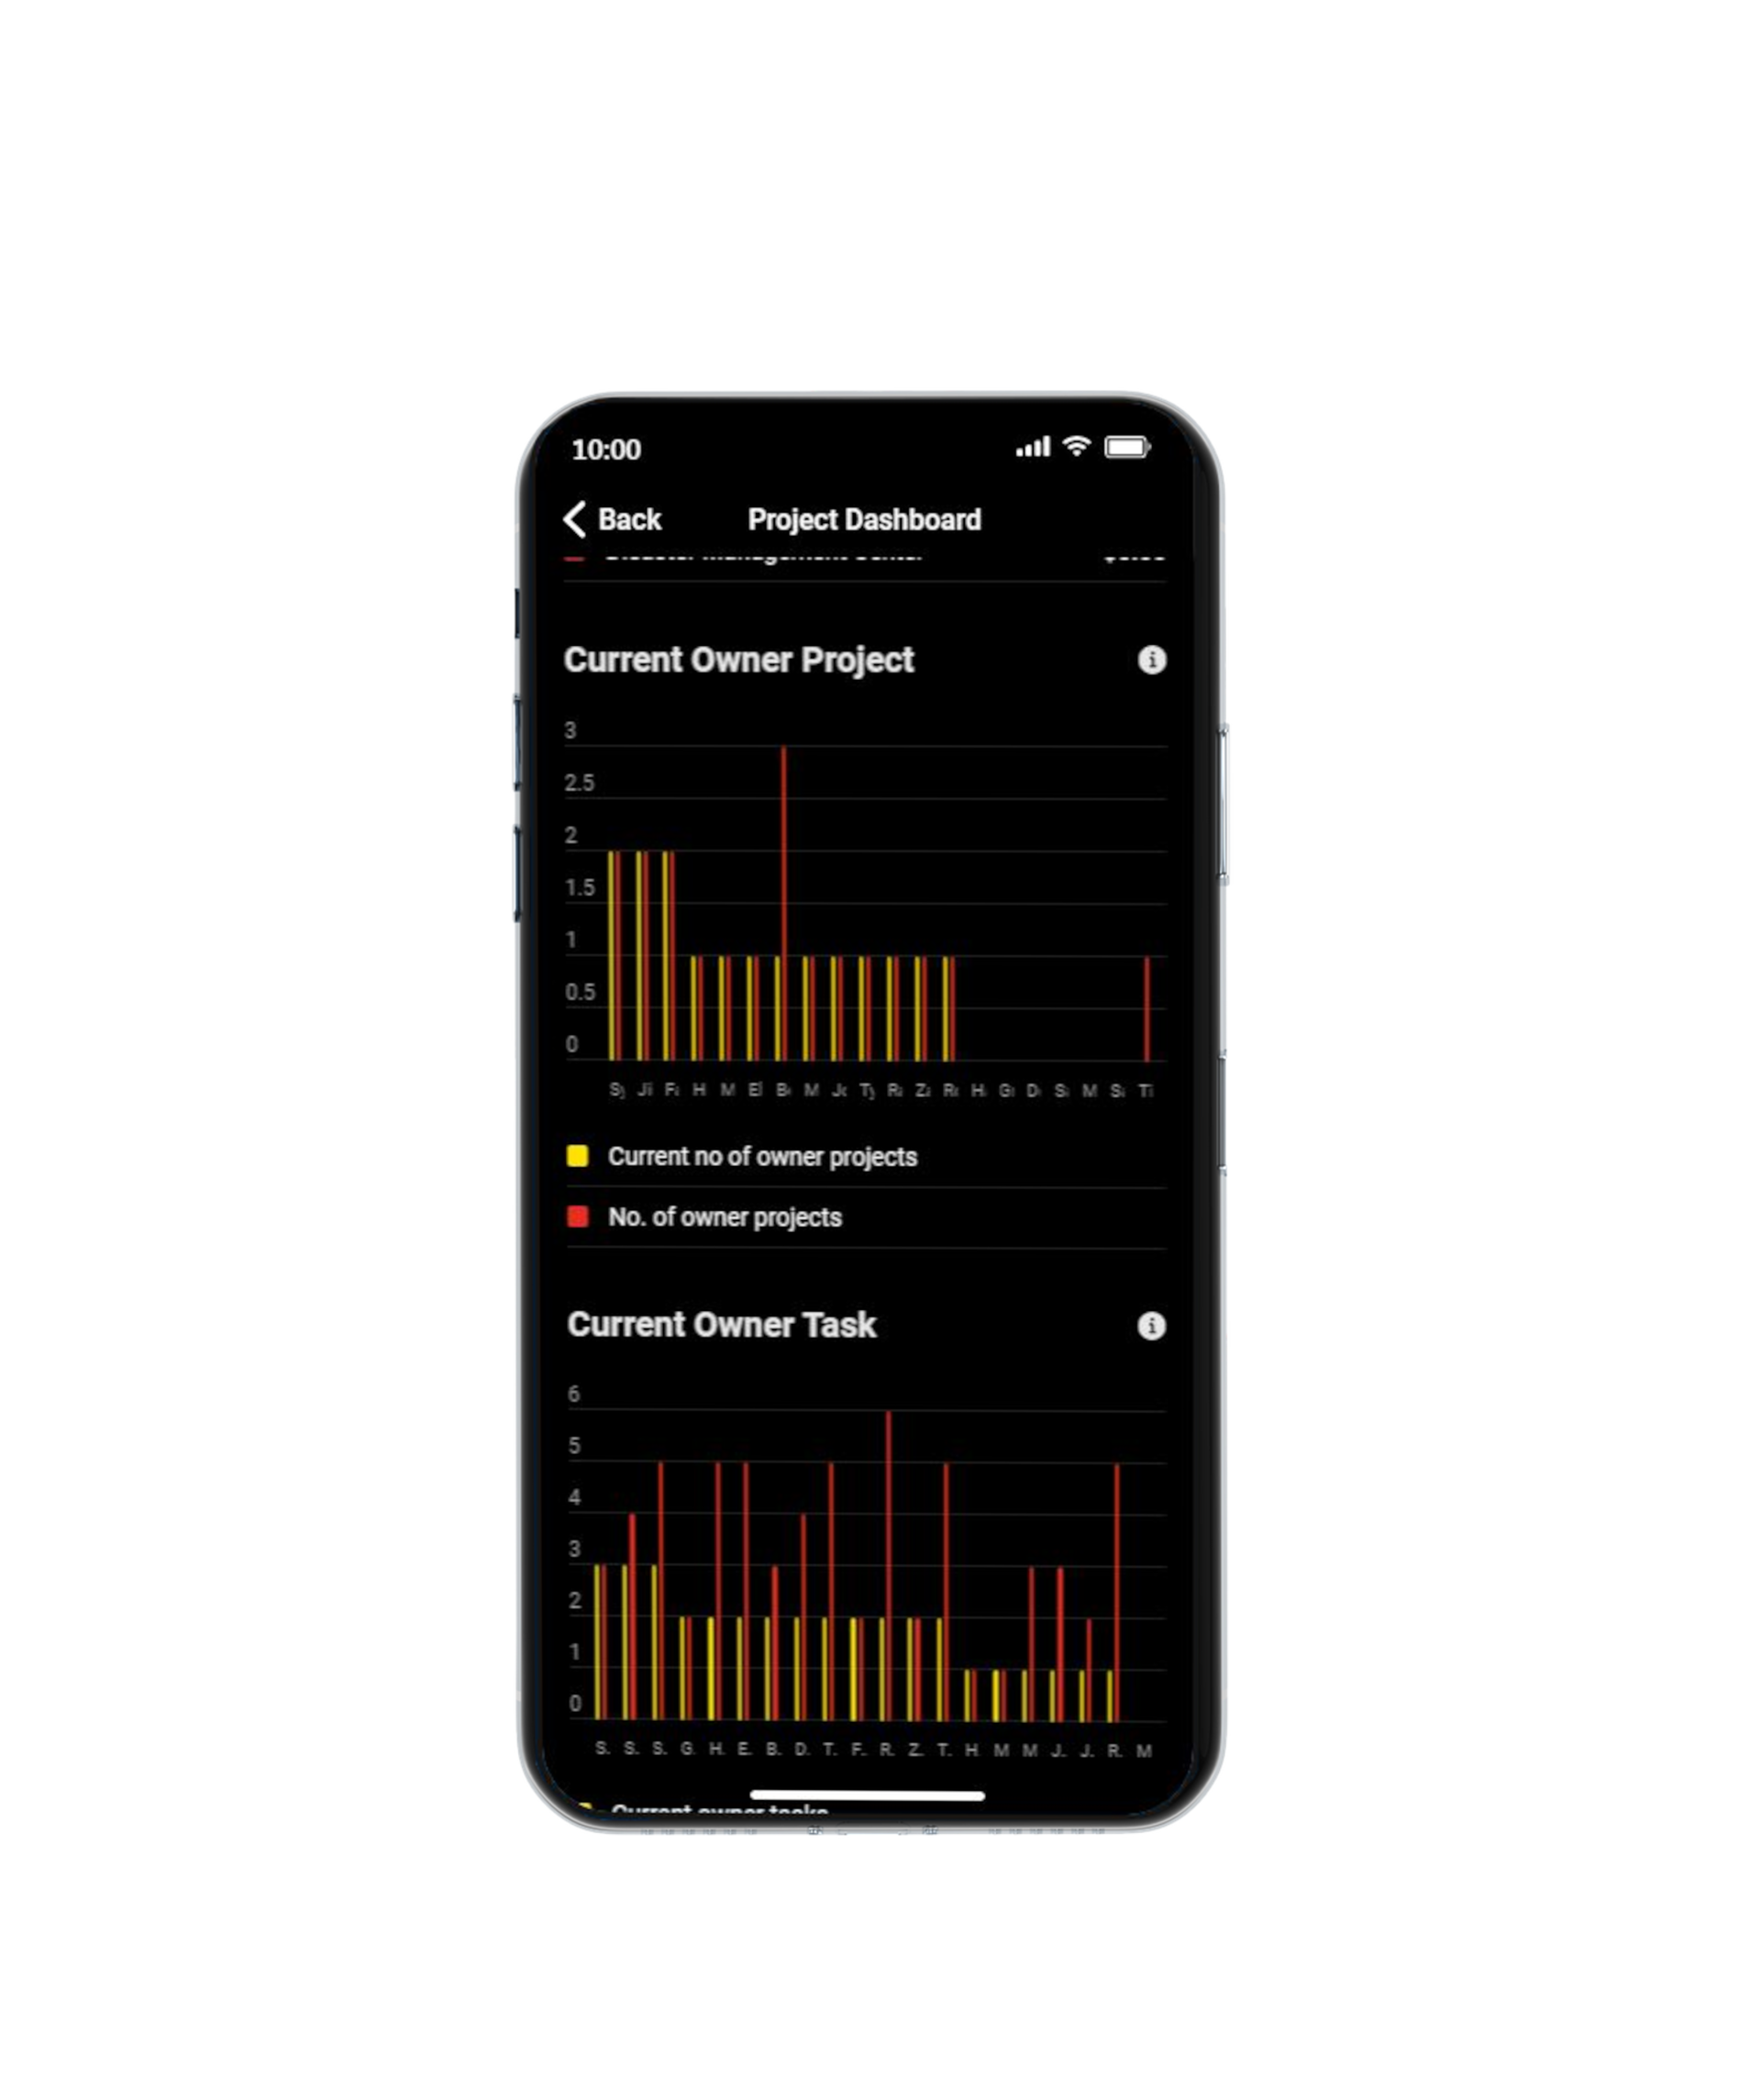
Tap the Project Dashboard icon on the Menu screen to bring up the Project Dashboard screen. On the screen is a list of project visualizations, including project status, updated project cost, current owner project, and current owner job.
The Current Owner Project and Task screens display bar graphs showing the current number of projects and tasks under each employee.
Tapping any legend (color) on the graph displays a floating bar of workload for each employee.
Tap the Back or Left Arrow icon in the top left corner of the screen to return to the previous screen.
Project Overview Videos
Project Overview
Project Dashboard
Get in touch
kasihmanagement101@gmail.com
Lynx
Kasih Consulting Services
Copyright © 2021. All rights reserved.
Made in Typedream